
Operating instructions
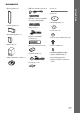
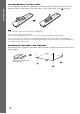
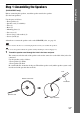
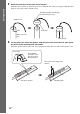
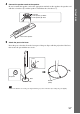
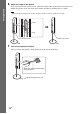
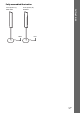
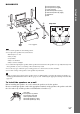
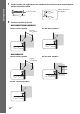
Table Of Contents
- WARNING
- About This Operating Instructions
- About the S-AIR function
- Playable Discs
- Getting Started
- Sound Adjustment
- Disc
- Tuner
- Control for HDMI/External Audio Device
- Using the Control for HDMI Function for “BRAVIA” Sync
- Using the DIGITAL MEDIA PORT Adapter
- Using an S-AIR Product
- Inserting the wireless transmitter/transceiver
- Establishing sound transmission between the unit and S-AIR sub unit (ID setting)
- Enjoying the system’s sound in another room
- Enjoying the S-AIR receiver while the unit is in standby mode
- Identifying the unit with a specific S-AIR sub unit (Pairing operation)
- If sound transmission is unstable
- Other Operations
- Additional Information
13
GB
Getting Started
Step 1: Assembling the Speakers
(DAV-HDX475 only)
Before connecting the speakers, attach the speaker stand to the speaker.
(For the front speakers)
Use the parts as follows:
• Front speakers (2)
• Speaker cords (2, red/white)
•Posts (2)
• Bases (2)
• Mounting plates (2)
• Post covers (2)
• Screws (large, with washer) (4)
• Screws (small) (6)
About how to connect the speaker cords to the SPEAKER jacks, see page 24.
Note
• Spread a cloth on the floor to avoid damaging the floor when you assemble the speakers.
Ti
p
• You can use the speaker without the speaker stand by installing it on the wall (page 18).
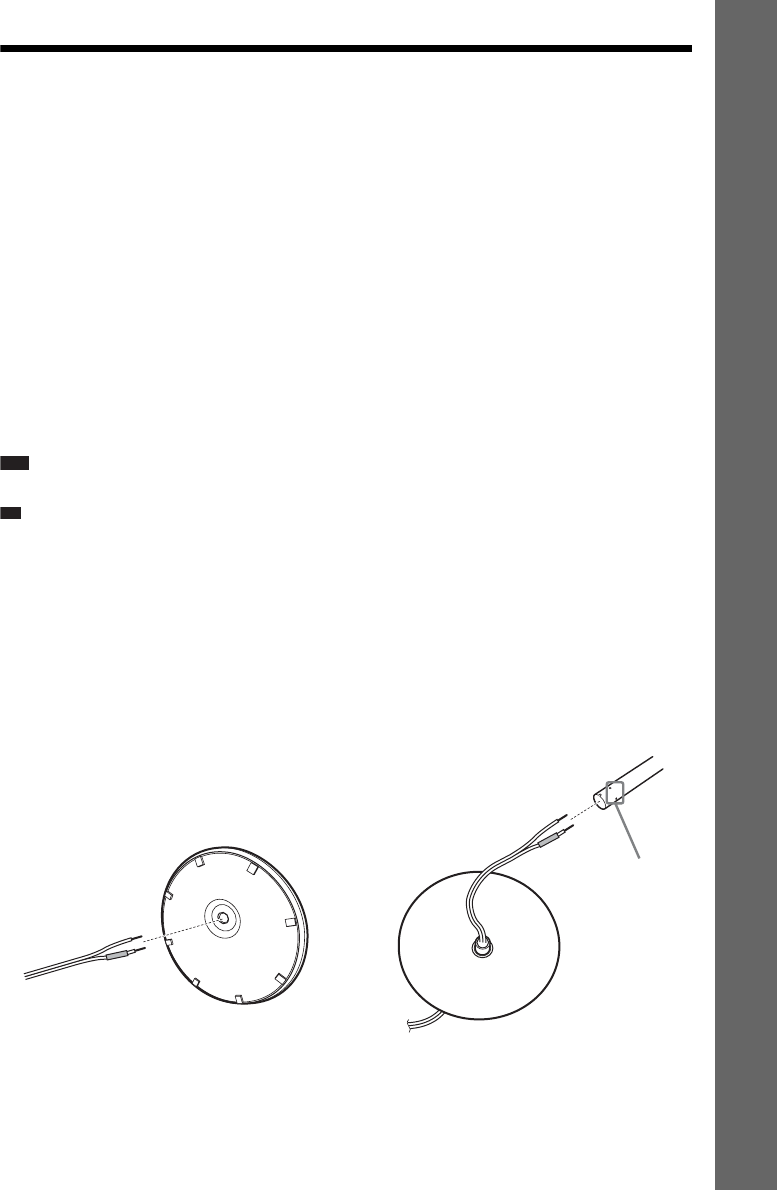
1 Thread the speaker cord through the hole in the base and post.
The connector and color tube of the speaker cords are the same color as the label of the jacks to be
connected.
Use the speaker cords as follows:
• Front speaker (L): White
• Front speaker (R): Red
Be careful with the orientation of the post. Thread the speaker cord (and the speaker system cord)
into the end of the post that has two holes.
Speaker cord
Bottom of the base
,
Post
Two holes
Top of the base