
User guide

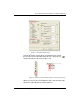

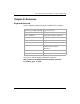

Table Of Contents
- Chapter 1: Getting Started 1
- Chapter 2: Modeler Plus Software Tutorial 13
- Chapter 3: The Bose Media Player 23
- Chapter 4: The Playlist tab 29
- Chapter 5: The Playback tab 37
- Chapter 6: Designing with Modeler Plus software 45
- Chapter 7: Customer presentations 51
- Chapter 8: Reference 59
- Introduction
- Chapter 1 : Getting Started
- Chapter 2 : Modeler Plus Software Tutorial
- Chapter 3 : The Bose Media Player
- Chapter 4 : The Playlist tab
- Chapter 5 : The Playback tab
- Chapter 6 : Designing with Modeler Plus software
- Chapter 7 : Customer presentations
- Chapter 8 : Reference
Bose
®
Modeler
®
Plus 6.5 Software User Guide Supplement
Chapter 7: Customer presentations 55
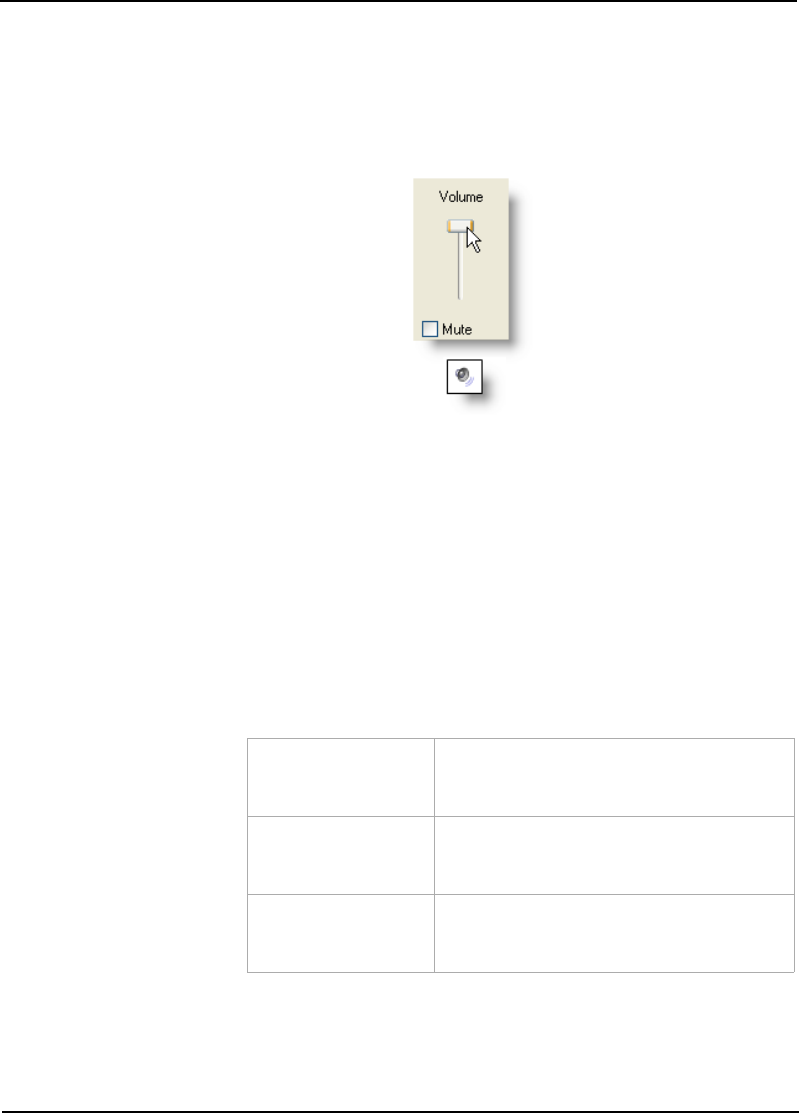
1. Place the CD with the calibration tone into a CD player, or load
the calibration tone into a media player on your computer.
If you are using a media player on your computer, make sure
your system volume is set to maximum.
Figure 7.6 - Set system volume to maximum
2. Connect the CD player to the Auditioner
®
Playback System III
using the supplied cable, or use a USB cable to connect the
Auditioner
®
Playback System III to your computer.
3. Toggle the Calibrate button on the front of the Auditioner
®
Playback System III to the up position to engage calibration
mode.
4. Play the calibration tone.
5. The LED read-out on the front of the Auditioner
®
Playback
System III provides the following information:
6. Adjust the volume level on the CD player or media player until
the calibrate LED is green.
Calibration High
(Red LED):
Incoming signal is too high. Decrease
the volume level on the CD player or
media player.
Calibration
Reference
(Green LED):
Unit is calibrated within ±1 dB SPL.
Calibration Low
(Yellow LED):
Incoming signal is too low. Increase
the volume level on the CD player or
media player.