
Installation Guide


52 en | Installing the In-Ceiling Mount AutoDome 100 Series Fixed Camera
F.01U.217.818 | 1.0 | 2011.04 Installation Manual Bosch Security Systems, Inc.
4 Installing the In-Ceiling Mount
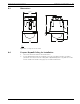
4.1 Unpacking
This equipment should be unpacked and handled with care. If an item appears to have been
damaged in shipment, notify the shipper immediately.
Verify that all the parts listed in the product's Parts List below are included. If any items are
missing, notify your Bosch Security Systems Sales or Customer Service Representative. Refer
to Section 1.4 Customer Support and Service, page 12, for contact information.
The original packing carton is the safest container in which to transport the unit and must be
used if returning the unit for service. Save it for possible future use.
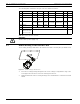
4.1.1 Parts List
The following table lists the parts included with the In-ceiling mount packages.
4.1.2 Description
This chapter details how to install the AutoDome in an In-Ceiling Mount. The In-Ceiling
AutoDome camera is suitable for use in environmental air spaces. Refer to Section 2 Installing
the Pendant Arm Wall, Corner, and Mast (Pole) Mounts, or refer to Section 3 Installing Roof
Parapet and Pipe Mounts for these specific installations.
4.1.3 Tools Required
– Straight slot screwdrivers ~ 2.5 mm (0.1 inch) – 3.1 mm (1/8 inch)
– No. 2 Phillips screwdriver
– Appropriate tool for cutting a hole in drywall or ceiling tile
– Pliers
4.2 Pre-installation Check List
1. Determine the location and distance for the power supply box based on its voltage and
current consumption. Refer to Section 5 Cable and Wire Standards, page 61 for
specifications.
2. Install all rough wiring including: power, control, video, alarms I/O, relay I/O, and fiber
optic cabling.
3. If you plan to use the RS232 or RS485 protocol to control the AutoDome, refer to
Section 5.4.2 Controlling the AutoDome via the RS232 Protocol, page 64, or
Section 5.4.3 Controlling the AutoDome via the RS485 Protocol, page 65, for instructions on
configuring the AutoDome to accept these protocols.
4. A minimum of 216-mm (8 1/2-inch) of air space above the ceiling is required to install the
In-ceiling Mount.
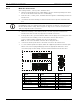
NOTICE!
If your application of the VG5 Series AutoDome in-ceiling mount is required to meet the IP54
environmental rating you must obtain the optional VGA-IP54K-IC Gasket Kit and follow the
directions included with the kit.
In-ceiling Mount
Quantity Item Part Number
1 Interface Box VG4-S-BIM
1 Bracket Assembly LTC 9349MK
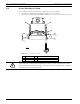
WARNING!
24 VAC Class 2 power supply only.