
Operation Manual
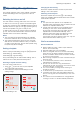
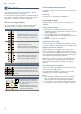

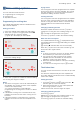
Table Of Contents
- [en] Instruction manual
- Table of contents
- [en] Instruction manual
- ( Important safety information 5
- ] Causes of damage 6
- 7 Environmental protection 7
- f Induction cooking 7
- * Getting to know your appliance 9
- 1 Operating the appliance 11
- | Flex Zone 14
- u Move function 15
- } FlexPlus Zone 16
- O Time-setting options 17
- v PowerBoost function 18
- x ShortBoost function 19
- z Keep warm function 19
- s Transferring settings 20
- Ü Cooking assist functions 21
- A Childproof lock 32
- k Wipe protection 33
- b Automatic safety cut-out 33
- Q Basic settings 34
- [ Energy consumption indicator 36
- t Cookware check 36
- D Cleaning 37
- { Frequently Asked Questions (FAQ) 38
- 3 Trouble shooting 39
- 4 Customer service 40
- E Test dishes 41
- 8 Intended use
- ( Important safety information
- ] Causes of damage
- 7 Environmental protection
- f Induction cooking
- * Getting to know your appliance
- 1 Operating the appliance
- | Flex Zone
- u Move function
- } FlexPlus Zone
- O Time-setting options
- v PowerBoost function
- x ShortBoost function
- z Keep warm function
- s Transferring settings
- Ü Cooking assist functions
- Cooking assist functions
- Cooking assistant function types
- Suitable cookware
- Sensors and special accessories
- Functions and heat settings
- Temperature settings
- Temperature ranges and settings
- Cooking functions
- Temperature setting
- Temperature range
- Suitable for
- Tips for cooking with the cooking functions
- Notes
- Setting the boiling point
- Height
- Setting ™…
- Note:
- Connecting the wireless temperature sensor to the control panel
- Status
- Resetting the wireless temperature sensor
- Setting procedure
- 1. Attach the temperature sensor to the saucepan; see the section on ~ "Preparing and maintaining the wireless temperature sensor"
- 2. Place a saucepan filled with sufficient liquid on the required hotplate and always put the lid on.
- 3. Select the hotplate on which you have placed the saucepan with the temperature sensor.
- 4. Touch the å symbol on the temperature sensor. The indicator å will light up in the control panel.
- 5. Select the right temperature setting from the table.
- 6. Once the signal has sounded, take the lid off and add the food. Keep the lid on during cooking.
- Note:
- Switching off cooking functions
- Note:
- Recommended dishes
- Meat
- Cooking assistance functions
- Temperature setting
- Total cooking time from signal (mins)
- Fish
- Cooking assistance functions
- Temperature setting
- Total cooking time from signal (mins)
- Egg-based dishes
- Cooking assistance functions
- Temperature setting
- Total cooking time from signal (mins)
- Vegetables and pulses
- Cooking assistance functions
- Temperature setting
- Total cooking time from signal (mins)
- Potatoes
- Cooking assistance functions
- Temperature setting
- Total cooking time from signal (mins)
- Pasta and cereals
- Cooking assistance functions
- Temperature setting
- Total cooking time from signal (mins)
- Soups
- Cooking assistance functions
- Temperature setting
- Total cooking time from signal (mins)
- Sauces
- Cooking assistance functions
- Temperature setting
- Total cooking time from signal (mins)
- Desserts
- Cooking assistance functions
- Temperature setting
- Total cooking time from signal (mins)
- Frozen products
- Cooking assistance functions
- Temperature setting
- Total cooking time from signal (mins)
- Further
- cooking assistance functions
- Temperature setting
- Total cooking time from signal (mins)
- Preparing and maintaining the wireless temperature sensor
- Preparing and maintaining the wireless temperature sensor
- Adhering the silicone patch
- 1. The adhesion point on the saucepan must be free of grease. Clean the saucepan, dry it thoroughly and wipe the adhesion point with a degreasing agent such as spirit.
- 2. Remove the protective film from the silicone patch. Adhere the silicone patch to the saucepan in the correct place using the the enclosed template as a guide.
- 3. Press the silicone patch down, including its inside surface.
- Notes
- Using the wireless temperature sensor
- Notes
- Cleaning
- Changing the battery
- Note:
- Declaration of Conformity
- A Childproof lock
- k Wipe protection
- b Automatic safety cut-out
- Q Basic settings
- [ Energy consumption indicator
- t Cookware check
- Cookware check
- 1. With the cookware still cold, fill it with approx. 200 ml of water and place it on the centre of the hotplate with the diameter that most closely matches that of the base of the cookware.
- 2. Go to the basic settings and select the ™‚ƒ setting.
- 3. Touch the settings range. A will flash on the hotplate display.
- Result
- Notes
- D Cleaning
- { Frequently Asked Questions (FAQ)
- 3 Trouble shooting
- 4 Customer service
- E Test dishes
- [en] Instruction manual
Time-setting options en
17
OTime-setting options
Time-setting options
Your hob has three timer functions:
■ Programming the cooking time
■ Kitchen timer
■ Stopwatch function
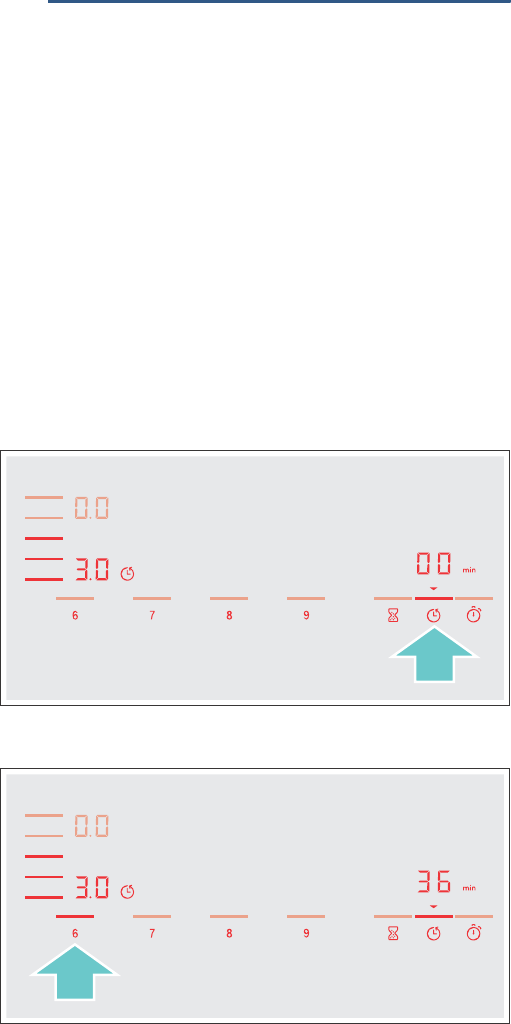
Programming the cooking time
The hotplate automatically switches off after the time
that is set has elapsed.
Setting procedure:
1. Select the hotplate and the required heat setting.
2. Touch the y symbol. The ‹‹ symbol and theV
indicator light up in the timer display.
y lights up in the display for the hotplate.
3. Within the next 10 seconds, set the required cooking
time in the settings range.
4. Touch the y symbol to confirm the selected setting.
The cooking time begins to elapse.
Notes
■ The same cooking time can be set automatically for
all hotplates. The set time for each of the hotplates
counts down independently.
You can find information on automatically
programming the cooking time in section ~ "Basic
settings"
■ If the flexible cooking zone is selected as the only
hotplate, the set time for the entire cooking zone is
the same.
■ If the Move function is selected for the combined
hotplate, the set time for the three hotplates is the
same.
Frying sensor
If a cooking time has been programmed for a hotplate
and the frying sensor has been activated, the cooking
time will not begin to count down until the selected
temperature setting has been reached.
Cooking functions
If a cooking time has been programmed for a hotplate
and one of the cooking functions has been activated,
the set cooking time will not start to count down until
the temperature for the selected area has been
reached.
Changing or deleting the time
Select the hotplate and then touch the y symbol.
Change the cooking time in the settings range or set
‹‹ to delete the programmed cooking time.
Touch the y symbol to confirm the selected setting.
When the time has elapsed
The hotplate switches off, the y display flashes and
the hotplate switches to the ‹‹ heat setting. An audible
signal sounds.
‹‹ and the V indicator flash in the timer display.
When the y symbol is touched, the indicators go out
and the acoustic signal ceases.
Notes
■ To set a cooking time of under 10 minutes, always
touch 0 before you select the required value.
■ If a cooking time was programmed for several
hotplates, the time information for the selected
hotplate is shown in the timer display.
■ Select the relevant hotplate to call up the remaining
cooking time.
■ You can set a cooking time of up to ŠŠ minutes.
The kitchen timer
You can use the kitchen timer to set a time of up to 99
minutes.
This functions independently from the hotplates and
from other settings. This function does not automatically
switch off a hotplate.
Setting procedure
1. Touch the t symbol. The ‹‹ symbol and the V
indicator light up in the timer display.
2. Select the required time on the control panel and
touch the t symbol to confirm.
After a few seconds, the time begins to elapse.
Changing or deleting the time
Touch the Y symbol.
Change the cooking time in the settings range or set
‹‹ to delete the programmed cooking time.
Touch the Y symbol to confirm the selected setting.