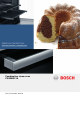
Combination steam oven CSG656R.
en Table of contents no i t c u r t s n I ] ne [ 8 Intended use . . . . . . . . . . . . . . . . . . . . . . . . . . . . . 4 ( Important safety information . . . . . . . . . . . . . . . 5 General information Steam. . . . . . . . . . . Meat thermometer . Cleaning function . . . . . . . . . . . . . . . . . . . . . . . . . . . . . . . . . . . . . . . . . . . . . . . . . . . . . . . . . . . . . . . . . . . . . . . . . . . . . . . . . . . . . . . . . . . . . . . . . . . . . . . . . .
en Intended use J Tested for you in our cooking studio . . . . . . . . 39 Do not use silicone moulds . . . . . . . . . Cakes and small baked items . . . . . . . Bread and rolls. . . . . . . . . . . . . . . . . . . Pizza, quiche and savoury cakes . . . . . Bakes and soufflés. . . . . . . . . . . . . . . . Poultry . . . . . . . . . . . . . . . . . . . . . . . . . Meat . . . . . . . . . . . . . . . . . . . . . . . . . . . Fish . . . . . . . . . . . . . . . . . . . . . . . . . . .
Important safety information (Important safety information General information no i t amro f n i y t e f as t na t ropmI : Warning Risk of fire! Combustible items stored in the cooking compartment may catch fire. Never store combustible items in the cooking compartment. Never open the appliance door if there is smoke inside. Switch off the appliance and unplug it from the mains or switch off the circuit breaker in the fuse box. Risk fire! is created when the appliance ■ A of draught door is opened.
en Causes of damage : Warning Hazard due to magnetism! Permanent magnets are used in the control panel or in the control elements. They may affect electronic implants, e.g. heart pacemakers or insulin pumps. Wearers of electronic implants must stay at least 10 cm away from the control panel. Steam : Warning Risk of scalding! ■ The water in the water tank may become very hot if you continue to operate the appliance. Empty the water tank after every operation with steam.
Environmental protection Steam Caution! ■ Baking tins: Ovenware must be heat and steam resistant. Silicone baking tins are not suitable for combined operation with steam. ■ Ovenware with areas of rust: Do not use any ovenware which displays areas of rust. Even the smallest spots of rust can lead to corrosion in the cooking compartment. ■ Dripping liquids: When steaming with a perforated cooking container, always insert the baking tray, the universal pan or the solid cooking container underneath.
en Getting to know your appliance Control panel *Getting to know your appliance In the control panel, you can use the various buttons, touch fields, touch-screen displays and the rotary selector to set the different appliance functions. The current settings are shown on the display. The overview shows the control panel when the appliance is switched on with the menu display. In this chapter, we will explain the displays and controls. You will also find out about the various functions of your appliance.
Getting to know your appliance Display The display is structured so that the information can be read at a glance in any situation. The value that you can currently set is highlighted and displayed in white text. The value in the background is displayed in grey. Highlighted The highlighted value can be changed directly without first being selected. After starting an operation, either the temperature or the level is always highlighted.
Getting to know your appliance en Heating types In order for you to find the correct heating type for your dish, we have explained the differences and scopes of application here. Type of heating 4D hot air * < Temperature 30-250 °C Use For baking and roasting on one or more levels. The fan distributes the heat from the ring heating element in the back panel evenly around the cooking compartment. For traditional baking and roasting on one level. Especially suitable for cakes with moist toppings.
Getting to know your appliance en Steam To enable you to find the correct steam type of heating for your dish, we have explained the differences and scopes of application here. Type of heating Steaming Temperature 30-100 °C Use For vegetables, fish, side dishes, for juicing fruit and for blanching Reheating 80-180 °C T Dough proving 30-50 °C B Defrosting 30-60 °C For plated meals and baked items Cooked food is gently reheated. The steam ensures that the food does not dry out.
en Accessories _Accessories Your appliance is accompanied by a range of accessories. Here, you can find an overview of the accessories included and information on how to use them correctly. Inserting accessories The cooking compartment has three shelf positions. The shelf positions are counted from the bottom up. se i r os ec A Accessories included Your appliance is equipped with the following accessories: Wire rack For ovenware, cake tins and ovenproof dishes. For roasts and grilled food.
Accessories en Locking function The accessories can be pulled out approximately halfway until they lock in place. The locking function prevents the accessories from tilting when they are pulled out. The accessories must be inserted into the cooking compartment correctly for the tilt protection to work properly. When inserting the wire rack, ensure that lug ‚ is at the rear and is facing downwards. The open side must be facing the appliance door and the outer rail must be facing downwards ¾.
en Before using for the first time Wire insert For meat, poultry and fish. For inserting into the universal pan to catch dripping fat and meat juices. HEZ324000 Universal pan, non-stick For moist cakes, pastries, frozen meals and large roasts. Pastries and roasts can be removed more easily from the universal pan. Baking tray, non-stick For tray bakes and small baked products. The pastries can be removed more easily from the baking tray. Profi pan For preparing large quantities.
Before using for the first time Initial use After connecting the appliance to the power or following a power cut, the settings for initial use are shown on the display. It may take a few seconds for the instruction to appear. Note: You can change these settings at any time in the basic settings. ~ "Basic settings" on page 26 Setting the language The language is the first setting displayed. "German" is the preset language. 1. Turn the rotary selector to set the required language. 2.
en Operating the appliance 1Operating the appliance You have already learnt about the controls and how they work. Now we will explain how to set your appliance. You will learn about what happens when you switch the appliance on and off, and how to select the operating mode. ecna i l p a eh t gn i t arepO Switching the appliance on and off Before you are able to set the appliance, you must switch it on. Note: The childproof lock and the timer can also be set when the appliance is switched off.
Operating the appliance 3. Press the l Start/Stop button to start. Rapid heating The time on the display shows how long the operation has already been running. &RRNLQJ WLPH 7RS ERWWRP KHDWLQJ P V 7\SHV RI KHDWLQJ P V a & P V With Rapid heating, you can shorten the heat-up time for some heating types. VWDUW (QG +RW DLU JULOOLQJ 5DSLG KHDWLQJ *ULOO ODUJH DUHD ) RII en VWRS The appliance begins to heat up.
en Steam `Steam Food can be cooked particularly gently using steam. With some heating modes, you can prepare food with steam assistance. In addition, the Dough proving, Defrost and Reheat heating modes are available. mae tS : Warning Risk of scalding! When you open the appliance door, hot steam can escape. Steam may not be visible, depending on its temperature. When opening, do not stand too close to the appliance. Open the appliance door carefully. Keep children away.
Steam en Starting 1. Fill the water tank. 2. Set the type of heating and temperature. 3. Touch the "Added steam" text field. In the display, the steam level is displayed in white and in focus. 4. Turn the rotary selector to set the steam level. 5. Press the l Start/Stop button to start. The appliance begins to heat up. Note: If the water tank runs dry during an operation with steam assistance, a message appears on the display prompting you to fill up the water tank.
en Steam Defrosting Use the "Defrosting B" type of heating to defrost frozen products. Note: If the water tank runs dry during the operation with the Defrosting setting, the operation is interrupted. Fill the water tank. Starting Fill the water tank. Touch the Menu field. Touch the "Steaming" text field. Touch the "Defrosting" text field. The temperature is in focus. 5. Set the temperature using the rotary selector. 6. Touch the "Duration" text field and set the duration.
Steam en 6. Slowly push the control panel downwards and then towards the rear until it is closed completely. The water tank has been filled. You can start operations with steam. Refilling the water tank If the water tank runs dry during a steam operation, a message appears on the display prompting you to fill up the water tank. Notes ■ Steam-assisted operations continue without adding steam.
en Time-setting options 4. Press the l Start/Stop button to start. OTime-setting options The cooking time counts down. Your appliance has different time-setting options. sno i t po gn i t es -emi T Time-setting option Use q Cooking time After the set cooking time has elapsed, the appliance ends the operation automatically. r End Enter a cooking time and the required end time. The appliance starts automatically so that the operation ends at the required time.
Time-setting options en 4. Set a later end time using the rotary selector. 7\SH RI KHDWLQJ ' KRW DLU +RW DLU HFR 7HPSHUDWXUH 7RS ERWWRP KHDWLQJ & 7\SH RI KHDWLQJ +RW DLU HFR 7RS ERWWRP KHDWLQJ Setting the timer &RRNLQJ WLPH &RRNLQJ WLPH P V & 7\SHV RI KHDWLQJ (QG P V (QG (QG 5DSLG SUHKHDWLQJ *ULOO ODUJH DUHD RII 5. Press the l Start/Stop button to start. The time at which the appliance will start is shown in the display.
en Meat thermometer @Meat thermometer The meat thermometer makes accurate cooking possible. It measures the temperature inside the food. As soon as the set temperature is reached, the appliance switches off automatically. re t emo reh t t aeM Types of heating Not all types of heating are suitable for operation with the meat thermometer. Once you have placed the meat thermometer in the cooking compartment, the following types of heating are available for you to select. < % .
Meat thermometer en 3. Touch the text field with the required type of heating. The default cooking compartment temperature is highlighted white in the display. 4. Use the rotary selector to set the cooking compartment temperature. 5. Touch the "Core temperature" text field. The default core temperature is highlighted white in the display. 6. Turn the rotary selector to set the core temperature. 7. Press the l Start/Stop button to start.
en Childproof lock AChildproof lock Your appliance is equipped with a childproof lock so that children cannot switch it on accidentally or change any settings. The control panel is locked and no settings can be made. The appliance can only be switched off using the ÿ On/Off button. kco l f o rpd l i hC Activating and deactivating You can activate and deactivate the childproof lock when the appliance is switched on or off. In each case, press the D field for approx. 4 seconds.
Basic settings en List of basic settings Power cut Depending on the features of your appliance, not all basic settings are accessible. The changes you make to the settings are saved even after a power cut. You only have to reset the settings for the initial use following a long-term power cut. The appliance can bridge a short-term power cut. Setting Language Clock Water hardness Options Additional languages are possible.
en Sabbath mode FSabbath mode With the Sabbath mode, a cooking time of up to 74 hours can be set. You can keep the food in the cooking compartment warm without having to switch the oven on or off. edom h t ab aS DCleaning agent With good care and cleaning, your appliance will retain its appearance and remain fully functioning for a long time to come. We will explain here how you should correctly care for and clean your appliance.
Cleaning agent en Door panels Door handle Hot soapy water: Clean with a dish cloth and then dry with a soft cloth. Do not use a glass scraper or a stainless steel scouring pad. Hot soapy water: Clean with a dish cloth and then dry with a soft cloth. If descaler comes into contact with the door handle, wipe it off immediately. Otherwise, any stains will not be able to be removed.
en Cleaning function .Cleaning function Your appliance has the "EcoClean Direct" and "Descaling" operating modes. The self-cleaning surfaces in the cooking compartment are cleaned with the “EcoClean Direct” cleaning function. You can use the "Descaling" operating mode to remove limescale from the evaporator. no i t c nu f gn i nae l C EcoClean Direct The self-cleaning surfaces in the cooking compartment are cleaned when the operating mode is set to "Cleaning function".
Cleaning function Descaling The appliance must be descaled regularly in order for it to continue operating correctly. There are several steps in the descaling programme. For hygiene reasons, the descaling programme must be run through completely so that the appliance can be ready for operation again.In total, the descaling programme runs for approx. 70-90 minutes. ■ Descale (approx. 55-70 minutes), then empty and refill the water tank ■ First rinsing cycle (approx.
en Rails qAppliance door pRails With good care and cleaning, your appliance will retain its appearance and remain fully functional for a long time to come. This will tell you how to remove the shelves and clean them. s l i aR With good care and cleaning, your appliance will retain its appearance and remain fully functional for a long time to come. This will tell you how to remove the appliance door and clean it.
Appliance door en Fitting the appliance door Reattach the appliance door in the opposite sequence to removal. 1. When attaching the appliance door, ensure that both hinges are inserted straight into the opening (figure !). Place both hinges at the bottom on the outer panel and use this as a guide. Ensure that the hinges are inserted into the correct opening. You must be able to insert them easily and without resistance.
Appliance door en Removing and installing the door panels Fitting the door on the appliance To facilitate cleaning, you can remove the glass panels from the appliance door. 1. Insert the front panel at the bottom into the retainers (figure !). 2. Close the front panel until both upper hooks are opposite the opening (figure "). Removing the door from the appliance 1. Open the appliance door slightly. 2. Press on the right and left side of the cover (figure !). 3. Remove the cover (figure ").
Trouble shooting 3Trouble shooting If a fault occurs, there is often a simple explanation. Before calling the after-sales service, please refer to the fault table and attempt to correct the fault yourself. gn i t o h s e l buo r T Fault The appliance does not work. "Sprache Deutsch" appears on the display. The time does not appear when the appliance is switched off. The appliance does not heat up; the m symbol lights up on the display.
en Trouble shooting The panel for removing the tank does The plug is not plugged into not open the mains Power cut The circuit breaker is faulty v field sensor faulty When you cook with steam, a lot of steam is produced When cooking with steam, a lot of steam is produced repeatedly Connect the appliance to the electricity supply Check whether other kitchen appliances are working Check in the fuse box to make sure that the fuse for the appliance is in working order Call the after-sales service If require
Customer service en 4Customer service Our after-sales service is there for you if your appliance needs to be repaired. We will always find an appropriate solution, also in order to avoid after-sales personnel having to make unnecessary visits. ec i v res remo t suC When calling us, please give the full product number (E no.) and the production number (FD no.) so that we can provide you with the correct advice. The rating plate bearing these numbers can be found when you open the appliance door.
en Dishes Baking sensor Your appliance is equipped with a baking sensor. This sensor is automatically activated when you select a corresponding baked item from the selection list. The appliance now takes over. The appliance switches off once the baked item is cooked. An audible signal sounds. The cooking time is approximately that listed in the recipe for your baked item and is not displayed. Do not use any silicone bakeware or accessories that contain silicone.
Tested for you in our cooking studio JTested for you in our cooking studio Here, you can find a selection of dishes and the ideal settings for them. We will show you which type of heating and temperature are best suited to your dish. You will get information on suitable cooking accessories and the height at which they should be placed in the oven. You will also get tips about cookware and preparation methods.
en Tested for you in our cooking studio Note: Baking times can not be reduced by using higher temperatures. Cakes or small baked items would only be cooked on the outside, and would not be fully baked in the middle. Remove unused accessories from the cooking compartment. This will achieve the best possible cooking results and energy savings of up to 20 per cent. The setting values apply to dishes placed into a cold cooking compartment. By doing so, you can make energy savings of up to 20 per cent.
Tested for you in our cooking studio en Dish Accessories/cookware Shelf posi- Type of tion heating Temperature in °C Shortcrust tart with moist topping Swiss flan Yeast cake with dry topping Yeast cake with dry topping Yeast cake with moist topping Yeast cake with dry topping, 2 levels Yeast cake with moist topping, 2 levels Plaited loaf, savarin Plaited loaf, savarin Swiss roll Swiss roll Stollen with 500 g flour Stollen with 500 g flour Strudel, sweet Strudel, sweet Strudel, frozen Strudel, frozen
en Tested for you in our cooking studio Dish Accessories/cookware Shelf posi- Type of tion heating Temperature in °C Macaroons Macaroons, 2 levels * Preheat Baking tray Universal pan + baking tray 2 3+1 90-110 90-110 < < Steam in- Cooking tensity time in mins. 20-40 20-40 Tips for cakes and small baked items You want to find out whether the cake Push a cocktail stick into the highest point on the cake. If the cocktail stick comes out clean with no dough resis completely cooked in the middle.
Tested for you in our cooking studio Bread and rolls Your appliance offers you a range of heating types for baking bread and rolls. You can find the ideal settings for many dishes in the settings tables. Also refer to the notes in the section on allowing dough to rise. Only use original accessories supplied with your appliance. These have been tailored to the cooking compartment and the operating modes of your appliance.
en Tested for you in our cooking studio Dish Accessories Shelf posi- Type of tion heating Temperature in °C/ grill setting Steam in- Cooking tensity time in mins. Bread White bread, 750 g White bread, 750 g Universal pan or cake tin Universal pan or cake tin 1 1 < < Multigrain bread, 1.5 kg Cake tin 1 < Multigrain bread, 1.5 kg Multigrain bread, 1.
Tested for you in our cooking studio Pizza, quiche and savoury cakes Your appliance offers you a range of heating types for preparing pizza, quiche and savoury cakes. You can find the ideal settings for many dishes in the settings tables. Also refer to the notes in the section on allowing dough to rise. Only use original accessories supplied with your appliance. These have been tailored to the cooking compartment and the operating modes of your appliance.
en Tested for you in our cooking studio Dish Accessories Shelf posi- Type of tion heating Temperature in °C Steam in- Cooking tensity time in mins.
Tested for you in our cooking studio Note: Cooking times cannot be reduced by using higher temperatures. Bakes or soufflés would only be cooked on the outside, but would be raw in the middle. The setting values apply to dishes placed into a cold cooking compartment. By doing so, you can make energy savings of up to 20 per cent. If you preheat the oven, the indicated cooking times will be reduced by several minutes.
en Tested for you in our cooking studio Covered cookware When cooking with covered cookware, the cooking compartment remains considerably cleaner. Ensure that the lid fits well and closes properly. Place the cookware onto the wire rack. Very hot steam may escape when opening the lid after cooking. Lift the lid at the rear, so that the hot steam can escape away from you. Poultry can also become crispy in a covered roasting dish. To do so, use a roasting dish with a glass lid and set a higher temperature.
Tested for you in our cooking studio Types of heating used: ■ < 4D hot air ■ % Top/bottom heating ■ 7 Circulated air grilling ■ ( Grill, large area ■ $ Pizza setting ■ S Steaming en The levels of steam intensity are indicated as numbers in the table: ■ ■ ■ 1 = Low 2 = Medium 3 = High Dish Accessories/cookware Shelf posi- Type of tion heating Temperature in °C/grill setting Steam in- Cooking tensity time in mins.
en Tested for you in our cooking studio Meat Your appliance offers you many heating types for preparing meat. You can find the ideal settings for many dishes in the settings tables. Roasting and braising Baste lean meat with fat as required or cover it with strips of bacon. Score the rind crosswise. If you turn the joint when cooking, ensure that the rind is underneath at first. When the joint is ready, turn off the oven and allow it to rest for another 10 minutes in the cooking compartment.
Tested for you in our cooking studio Note: When grilling very fatty items, do not slide the universal pan in directly under the wire rack, but rather at level 1. When grilling, try wherever possible to use pieces of food which are of a similar thickness and weight. This will allow them to brown evenly and remain succulent and juicy. Place the food to be grilled directly onto the wire rack. Use tongs to turn the pieces of food you are grilling.
en Tested for you in our cooking studio Dish Accessories/cookware Shelf posi- Type of tion heating Temperature in °C/ grill setting Pork fillet, 400 g Pork fillet, 400 g Smoked pork on the bone, 1 kg (with a little added water) Smoked pork on the bone, 1 kg Pork steaks, 2 cm thick Pork medallions, 3 cm thick (preheat oven for 5 mins.) Cookware, uncovered Steam container Cookware, covered 1 2 1 7 S 7 210-220* 100 210-220 Steam in- Cooking tensity time in mins.
Tested for you in our cooking studio en Tips for roasting, braising and grilling The cooking compartment becomes very dirty. The roast is too dark and the crackling is burned in places, and/or the roast is too dry. The crackling is too thin. The roast looks good but the juices are burnt. The roast looks good but the juices are too clear and watery. The meat gets burned during braising. Grilled food is too dry. Prepare your food in an enclosed roasting dish or use the grill tray.
en Tested for you in our cooking studio Steaming The fish is cooked more gently using the steaming function, and remains particularly succulent. Larger pieces require a longer heating-up time and a longer cooking time. If you are using several pieces which are the same weight, the heating-up time is increased, and not the cooking time. Fish does not need to be turned. Use the perforated steam container (size XL) and slide the universal pan in underneath.
Tested for you in our cooking studio en Dish Accessories/cookware Shelf posi- Type of tion heating Temperature in °C/grill setting Fish fillet, au gratin Fish fillet, au gratin Fish fingers (turn during cooking) Wire rack Cookware, uncovered Baking tray 2 1 1 7 7 $ 220-240 200-220 220-240 Steam in- Cooking tensity time in mins.
en Tested for you in our cooking studio Types of heating used: ■ < 4D hot air ■ % Top/bottom heating ■ ( Grill, large area ■ $ Pizza setting ■ S Steaming The levels of steam intensity are indicated as numbers in the table: ■ ■ ■ 1 = Low 2 = Medium 3 = High Dish Accessories/cookware Shelf posi- Type of tion heating Temperature in °C/grill setting Steam in- Cooking tensity time in mins.
Tested for you in our cooking studio en Dish Accessories/cookware Shelf posi- Type of tion heating Temperature in °C/grill setting Steam in- Cooking tensity time in mins. Rice Basmati rice, 1:1.5 Long-grain rice, 1:1.5 Brown rice, 1:1.5 Parboiled rice, 1:1.
en Tested for you in our cooking studio Dish Accessories/cookware Shelf position Type of heating Temperature in °C Crème caramel Dampfnudeln (steamed bread rolls) Yogurt Steam container Universal pan Individual moulds S S T 80 100 35-40 Rice pudding, 1:2.5 Fruit compote Universal pan Universal pan 1 1 Cooking compartment floor 1 1 Cooking time in mins.
Tested for you in our cooking studio en Dish Accessories/cookware Shelf posi- Type of tion heating Temperature in °C Cooking time in mins. Cakes on baking trays Sponge cake with dry topping Shortcrust tart with dry topping Plaited loaf, savarin Yeast cake with dry topping Baking tray Baking tray Baking tray Baking tray 1 1 1 1 . .
en Tested for you in our cooking studio Slow cook Slow cooking is a technique for cooking food over a long period at low temperatures. For this reason, it is also called "low-temperature cooking". Slow cooking is ideal for all prime cuts (e.g. tender portions of beef, veal, pork, lamb or poultry) which are to be cooked "à point". The meat will remain succulent and tender. The benefit of this cooking method is that it allows lots of scope for menu planning because slow-cooked meat is easy to keep warm.
Tested for you in our cooking studio en Dish Cookware Shelf posi- Type of tion heating Searing time Temperain mins. ture in °C Saddles of lamb, boneless, 200 g each Leg of lamb, boned, medium, 1 kg, tied * Preheat Cookware, uncovered 1 . 5-7 85* Cooking time in mins. 45-75 Cookware, uncovered 1 . 6-8 85* 180-240 Tips for slow cooking Slow-cooking duck breast. Place the cold duck breast into a pan and fry the skin side first. After slow cooking, grill for 3 to 5 minutes until crispy.
en Tested for you in our cooking studio Preserving, juicing and disinfecting Your appliance is also suitable for preserving, juicing and disinfecting. Preserving You can preserve fruit and vegetables using your appliance. : Warning Risk of injury! If the food is preserved incorrectly, the preserving jars may burst. Follow the instructions for preserving. Jars Use only clean and undamaged preserving jars. Only use heat-resistant, clean and undamaged rubber rings. Check clips and clamps in advance.
Tested for you in our cooking studio Allowing the dough to prove at dough proving setting Yeast dough will prove considerably more quickly using the "Dough proving" heating type than at room temperature and does not dry out. Only start operation when the cooking compartment has fully cooled down. Always allow yeast dough to prove twice. Observe the specifications in the settings tables for the 1st and 2nd proving processes (dough fermentation and final fermentation).
en Tested for you in our cooking studio Defrosting The steam function "Defrost" is suitable for defrosting frozen fruit and vegetables. Use heating type 4D hot air to defrost baked items. Poultry, meat and fish should ideally be defrosted in the refrigerator. Remove frozen food from any packaging when defrosting it. Place frozen fruit and vegetables into the perforated steam container (size XL) and slide the universal pan in underneath.
Tested for you in our cooking studio Dish Dishes, chilled Plated meal, 1 portion Soup, stew, 400 ml Side dishes, e.g. pasta, dumplings, potatoes, rice Bakes, e.g. lasagne, potato gratin Pizza, cooked Baked goods Bread rolls, baguette, baked Pastries (vol-au-vents) Baked goods, frozen Pizza, cooked Bread rolls, baguette, baked * Preheat en Accessories/cookware Shelf posi- Type of tion heating Temperature in °C Cooking time in mins.
en Tested for you in our cooking studio Dish Baking Piped cookies (preheat oven for 5 mins.) Piped cookies (preheat oven for 5 mins.) Piped cookies, 2 levels (preheat oven for 5 mins.) Small cakes (preheat oven for 5 mins.) Small cakes (preheat oven for 5 mins.) Small cakes, 2 levels (preheat oven for 5 mins.
6
Robert Bosch Hausgeräte GmbH Carl-Wery-Straße 34 81739 München Germany www.bosch-home.