Built-in cooker HEA63B0.
Ú Table of contents e[nuoIrs]ctimanul Important safety information.....................................................4 Causes of damage .............................................................................5 Your new cooker.........................................................................6 Control panel .......................................................................................6 Buttons and display............................................................................
: Important safety information Read these instructions carefully. Only then will you be able to operate your appliance safely and correctly. Retain the instruction manual and installation instructions for future use or for subsequent owners. This appliance is only intended to be fully fitted in a kitchen. Observe the special installation instructions. Check the appliance for damage after unpacking it. Do not connect the appliance if it has been damaged in transport.
or switch off the fuse in the fuse box. Contact the after-sales service. ■ The cable insulation on electrical appliances may melt when touching hot parts of the appliance. Never bring electrical appliance cables into contact with hot parts of the appliance. ■ Do not use any high-pressure cleaners or steam cleaners, which can result in an electric shock. ■ When replacing the cooking compartment bulb, the bulb socket contacts are live.
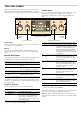
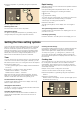
Your new cooker Here you will learn about your new cooker. The control panel and the individual operating controls are explained. You will find information on the cooking compartment and the accessories. KRWSODWH FRQWUROV Control panel Here, you will see an overview of the control panel. All of the symbols never appear in the display at the same time. Depending on the appliance model, individual details may differ. %XWWRQV DQG GLVSOD\ 7HPSHUDWXUH VHOHFWRU )XQFWLRQ VHOHFWRU Control knobs The control
Temperature selector Use the temperature selector to set the temperature, grill setting or cleaning setting. Setting þ Off position 1-9 Heat settings Setting ÿ Meaning Off position 50-300 Temperature range Exception: the maximum temperature for < 3D hot air and ’ Hot air eco is 275 °C. 1, 2, 3 Grill settings The grill settings for "Grill, large area" (. The output of the hotplate.
Universal pan For moist cakes, pastries, frozen meals and large roasts. It can also be used to catch dripping fat when you are grilling directly on the wire rack. Slide in the universal pan with the sloping edge facing the oven door. Optional accessories You can purchase optional accessories from the after-sales service or specialist retailers. You will find a comprehensive range of products for your oven in our brochures and on the Internet.
After-sales service products You can obtain suitable care and cleaning agents and other accessories for your domestic appliances from the after-sales service, specialist retailers or (in some countries) online via the eShop. Please specify the relevant product number. Cleaning cloths for stainless-steel surfaces Product no. 311134 Reduces the build-up of dirt. Impregnated with a special oil for perfect maintenance of your appliance's stainless-steel surfaces.
2. Set the temperature or grill setting using the temperature selector. Rapid heating With rapid heating, your oven reaches the temperature selected particularly quickly. & Use rapid heating when temperatures above 100 °C are selected. The following types of heating are suitable: ■ ■ < 3D hot air % Top/bottom heating To ensure an even cooking result, do not place your dish in the cooking compartment until rapid heating is complete. 1. Set the type of heating and temperature.
4. Use the @ or A button to set the cooking time. Default value for @ button = 30 minutes Default value for A button = 10 minutes The oven will start up after a few seconds. The cooking time counts down in the display and the [r] symbol lights up. The other time symbols go out. 5. Press the 0 button. The brackets are around p. The time when the dish will be ready is displayed. 6. Use the @ or A button to set a later end time. The cooking time has elapsed A signal sounds. The oven stops heating.
Changing the clock 2. Use the @ or A button to change the clock. No other time-setting option should have been set. After a few seconds, the time that has been set is adopted. 1. Press the 0 button four times. Hiding the clock The time symbols light up in the display and the brackets are around 0. You can hide the clock. For more information, please refer to the section Changing the basic settings. Childproof lock The oven has a childproof lock to prevent children from switching it on by accident.
Self-cleaning During self-cleaning, the oven heats up to approx. 500 . This burns off residues from roasting, grilling or baking and you only need to wipe the ashes from the cooking compartment. You can choose from three cleaning levels. Level Degree of cleaning Cooking time 1 gentle approx. 1 hour, 15 minutes 2 medium approx. 1 hour, 30 minutes 3 intensive approx. 2 hours The heavier and older the dirt, the higher the cleaning level should be.
in the display and the r symbol is in brackets. The p symbol goes out. After self-cleaning Once the cooking compartment has cooled down, wipe out the ash that has been left behind in the cooking compartment with a damp cloth. Care and cleaning With good care and cleaning, your oven will remain clean and fully-functioning for a long time to come. Here we will explain how to maintain and clean your oven correctly.
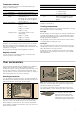
1. When attaching the oven door, ensure that both hinges are Refitting the rails 1. First insert the rail into the rear socket, press it to the back slightly (figure A), 2. and then hook it into the front socket (figure B). $ inserted straight into the opening (figure A). 2. The notch on the hinge must engage on both sides (figure B). $ % % 3. Fold back both locking levers (figure C). Close the oven The rails fit both the left and right sides.
2. Unscrew the cover at the top of the oven door. To do this, Installation 3. Lift the top panel up and pull it out and remove the two small During installation, make sure that the lettering "top right" is upside down at the bottom left of both panels. unscrew the left and right screws (fig. A). seals (fig. B). $ 1. Insert the lower panel at an angle towards the back (fig. A). % 2. Slide in the middle panel (fig. B). $ % 4. Unscrew the retaining clips on the right and left.
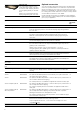
Problem Possible cause Remedy/information : Risk of electric shock! The oven does not heat up. There is dust on Turn the control knobs back the contacts. and forth several times. Incorrect repairs are dangerous. Repairs may only be carried out by one of our trained after-sales engineers. The oven door The oven door Wait until the oven has cannot be is locked by q cooled down and the L opened. The L self-cleaning. symbol goes out. symbol lights up in the display.
Hot air eco heating type Table With the energy-efficient "Hot air eco" heating type, you can prepare many dishes on one level. The fan distributes the energy-optimised heat from the ring heating element in the back wall evenly around the cooking compartment. You can achieve successful baking, roasting and cooking without having to preheat the oven. Notes ■ Place the items in the empty cooking compartment before it has heated up. Otherwise, energy optimisation will not have any effect.
Saving energy ■ ■ ■ ■ ■ Only preheat the oven if this is specified in the recipe or in the operating instruction tables. Use dark, black lacquered or enamelled baking tins. They absorb the heat particularly well. Open the oven door as infrequently as possible while you are cooking, baking or roasting. For longer cooking times, you can switch the oven off 10 minutes before the end of the cooking time and use the residual heat to finish cooking.
Cakes in tins Tin Level Type of heating Temperature in °C Cooking time in minutes Flan base, sponge flan tin 3 % 160-180 20-30 Delicate fruit flan, sponge springform/ring tin 2 % 160-180 50-60 Sponge base, 2 eggs (preheat) flan tin 2 % 150-170 20-30 Sponge flan, 6 eggs (preheat) springform cake tin 2 % 150-170 40-50 Shortcrust pastry base with crust springform cake tin 1 % 180-200 25-35 Fruit tart/cheesecake, pastry base* springform cake tin 1 % 160-180 70-90 Swiss
Small baked items Accessories Level Type of heating Temperature in °C Cooking time in minutes Macaroons universal pan 2 % 110-130 30-40 universal pan + baking tray 3+1 : 100-120 35-45 2 baking trays + universal pan 5+3+1 : 100-120 40-50 Meringue universal pan 3 : 80-100 100-150 Muffins wire rack with muffin tray 3 % 180-200 20-25 2 wire racks with muffin trays 3+1 : 160-180 25-30 Choux pastry universal pan 2 % 210-230 30-40 Puff pastry universal pan 3 : 180-2
You were baking on several levels. The Always use : 3D hot air to bake on more than one level. Baking trays that are placed in items on the top baking tray are darker the oven at the same time will not necessarily be ready at the same time. than that on the bottom baking tray. Condensation forms when you bake moist cakes. Baking may result in the formation of water vapour, which escapes above the door. The steam may settle and form water droplets on the control panel or on the fronts of adjacent units.
Meat Weight Accessories and ovenware Level Type of heating Temperature Cooking time in °C, grill set- in minutes ting Joint with rind (e.g. shoulder) 1.0 kg uncovered 1 4 190-210 130 1.5 kg 1 4 180-200 160 2.0 kg 1 4 170-190 190 Fillet of pork 500 g wire rack + universal pan 3+1 4 230-240 30 Pork joint, lean 1.0 kg uncovered 2 % 190-210 120 1.5 kg 2 % 180-200 140 2.
Poultry Weight Accessories and ovenware Level Type of heating Temperature Cooking time in °C, grill set- in minutes ting Rolled turkey joint 1.5 kg uncovered 1 4 200-220 110-130 Turkey breast 1.0 kg covered 2 % 180-200 90 Turkey thigh 1.0 kg wire rack 2 4 180-200 90-100 upwards. Placing half a potato or a small ovenproof container in the stomach cavity of the fish will make it more stable. Fish Turn the pieces of fish after Z of the time. Whole fish does not have to be turned.
Accessories and ovenware Level Type of heating Temperature in °C, grill setting Cooking time in minutes 4 slices, with topping wire rack + universal pan 3+1 4 160-170 10-15 12 slices, with topping wire rack + universal pan 3+1 4 160-170 15-20 Dish Toast Convenience products Observe the instructions on the packaging. If you line the accessories with greaseproof paper, make sure that the paper is suitable for these temperatures.
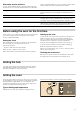
Dish Ovenware Yoghurt Cups or screw-top jars Proving dough Type of heating Temperature Cooking time on the cooking compartment floor : 50 °C Preheat 5 mins 50 °C 8 hrs Heat-resistant dish on the cooking compartment floor : 50 °C Preheat 5-10 mins Switch off the appliance and place the yeast dough in the cooking compartment 20-30 mins Defrost The defrosting time will depend on the type and quantity of the food.
Vegetables As soon as bubbles begin to form in the jars, set the temperature back to between 120 and 140 °C. Depending on the type of vegetable, heat for approx. 35 to 70 minutes. Switch off the oven after this time and use the residual heat. Vegetables with cold cooking water in one-litre jars When it starts to bubble Residual heat Gherkins - approx. 35 minutes Beetroot approx. 35 minutes approx. 30 minutes Brussels sprouts approx. 45 minutes approx.
Test dishes These tables have been produced for test institutes to facilitate the inspection and testing of the various appliances. In accordance with EN 50304/EN 60350 (2009) and IEC 60350. Baking Baking on 2 levels: Always insert the universal pan above the baking tray. Baking on 3 levels: Insert the universal pan in the middle. Piped biscuits: Baking trays that are placed in the oven at the same time will not necessarily be ready at the same time.
Robert Bosch Hausgeräte GmbH Carl-Wery-Straße 34 81739 München Germany www.bosch-home.