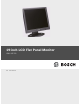
9-inch LCD Flat Panel Monitor UML-19P-90 en User’s Manual
UML-19P-90 LCD Monitor Table of Contents | en iii Table of Contents 1 Safety 1 1.1 Important Safety Instructions 1 1.2 Safety Precautions 2 1.3 Important Notices 3 1.4 Customer Support and Service 7 2 Unpacking 9 2.1 Parts List 9 3 Exploded View 9 4 Description 10 4.1 Features 10 4.2 Power 11 5 Installing the Monitor 11 5.1 Ventilation 11 5.2 Mounting the Monitor 11 5.2.1 Desktop Installation 11 5.2.2 Wall Mount Installation 11 5.2.
iv en | Table of Contents F01U099396 | 1.0 | 2008.11 UML-19P-90 LCD Monitor User’s Manual Bosch Security Systems, Inc.
UML-19P-90 LCD Monitor Safety | en 1 Safety 1.1 Important Safety Instructions 1 Read, follow, and retain for future reference all of the following safety instructions. Heed all warnings on the unit and in the operating instructions before operating the unit. 1. Cleaning - Unplug the unit from the outlet before cleaning. Follow any instructions provided with the unit. Generally, using a dry cloth for cleaning is sufficient, but a moist fluff-free cloth or leather shammy may also be used.
2 en | Safety UML-19P-90 LCD Monitor 11. Power sources - Operate the unit only from the type of power source indicated on the label. Before proceeding, be sure to disconnect the power from the cable to be installed into the unit. – For battery powered units, refer to the operating instructions. – For external power supplied units, use only the recommended or approved power – For limited power source units, this power source must comply with EN60950.
UML-19P-90 LCD Monitor ! ! ! i 1.3 Safety | en 3 WARNING! Medium risk: Indicates a potentially hazardous situation. If not avoided, this could result in serious bodily injury or death. CAUTION! Medium Risk Indicates a potentially hazardous situation. If not avoided, this may result in minor or moderate injury. Alerts the user to important instructions accompanying the unit. CAUTION! Low risk: (without safety alert symbol) Indicates a potentially hazardous situation.
4 en | Safety UML-19P-90 LCD Monitor connection to grounding electrodes, and requirements for the grounding electrode. i NOTICE! This device is intended for use in public areas only. U.S. federal law strictly prohibits surreptitious recording of oral communications. Your Bosch product was developed and manufactured with high-quality material and components that can be recycled and reused.
UML-19P-90 LCD Monitor Safety | en 5 Video loss - Video loss is inherent to digital video recording; therefore, Bosch Security Systems cannot be held liable for any damage that results from missing video information. To minimize the risk of lost digital information, Bosch Security Systems recommends multiple, redundant recording systems, and a procedure to back up all analog and digital information. i NOTICE! This is a class A product.
6 en | Safety UML-19P-90 LCD Monitor Au besoin, l’utilisateur consultera son revendeur ou un technicien qualifié en radio/télévision, qui procédera à une opération corrective. La brochure suivante, publiée par la Commission fédérale des communications (FCC), peut s’avérer utile : « How to Identify and Resolve RadioTV Interference Problems » (Comment identifier et résoudre les problèmes d’interférences de radio et de télévision). Cette brochure est disponible auprès du U.S.
UML-19P-90 LCD Monitor 1.4 Safety | en 7 Customer Support and Service If this unit needs service, contact the nearest Bosch Security Systems Service Center for authorization to return and shipping instructions. Service Centers USA Repair Center Telephone: 800-566-2283 Fax: 800-366-1329 E-mail: repair@us.bosch.com Customer Service Telephone: 888-289-0096 Fax: 585-223-9180 E-mail: security.sales@us.bosch.com Technical Support Telephone: 800-326-1450 Fax: 585-223-3508 or 717-735-6560 E-mail: technical.
8 en | Safety F01U099396 | 1.0 | 2008.11 UML-19P-90 LCD Monitor User’s Manual Bosch Security Systems, Inc.
UML-19P-90 LCD Monitor 2 Unpacking | en 9 Unpacking This equipment should be unpacked and handled with care. If an item appears to have been damaged in shipment, notify the shipper immediately. Verify that all the parts listed in the Parts List below are included. If any items are missing, notify your Bosch Security Systems Sales or Customer Service Representative. The original packing carton is the safest container in which to transport the unit and must be used if returning the unit for service.
10 en | Description UML-19P-90 LCD Monitor Reference # Button Description 4 Adjusts the value when in the Scrolls down in the OSD. OSD or decreases Audio Mute menu. 5 Decreases the value when in Scrolls left in the OSD. the OSD or decreases the volume. 6 Increases the value when in the Scrolls right in the OSD. OSD or increases the volume. 7 Not Used 8 Power Button / Power On (green) LED Indicator Unsupported Mode (green) Standby/Power Off (red) Figure 3.
UML-19P-90 LCD Monitor 4.2 Installing the Monitor | en 11 Power Model No. Rated Voltage Voltage Range Power at Rated Voltage UML-19P-90 120/230 VAC, 100-240 VAC 40 W (max) 50/60 Hz 5 Installing the Monitor This chapter outlines the procedures to install the UML-19P-90. A qualified service person should install the monitor and adhere to all local codes. 5.1 Ventilation To prevent overheating, ensure that the ventilation openings on the rear of the monitor are not covered. 5.
12 en | Installing the Monitor 2. UML-19P-90 LCD Monitor Mount the unit to the mounting device (not provided) using the four (4) mounting holes on the rear panel. The square mounting hole patterns are standard on 100 mm (3.9 in.) centers. Figure 5.2 5.2.
UML-19P-90 LCD Monitor Installing the Monitor | en 3. 13 If necessary, remove the side brackets from the 8C or current position and screw to the 9V position. 4. Adjust the location of the inner brackets so they align flush with the inner threaded holes on the back of the monitor. 5. Secure the RMK-08 rack mount bracket to the UML-19P-90 flat panel from the back side using the VESA 100 mm mounting points and the supplied four (4), M4*8 Phillips screws. Bosch Security Systems, Inc.
14 en | Navigating the Monitor 6. UML-19P-90 LCD Monitor Secure the fully assembled rack mount to the cabinet using four (4) rack mount screws and clips (not provided). 5.3 Connecting the PC Signal to the Monitor VGA The monitor can be connected to the analog VGA signal by using the provided VGA cable (DSUB to D-SUB). Figure 5.4 VGA Input DVI The monitor can be connected to a digital signal by using the provided DVI cable (DVI-D to DVI-D). Figure 5.5 DVI Input 6 Navigating the Monitor 6.
UML-19P-90 LCD Monitor Navigating the Monitor | en Reference # Button Description 1 Input Button Selects the signal to be displayed; choices are: VGA or DVI. Operates as the Select/ Enter key when in the OSD menu. 2 Menu Button Selects the on-screen display (OSD). 3 Adjusts the value when in Adjusts the value when in 4 15 Scrolls up in the OSD. the OSD. Scrolls down in the OSD. the OSD or auto adjusts when in VGA mode. 5 6 Decreases the value when Scrolls left in the OSD.
16 6.3 en | Navigating the Monitor UML-19P-90 LCD Monitor On-screen Display Menus There are five (5) on-screen menus that allow you to customize your settings. Press the Menu button on the front panel of the monitor to access the OSD menu, then press the Input button to enter your selection. Icon Menu Function Auto Adjust Adjusts the screen size when input is in DSUB Analog (VGA) mode. Screen Adjusts the Brightness and Contrast in both modes, H. Position, V.
UML-19P-90 LCD Monitor 6.5 Navigating the Monitor | en 17 Screen To access the Screen submenu, press the Menu button on the front panel of the monitor, then press the left and right arrows to highlight the Screen icon. Next, press the Input button on the front panel to access the Screen submenu options. DVI Digital Mode BRIGHTNESS CONTRAST H. POSITION V. POSITION PHASE ADJUST CLOCK ADJUST 1280x1024 63.9 kHz 60Hz DSUB Analog (VGA) Mode BRIGHTNESS CONTRAST H. POSITION V.
18 en | Navigating the Monitor UML-19P-90 LCD Monitor V. POSITION Adjusts the vertical position for the desktop (range - MIN, 1-99%, MAX). Note: not available in DVI Digital mode. PHASE ADJUST Adjusts for best picture quality by adjusting for sharpness of vertical lines (range - MIN, 1-99%, MAX). Note: not available in DVI Digital mode. CLOCK ADJUST Adjusts the best picture quality by adjusting the horizontal size of the video displayed (range - MIN, 1-99%, MAX).
UML-19P-90 LCD Monitor 6.7 Navigating the Monitor | en 19 Utility To access the Utility submenu, press the Menu button on the front panel of the monitor, then press the left and right arrows to select the Utility icon. Next, press the Input button, then press the up and down arrows to select the Utility submenu options. DVI Digital and DSUB Analog (VGA) Modes RECALL FULL AUTO INPUT SELECT 1280x1024 63.9 kHz 60Hz Submenu Definition RECALL Restores default settings.
20 en | Navigating the Monitor 6.9 UML-19P-90 LCD Monitor OSD To access the OSD submenu, press the Menu button on the front panel of the monitor, press the Input button, then press the left and right arrows to select the OSD icon. Press the up and down arrows to select the OSD submenu options. DVI Digital and DSUB Analog (VGA) Modes OSD TIME OUT OSD H. POSITION OSD V. POSITION OSD TRANSPARENCY 1280x1024 63.
UML-19P-90 LCD Monitor Power Management | en Submenu 7 21 Definition AUDIO VOLUME Adjusts the audio volume (range - MIN, 1-99%, MAX). AUDIO MUTE Enables or disables the mute function (options - ON and OFF). Power Management This monitor features a power management system to “power down” upon receipt of the display power management signaling (DPMS) from a DPMS video card.
22 en | Maintenance UML-19P-90 LCD Monitor Problem Solution Vertical or horizontal noise is Adjust the Clock and Phase in the Screen submenu. present in the picture in VGA mode Incorrect colors – Press the Menu button on the front panel of the monitor, then press the right arrow to select the Color menu. Press the down arrow on the front panel and select 9300K or 6500K. - or - – Press the Menu button on the front panel of the monitor, then press the right arrow to select the Utility menu.
Americas Bosch Security Systems, Inc. 850 Greenfield Road Lancaster, Pennsylvania 17601 USA Telephone +1 888-289-0096 Fax +1 585-223-9180 Email: security.sales@us.bosch.com www.boschsecurity.us Europe, Middle East, Africa: Bosch Security Systems B.V. P.O. Box 80002 5600 JB Eindhoven, The Netherlands Phone: + 31 40 2577 284 Fax: +31 40 2577 330 emea.securitysystems@bosch.com www.boschsecurity.