ACTIVE CUBE Application manual - Positioning
General Information about the Documentation This application manual complements the configurations described in the operating instructions and the „Quick Start Guide“ of the ACU frequency inverters (ACTIVE Cube series). Configurations 240, 440 and 540, which are described in this application manual, contain additional positioning functions. For better clarity, the documentation is structured according to the customer-specific requirements made on the frequency inverter.
TABLE OF CONTENTS 1 2 General Safety Instructions and Information on Use .................................................. 5 1.1 General Information .............................................................................................. 5 1.2 Purpose of the Frequency Inverters ...................................................................... 6 1.3 Transport and Storage........................................................................................... 6 1.
4.4.2 Motion block data ................................................................................................ 54 4.4.2.1 Target position.............................................................................................. 54 4.4.2.2 Speed .......................................................................................................... 54 4.4.2.3 Acceleration and Deceleration ........................................................................ 55 4.4.2.
.2 Status word of the positioning .......................................................................... 152 6.3 Status word 411 ................................................................................................ 154 6.4 Digital Positioning Output Signals..................................................................... 155 6.5 Logic Signal Sources for Positioning ................................................................. 156 6.6 Positioning Error Messages ..............
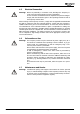
1 General Safety Instructions and Information on Use Warning! The specifications and instructions contained in the documentation must be complied with strictly during installation and commissioning. Only qualified staff who has read the documentation and, in particular, the safety instructions carefully is allowed to carry out installation or commissioning work or to operate the frequency inverters.
1.2 Purpose of the Frequency Inverters Warning! 1.3 The frequency inverters are electrical drive components intended for installation in industrial plants or machines. Commissioning and start of operation is not allowed until it has been verified that the machine meets the requirements of the EC Machinery Directive 98/37/EEC and EN 60204.
1.5 Electrical Connection Warning! Before any assembly or connection work, discharge the frequency inverter. Verify that the frequency inverter is discharged. Do not touch the terminals because the capacitors may still be charged. Comply with the information given in the operating instructions and on the frequency inverter label. When working at the frequency inverters, comply with the applicable standards BGV A2 (VBG 4), VDE 0100 and other national directives.
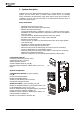
2 System description Positioning via motion blocks enables movement by a certain distance or to a target position. For each motion block, a separate motion profile can be set, including speed, acceleration and deceleration ramp. When motion blocks are processed automatically, the drive will react according to the parameterized behavior when it reaches the target position.
2.1 Terminal diagram ACTIVE Cube (ACU) series The terminal diagram shows an example of a linear axis, with standard parameter configuration of digital inputs. The sensor is evaluated using an EM extension module.
3 Commissioning of the Frequency Inverter Warning! 3.1 Carry out the electrical and mechanical installation according to the operating instructions or the "Quick Start Guide" of the frequency inverter. Comply with the safety instructions provided there. Frequency inverters of the ACU series feature the "Safe Torque Off" function. In any case comply with the application manual "Safe Torque Off" when using this safety function.
3.2 Caution! Commissioning of the motor During the guided commissioning, comply with the safety instructions in chapter "General Safety Instructions and Information on Use" and in the Operating Instructions or the "Quick Start Guide" of the frequency inverter. Carry out the guided commissioning procedure of the frequency inverter for one of the configurations listed below. These configurations contain the motion block positioning functions.
3.3 Control Inputs and Outputs The modular structure of the frequency inverters enables a wide spectrum of applications on the basis of the available hardware and software functionality. The functionality of the control inputs and outputs described in the "Quick Start Guide" and operating instructions is extended in the described configurations. Caution! Switch off power supply before connecting or disconnecting the control inputs and outputs.
3.3.1 Factory settings of the digital inputs Control input functions Digital Control Control positioning JOG mode / Input terminal Teach-in Digital inputs of frequency inverter: S1IND X210A.3 Digital input STOA for safety function S2IND X210A.4 Start Store actual JOG Clockwise Positioning position value 3) JOG Anticlockwise S3IND X210A.5 Stop Positioning, Touch probe 1) S4IND X210A.6 Freely programmable or 2) Encoder 1 Track B S5IND X210A.7 Freely programmable or 2) Encoder 1 Track A S6IND X210B.
X210A.5 Stop Positioning JOG Anticlockwise In JOG mode, the drive is moved in negative direction (anticlockwise) at an adjustable fixed speed. JOG mode is activated via terminal X210B.6. In teach-in operation modes (Operation Mode 1221), the JOG function is activated automatically. Touch probe Input for momentary contact switch or sensor for setting the reference position. Effective in Motion Mode 1208 with touchprobe.
X210B.6 JOG-Mode Active Teach-In 3.4 Activates JOG mode. JOG clockwise via terminal X210A.4 or JOG anticlockwise via terminal X210A.5 is executed. In teach-in operation modes (Operation Mode 1221), the JOG function is activated automatically. When a rising signal edge is received, the current position in the selected motion block is saved as the target position.
3.
Digital signals for status indication Digital signals can be influenced depending on the status of a motion order. For example, a digital signal can be parameterized such that it signals reaching of the target position or the end of the motion block. JOG mode The drive is operated manually via two digital inputs at a parameterizable, fixed speed. This enables for example functional tests for commissioning and approaching of positions for teach-in mode.
3.5.1 Getting started In order to use the positioning function, you must start the frequency inverter in Configuration 240, 440 or 540. If required, perform a motor measurement. Several functions will be readjusted as soon as you set up the configuration of the positioning operation. This includes the functions of the digital inputs. Warning! Ensure that your parameterization corresponds to the connected terminals.
3.5.1.2 Two different encoders for motor and positioning In systems where slip may occur, the motor encoder cannot be used as position encoder at the same time. Due to the slip (e.g. slipping in the case of a wheel/rail system), the motor encoder cannot approach the actual target with sufficient accuracy. By using a position encoder connected to the positioning system, precise positioning is possible even in the case of a system where slip may occur.
3.5.1.3 No motor encoder, external encoder for positioning In some applications the speed control accuracy and the dynamic behaviour of a sensorless motor control are sufficient. Positioning is possible in non-slip and in slipcontaining systems via an external encoder.
3.5.2 Reference system The reference system provides the link between the electrical system and the mechanical system. In parameter Feed Constant 1115, the user units (u) per revolution (U) are entered. By choosing a suitable parameter configuration, the feed constant can consider both the mechanical motion distance and the accuracy (resolution) (see example).
Example: Linear axis, drive via gearbox Revolutions of gearbox output shaft Gear Box: Driving shaft revolutions 1116 Gear Feed Gear Box: Motor shaft revolutions 1117 Revolutions of motor shaft Feed rate of linear axis: 25 mm per revolution of the output shaft Required positioning accuracy: ±1/100 mm Gear factor: 1/19.75 Feed rate 25 mm = = 2500 Accuracy 1/100 mm Feed Constant = 1 unit = 0.01 mm Set Feed Constant 1115 to 2500 u/U. Gear Box : Shaft revolutions 1116 1 100 Gear factor = = = 19.
2.45 Gear Box : Driving shaft revolutions 1116 245 Gear Factor = = = 0.18 Gear Box : Motor shaft revolutions 1117 18 Set Gear Box: Driving shaft revolutions 1116 to 245. Set Gear Box: Motor shaft revolutions1117 to 18. s max [u] = Note: ( ) ± 2 31 − 1 Ink ⋅ 3600 16 2 Ink ⋅ 18 U [u] ⋅ 245 U = ±1 605 631 999 units ≈ ±160 563 200° ≈ ±446 009 U Gear transmission factors are rounded in many cases and may result in a "drift" in the application, i.e.
3.5.3 Setting up a motion profile For complex motion profiles, e.g. profiles requiring different speeds and accelerations, different motion blocks must be created. Example: v Motion block 1 v1 v2 a11 Motion block 2 a12 a21 a22 t2 v3 Motion block 1 Approach target pos. 1 a11 Acceleration v1 Speed a12 Deceleration Motion block 2 Approach target pos. 2 a21 Acceleration v2 Speed a22 Deceleration t2 Delay until next motion block, e.g.
3.5.4 Control via software All parameters of the frequency inverter can be set up via the PC software VPlus. In Configuration 30, set up an operation mode x40 which is suitable for positioning. Now, when data are read from the inverter, all parameters are read and are available for parameterization. With the PC software VPlus, 32 motion blocks with different motion profiles are available. The program VTable which is included in VPlus enables comfortable parameterization of the motion blocks.
3.5.5 Write index and read index for the motion blocks table Via the write and read indices, the index of the motion block table the parameters of which are to be read or written is specified. VTable uses the parameters automatically for writing and reading. The write and read parameters are required for parameterization via keypad or for parameterization via a bus system (e.g. PROFIBUS).
Write index/Motion Block Sel. (Writing) 1200, Read index/Motion Block Sel. (Reading) 1201 VPlus Parameter Motion Block Sel. (Writing) 1200 Motion Block Sel. (Reading) 1201 Target Position / Distance 1202 Speed 1203 . . Data Set 0 2 2 4096 units 20000 u/s ... ... ... VTable Motion Blocks ... Target Position / Distance 1202 Speed 1203 . . 04/08 04/08 Application manual Positioning Application manual Positioning Index 1 ... ... ... ... Index 2 4096 units 20000 u/s ... ...
4 4.1 Operation Modes of the Positioning General Issues about Operation Modes The following operation modes are available for positioning. Operation modes: − Positioning mode. Automatic operation for sequence-controlled and repeatable approach to different targets in an application. The target can be selected via an overriding controller (parameter channel of field bus or digital inputs). − Homing. A homing operation is performed in order to define a new point of reference in the system.
4.1.1 Assignment of digital inputs In the individual operation modes of the positioning, the digital inputs have different inputs. The following table provides an overview of the functions and assigns them to the terminals, as parameterized in the factory settings for the functions. Assignment of terminals S4IND/S5IND depends on Configuration 30.
4.1.1.1 Instructions on MFI1D (multifunction input) Multi-function input MFI1D is processed, depending on the application or function, as an analog input value or a digital input signal. By default, the positioning function uses multi-function input MFI1D as a digital signal for certain functions. The sampling rate of multi-function input MFI1D is slower than that of digital signals S1IND, S2IND, etc. For this reason, this input should only be used for signals which are not time-critical, e.g.
4.1.2 Operation modes for controlling the positioning operation Parameter Operation mode 1221 defines: − Selection of starting record number via parameters or digital inputs − Automatic sequence of motion orders or individual order − Start of teach-in mode Operation mode 1221 0 - Off Sequence Mode w/o Restart, 101 - 1st Motion Block via Digital Inputs Sequence Mode w/o Restart, 102 - 1st Motion Block via P.
Operation mode 1221 10x Sequence mode without restart Parameter Operation mode 1221 = 101 or 102 v motion block 1 v1 v2 motion block 2 a12 a11 motion block 3 a22 STOP, without restart a21 t2 v3 a31 t a32 Sequence mode with restart 11x Parameter Operation mode 1221 = 111 or 112 v motion block 1 v1 v2 motion block 2 a12 a11 motion block 3 a22 a11 a21 t2 v3 motion block 1 a31 a32 motion block 2 a12 a21 t restart Single motion 20x Parameter Operation mode 1221 = 201 or 202 v motion
4.1.3 Input and output signals Input signals Motion blocks Output signals Target Position / Distance 1202 Speed 1203 Start Positioning 1222 Stop Positioning 1223 Resume Motion Block 1230 Motion block (via Parameter Starting record number 1228 or digital inputs) Accelereation 1204 Ramp Rise Time 1205 Deceleration 1206 Ramp Fall Time 1207 Motion Mode 1208 Digital Signal 1 1218 Digital Signal 2 1219 Digital Signal 3 1247 Digital Signal 4 1248 Sequence mode No.
Note: 4.2 Before a positioning operation can be started, the point of reference of the positioning operation must be determined in a homing operation. Otherwise, error message "F1570 – No Homing Done" will be displayed if you try to start a positioning operation. Homing When the drive is started, a defined starting position must be specified. In a homing operation, the point of reference of the positioning operation is determined. All positioning data relates to this point of reference.
4.2.2 Input and output signals for homing Function Drive disabled Homing is started Home position is set Homing is interrupted Terminal assignment for homing ConStart Stop Home troller Homing Positio- Switch release (manual) ning 1139 2) 1) 1235 1223 Off* S3IND* S6IND * 6) 0 X X X 1 1 0 1 1 0 1 1 1 0 edge X 3) Neg. HW Limit Switch Pos.
In most homing operations, a home switch (cam) and a hardware limit switch will be required. Mind wiring and parameter configuration accordingly. Input terminals for homing Pos. HW Limit Switch 1138 = set "540 - S4IND inverted (Hardware)" Neg. HW Limit Switch 1137 = "541 - S5IND inverted (Hardware)" Pos. HW Limit Switch Neg.
Input and output signals for homing Input signals Assign digital input signals or logic signals to the parameters. Start Homing (manual) 1235 Neg. HW Limit Switch 1137 Pos. HW Limit Switch 1138 Home Switch 1139 Homing Output signals Homing Mode 1130 Assign operation mode Homing Modes 1 ... 14: Home switch or limit switch and speed sensor reference signal 17 ...
4.2.4 Home offset With parameter Home Offset 1131, the point of reference for positioning can be adjusted to the mechanical system. The value adjusted for parameter Home Offset 1131 is added to the home position. Positive values will cause a shift of the point of reference in positive direction (clockwise), negative values will cause a shift in negative direction (anticlockwise).
Via parameter Acceleration 1134, the acceleration and deceleration value to be used for homing is adjusted. Parameter Ramp Rise Time 1135 defines the time in which the frequency is to be brought to the acceleration and deceleration ramp adjusted for homing. In this way, a non-linear acceleration and deceleration (S-curve) can be obtained for homing, and the load during acceleration and deceleration of the drive can be reduced, e.g. in order to limit jerking.
Attention! − After changing motion profiles, you should test the automatic sequence of motion blocks at reduced speed. The scaled speed function can be activated via parameter Speed Override 1236. For the test, an emergency stop device must be provided in order to be able to stop the drive immediately in the case of extraordinary movements. − If the load moment is changed while motion blocks are being processed, the target position may not be reached.
4.4 Positioning Mode And Motion Block Data 4.4.1 Motion Mode The positions are defined either in relation to a fixed reference position (absolute motion mode), in relation to other positions or a touch-probe sensor. Parameter Motion Mode 1208 enables the selection.
The operation mode of parameter Motion Mode 1208 defines the reference of the target position. Operation modes 10 to 14 are combined with the function of an electronic gear. Motion Mode 1208 0 - absolute 1 - relative 2- Touch probe: rising edge 3- Touch probe: falling edge 4 - Velocity 10 - Gearing, absolute 11 - Gearing, relative 12 - Gearing, touch probe: rising edge 13 - Gearing, touch probe: falling edge 14 - Gearing 20 - Gearing, direct sync., absolute 21 - Gearing, direct sync.
Motion Mode 1208 Gearing, direct sync., 23 - Touch-Probe: Falling Edge 24 - Note: Gearing, direct synchronisation Function Operation mode 3 is combined with the electronic gearing function. The drive is accelerated to the master speed. At the start of a motion block the drive is sychronised with the master drive directly. Like operation mode 4, but the drive moves at the speed profile defined by the electronic gear. The target position is not relevant and is not evaluated.
4.4.1.1 Motion mode "absolute" Parameter Motion Mode 1208 = "0 – absolute": The target position is the position adjusted in the motion block at Target Position/Distance 1202. Target position relates to the fixed reference position (point of reference for positioning) which is determined by a homing operation. An absolute distance is covered, referred to the reference position. When the target position is reached, logic signal "282 Target Position Reached" is set.
4.4.1.3 Motion mode "touch probe" (sensor) Activation of motion mode "touch probe": − Parameter Motion Mode 1208 = "2 – touch probe: rising edge" or − Parameter Motion Mode 1208 = "3 – touch probe: falling edge" The rising or falling edge of a digital signal on digital input S3IND (terminal 210A.5) is used for setting a reference point for a relative positioning operation. As soon as the signal is received, the drive moves by the relative distance of parameter Target Position/Distance 1202.
If no touch-probe signal is received within the touch probe window, the settings of parameter Touch-Probe-Error: Next Motion Block 1210 will become effective. Touch-Probe-Error: Next Motion Block 1210 Function The drive is stopped via Emergency Ramp 1179, after that, error message "F1573 No touch probe signal detected" is output. Factory setting.
4.4.1.4 Motion mode "velocity" Parameter Motion Mode 1208 = "4 – velocity": The drive is accelerated to Speed 1203 at the motion profile set in the motion block. Settings for Target Position / Distance 1202 will not be evaluated. The motion block remains active until another motion block is selected. Jumping to motion blocks with other motion modes, e.g. "absolute" or "relative" is possible.
4.4.1.5 Combination with electronic gear Positioning operation modes 10 to 14 and 20 to 24 (parameter Motion Mode 1208) are combined with the electronic gearing function. Operation modes 10 to 14, “Gearing” Synchronisation at attaining the master speed Operation modes 20 to 24, “Gearing, direct synchronisation” Direct synchronization at the start of a motion block Operation modes 10 to 14, “Gearing” The drive accelerates the master speed at the ramps parameterized in the motion block.
Note: If both a motor and a position encoder (two different encoders) are used, the function "Electronic Gear" can only be used via system bus.
Motion mode “Gearing”, synchronisation at master speed Activation of motion mode “Gearing”: − Parameter Motion Mode 1208 = “10 - Gearing, absolute” or − Parameter Motion Mode 1208 = “11 - Gearing, relative” or − Parameter Motion Mode 1208 = “14 - Gearing” 1. 2. 3. 4. Acceleration with ramps from the motion block (Acceleration 1204) Synchronisation of drive and master after attaining the master speed.
Motion mode “Gearing, touch probe”, synchronisation at master speed Activation of motion mode “Gearing, touch probe“: − Parameter Motion Mode 1208 = “12 - Gearing, touch probe: rising edge” or − Parameter Motion Mode 1208 = “13 - Gearing, touch probe: falling edge” Motion mode 12 corresponds to motion mode 2 - “Touch probe: rising edge”, but contains the additional electronic gearing function. For motion mode 2 refer to chapter 4.4.1.3.
Positioning mode “Gearing, direct synchronisation“ Activation of motion mode “Gearing, direct synchronisation“ − Parameter Motion Mode 1208 = “20 - Gearing, direct sync., absolute” or − Parameter Motion Mode 1208 = “21 - Gearing, direct sync., relative” or − Parameter Motion Mode 1208 = “24 - Gearing direct synchronisation” With Touch-Probe signal: − Parameter Motion Mode 1208 = “22 - Gearing, direct sync., Touch-Probe, pos. Edge” or − Parameter Motion Mode 1208 = “23 - Gearing, direct sync.
Attention! During the processing of motion blocks and operation modes with electronic gearing for Motion Mode 1208, the direction of motion of the axis may be reversed. The speed defined by the master is too high in order to reach the target position at the deceleration set in the motion block. In this case, the target position is passed with the current deceleration and then approached from the opposite direction.
4.4.2 Motion block data The data of each motion block is saved separately. The motion block data consist of values for: Target Position Speed Acceleration Deceleration Ramp rise times 4.4.2.1 Logic Next motion block - Event - Interruption Event - Delay Digital signal Digital signals for indication of status of motion orders Target position Parameter Target Position/Distance 1202 defines the distance to be covered. The meaning of the parameter depends on parameter Motion Mode 1208.
4.4.2.3 Acceleration and Deceleration For parameters Acceleration 1204 and Deceleration 1205, the values for the motion to the target position are adjusted. Via the ramp rise time, a non-linear acceleration and deceleration (S-curve) can be obtained, and the load during acceleration and deceleration of the drive can be reduced, e.g. in order to limit jerking. The factory setting of 0 ms causes a linear ramp. No.
Motion blocks are processed automatically in the following order: − Motion block is selected − Motion block is executed with or without repetition − Interrupt a motion block and jump to the next motion block under configurable conditions according to priority a) Int.-Event 1: Next Motion Block 1262 b) Int.
Automatic sequence Logic signal „1“ First motion block via digital inputs: First motion block via parameter: In the settings of In the settings of 101 - Sequence Mode w/o Restart, 1st Motion Block via Digital Inputs 111 - Sequence Mode with Restart, 1st Motion Block via Digital Inputs 102 - Sequence Mode w/o Restart, 1st Motion Block via P. 1228 112 - Sequence Mode with Restart, 1st Motion Block via P.
After completion of the current motion order, a new motion order can be started automatically. As soon as the positioning operation is started with the corresponding logic signal for parameter Start Positioning 1222, the operation is started with the first motion block.
After interuption of the current motion order, a new motion order can be started automatically. During a running motion block the settings are evaluated for parameters: − Interrupt-Event 1 1260 − Int.-Event 1: Next Motion Block 1262 − Interrupt-Event 2 1263 − Int.-Event 2: Next Motion Block 1265 If parameter Interrupt-Event 1 1260 receives a logic signal via the assigned input, the motion block adjusted in parameter Int.-Event 1: Next Motion Block 1262 is activated.
Set the next motion block, stop of the drive or error switch-off for an event: By entering one of the listed values for parameters − Delay: Next Motion Block 1213 − Event 1: Next Motion Block 1215 − Event 2: Next Motion Block 1217 − Int.-Event 1: Next Motion Block 1262 − Int.-Event 2: Next Motion Block 1265 the next motion block or user-defined behavior in the case of events can be selected. Errors in the motion sequence can be identified quickly by emergency stop, stop and the error switch-off function.
Example: Start of tne next motion block after delay expiry and by event 1 Motion block 1 Motion block 2 1000 ms Delay 1212 Delay: Next Motion 2 Block 1213 3000 ms Delay 1212 Delay: Next Motion 4 Block 1213 0 ms Delay 1212 Delay: Next Motion 0 Block 1213 Event 1 1214 Event 1 1214 Event 1 1214 S4IND Event 1: Next Motion Block 1215 3 Event 1: Next Motion Block 1215 1000 ms Delay 1 Start Pos.
4.4.2.5 Single motion A signal on Start Positioning 1222 starts the Starting Record Number 1228 (parameter Operation Mode 1221 in setting "202- single motion, motion block from p. 1228") or the motion block set via parameters Motion Block Change-Over 1 1224 to Motion Block Change-Over 5 1254, (parameter Operation Mode 1221 in setting "201-single motion, motion block via digital inputs"). After completion of the motion, the target position is maintained.
4.4.3 Control of motion 4.4.3.1 Selection of motion block via digital signals (motion block change-over) If the motion blocks are selected via digital signals, motion blocks 1 to 32 can be selected via the motion block change-over function.
Input signals for motion block change-over Input signals Assign digital input signals to the parameters.
4.4.3.2 Motion block selection via parameter (startingrecord number) Via parameter Starting-Record Number 1228, one of the 32 motion blocks can be selected. The motion block selection via parameter is active if parameter Operation Mode 1221 is set to one of the following modes: − − − − 102 112 202 302 - Sequence Mode with Restart, 1st Motion Block via P. 1228 Sequence Mode with Restart, 1st Motion Block via P. 1228 Single Motion, Motion Block Sel. via P. 1228 Teach-In, Motion Block Sel. via P.
4.4.4 Input and output signals for motion blocks The controller enables the execution of individual orders, repetition of motion blocks and automatic sequence of motion blocks. The motion block for the motion order can be selected via digital inputs or parameters. The terminal assignment (without selection of motion block) is shown in the following table. Terminal assignment for motion mode Controller release Function Start Positioning 1222 S2IND* Drive disabled Positioning is started and processed (4.
Note: For controller release of the power component, wiring of the following digital inputs is required: STOA (terminal X210A.3) and STOB (terminal X210B.2). In safety-oriented systems, the documentation "Safe Torque Off" shall be complied with. Note: Before a positioning operation can be started, the point of reference of the positioning operation must be identified in a homing operation. Otherwise, error message "F1570 – No Homing Done" will be displayed if you try to start a positioning operation. 4.
4.4.5.1 Starting and stopping positioning The positioning operation is controlled via signals for both parameters Start Positioning 1222 and Stop Positioning 1223. The parameters can be assigned logic signals or digital inputs. The positioning operation is started with a positive edge on digital input or a logic signal for parameter Start Positioning 1222 (factory setting S2IND).
A motion block can be started with “Start Positioning” even if the “Holding Time” is not elapsed. Input signals for starting and stopping motion block sequences or single motions Input signals Assign digital input signals orlogic signals to the parameters. Start Positioning 1222 Stop Positioning 1223 Note: Start and Stop of the positioning: A positioning sequence or a single motion will be executed or stopped according to the adjusted parameter Operation Mode 1221.
According to the example above: Reaction of the drive on set “Stop Positioning” and reset “Start Positioning” − Reaction on set “Stop Positioning” (example) Distance-time and velocity-time diagrams Starting-Record Number 1228 1 Motion Blocks Index 1 Index 2 Index 3 Index 4 Target Position TP 1 TP 2 TP 3 TP 4 Next Motion Block 2 3 4 2 TP: Target Position value a) Stop b) 1 0 t Start 1 0 t Position Index 4 Target Position 4 Target Position 3 Index 3 StartingRecord Number Index 1 Targ
− Reaction on reset “Start Positioning” (example) Distance-time and velocity-time diagrams Starting-Record Number 1228 1 Motion Blocks Index 1 Index 2 Index 3 Target Position TP 1 TP 2 TP 3 TP 4 Next Motion Block 2 3 4 2 Index 4 TP: Target Position value a) Stop b) 1 0 t Start 1 0 t Position Target Position 4 Target Position 3 Target Position 2 Target Position 1 Index 3 StartingRecord Number Index 1 Index 2 t v 0 Target position reached: t 1 3 2 1 Target Position 3 not reac
4.4.5.2 Resuming interrupted motion blocks The resume function enables continuing motion blocks after an interruption by an error or by resetting of the "Start Positioning" signal. Resumption is effected as follows: 1. Set signal on the input assigned to parameter Resume Motion Block 1230. 2. Set Signal Start Positioning 1222 The resumed motion block is indicated by parameter Motion Block to Resume 1249. The resume is deactivated while the teach-in function is being carried out.
4.4.
The operation mode is the result of the combination of 3 possible input signals and 3 status changes to produce the required output signal. The unit digit defines the evaluation upon the start of the motion block, the tens digit defines the evaluation as soon as the reference value is reached and the hundreds digit defines the evaluation at the end of the motion block.
Example 1: Digital signal 3 is to indicate that the target position was reached. When the position is reached, the output signal is to be "1". When the position is not reached, the output signal is to be "0". As soon as the target position is reached, the output is to be switched on, i.e. tens digit is _1_. When the motion block is started, it is assumed that the target position has not been reached, i.e. unit digit is __2. At the end of the motion block, the target position is unchanged; i.e.
4.5 JOG Mode For commissioning and teach-in mode, the drive can also be controlled manually via digital inputs. JOG mode offers various options: − The drive is moved clockwise or anticlockwise, via two digital inputs in each direction − 4 fixed speeds available in each of 4 data sets; selection via reference frequency channel − Control possible via buttons of control unit − Separate acceleration and deceleration ramps − Approaching of positions to be saved as target positions in motion blocks.
Standard Terminal Assignment JOG mode Function Controller release JogMode Active 1231 MFI1D* Drive disabled Drive disabled JOG mode clockwise JOG mode anticlockwise Jog Clockwise Jog Anticlockwise 1233 1232 S2IND* S3IND* Neg. HW Limit Switch Pos.
Input terminals for JOG mode: Factory settings of the parameters Jog Clockwise 1232 = „71 - S2IND“ Jog Anticlockwise 1233 = „72 - S3IND“ Jog-Mode Active 1231 = „76 - MFI1D“ „ON“=JOG clockwise „ON“=JOG anticlockwise „ON“=Jog-Mode active X210A 1 +20 V/180 mA 2 GND 20 V 3 STOA (safety function) 4 S2IND 5 S3IND 6 S4IND 7 S5IND X210B 1 S6IND 2 STOB (safety function) 3 S1OUT 4 MFO1A 5 +10 V/4 mA 6 MFI1D 7 GND 10 V Switch-on is not necessary if parameter Operation Mode 1221 = - „301 - Teach-In, Motion Block
4.5.1 Fixed speed in JOG mode Four fixed speeds can be used in JOG mode. The fixed speed to be used can be selected via parameter Reference Frequency Source 475 of the reference frequency channel. For parameter Reference Frequency Source 475, an operation mode with fixed speed (FF/fixed frequency) must be selected. Via the logic states of the signals assigned to parameters Fixed Frequency Change-Over 1 66 and Fixed Frequency Change-Over 2 67, one of the four fixed speeds can be selected.
JOG mode via keypad can be activated: • • Navigate to the CTRL menu. Actuate the ENT-key. Signal CTRL flashes. • Actuate the ENT-key again to reach the local operation mode (stopped). • Use the FUN-key to travel with Jog-Speed Keypad 1174. While the key is actuated the drive runs. If the key is not actuated any more the drive will be stopped at the deceleration ramp. Use the ENT-key to change the direction of rotation.
4.5.2 Acceleration and Deceleration in JOG Mode In JOG mode separate acceleration and deceleration ramps with S curves (ramp times) are used: Parameter Description Acceleration Ramp Rise Time Deceleration Ramp Fall Time Emergency Ramp No. 1175 1176 1177 1178 1179 Min. 1 u/s2 0 ms 1 u/s2 0 ms 1 u/s2 Acceleration 1175 Setting Max. 232-1 u/s2 2000 ms 232-1 u/s2 2000 ms 232-1 u/s2 Fact. sett.
Input signals for teach-in Input signals Teach-In Assign digital input signals or logic signals to the parameters. Selection of the motion block: Motion Block Change-Over 1 1224 Motion Block Change-Over 2 1225 Motion Block Change-Over 3 1226 Motion Block Change-Over 4 1227 Starting-Record Number 1228 Teach-In-Signal 1239 Operation Mode 1221 = 301 - Teach-In, Motion Block Sel. via Digital Inputs 302 - Teach-In, Motion Block Sel. via P.
Standard terminal assignment in teach-in mode Function Controller release Jog Clockwise 1232 S2IND* Drive disabled Drive disabled JOG mode clockwise JOG mode anticlockwise Jog Anticlockwise 1233 S3IND* Teach-In Signal 1239 MFI1D* Neg. HW Limit Switch 1137 S5IND 2) Pos.
Selection of motion blocks for teach-in Selection of motion block where the current position is to be saved as a target position: Operation mode 1221 301 - Teach-In, Motion Block Sel. via Digital Inputs Selected motion block The current position is saved as the Target Position / Distance 1202 in the motion block selected by the motion block change-over function.
4.7 Electronic gear Electronic gears are used in many plants where a synchronous operation, either continuous or for a limited period of time, of several drives is required. The function includes: − Activation/deactivation of synchronization of several drives at any time during operation. − Adjustable ratio of different gear factors between master and slave. − Parameterizable signals for feedback "In Gear". − Synchronization of slave drive with master drive via system bus or encoder inputs.
In setting "11 - RxPDO1.Long1 extrapolated" of parameter Master Position Source 1122 the system bus synchronization must be set to 1 or 10 to ensure a reliable function of Operation Mode 1180. Operation mode 1180 0 1 2 3 10 Off 1) RxPDO1 RxPDO2 RxPDO3 SYNC - 2) 3) 3) 1) If the error message "F1453 Systembus-Synchronization not activated" is displayed when the slave drive is started, one of the operation modes 1, 2, 3 or 10 must be selected.
4.7.2 Gear factor Via parameters Gear Factor Numerator 1123 and Gear Factor Denominator 1124, the gear factor is set permanently at the frequency inverter of the Slave drive. Gear factor = Gear Factor Numerator 1123 Gear Factor Denominator 1124 Parameter No. Description 1123 Gear Factor Numerator 1124 Gear Factor Denominator 4.7.3 Min. -32 767 1 Setting Max. 32 767 65 535 Fact. sett. 1 1 Resynchronization Limitation of acceleration when the gear factor is changed is effected via parameter Resync.
1128 Parameter Start Phasing Factory setting 7 - Off Input and output signals of phasing function Input signals Output signals Phasing Operation modes for digital outputs: Assign digital input signals or Phasing: Offset 1125 56 - Phasing Done logic signals to the parameter. Phasing: Speed 1126 156 - Inv. Phasing Done Phasing: Acceleration 1127 Signal source: Start Phasing 1128 616 - Phasing Done Example of phasing function: 1. Signal "Start Phasing" is set. 2.
The phasing function can be cancelled by resetting the Start Phasing signal. The current speed is reduced at the value of Phasing: Acceleration 1127 and signal "56 - Phasing Done" is set. Example of cancellation of phasing function 1. Signal “Start Phasing” is set 2. Deceleration to master speed 3.
4.8 Monitoring Functions 4.8.1 Travel limits Bumping into the mechanical stops of a limited travel range can be prevented by: − Hardware limit switches − Software limit switches (parameters) Limit switches can be used in order to protect the machine and to limit the travel range. Neg. SW Limit Switch 1146 Left mechanical machine stop Pos. SW Limit Switch 1145 Right mechanical machine stop Home position Neg. HW Limit Switch (anticlockwise rotation of motor) Pos.
For each direction of motion, there is one HW limit switch. The HW limit switches are connected to digital inputs which are assigned to parameters Neg. HW Limit Switch 1137 and Pos. HW Limit Switch 1138. Parameter Factory setting 1138 Pos. HW Limit Switch 7 - Off 1137 Neg. HW Limit Switch 7 - Off Setting, e.g.
Input signals and error messages /warnings of hardware limit switches: Input signals Assign digital inputs to the parameters. Neg. HW Limit Switch 1137 Pos. HW Limit Switch 1138 HW limit switches Hysteresis 1149 Fault Reaction 1143 Failure messages/warnings F1445 Pos. and Neg. HW-Lim Switch Simultaneously F1446 Limit Switch Incorrect Wired! Assign operation mode 1 - Error-Switch-Off 2 - Shutdown, Error 3 - Emergency-Stop, Error 10 - Warning F1447 Pos. HW-Limit Switch F1448 Neg.
4.8.2.1 Hysteresis for hardware limit switch Via parameter Hysteresis 1149, the switching hysteresis of a limit switch (e.g. proximity switch) can be considered. In addition, the hysteresis prevents non-defined switching when the axis has stopped at a limit switch position. The drive can be enabled if the distance between the axis and the hardware limit switch exceeds the value of parameter Hysteresis 1149. Parameter No. Description 1149 Hysteresis Example: Setting Max. 231-1 u Min. 0u Fact. sett.
4.8.2.2 Fault reaction Via parameter Fault Reaction 1143, you can define the behavior of the drive when the hardware limit switch is reached. Fault Reaction 1143 0 - Disabled 1 - Error-Switch-Off 2 - Shutdown, Error 3- Emergency-Stop, Error 10 - Warning 1) Function No evaluation of hardware limit switches. Factory setting. The drive is stopped and error message "F1447 Pos. HW Limit Switch" or "F1448 Neg. HW Limit Switch" is output.
Hardware limit switches can also be used for homing. In this case, the hardware limit switches are not evaluated by parameter Fault Reaction 1143 during homing. Warning! If evaluation of hardware limit switches is off, external control measures must be taken to ensure that in dangerous situations, e.g. hardware limit switch overrun, safety device open, danger of loads falling down, the drive is switched off immediately and a mechanical brake is triggered, if necessary.
Error messages/warnings of software limit switches: Failure messages/warnings SW-Endschalter Pos. SW Limit Switch 1145 F1444 Pos. SW-Lim. Switch < Neg. SW-Lim. Switch Neg. SW Limit Switch 1146 Fault Reaction 1144 Assign operation mode 1 - Error-Switch-Off 2 - Shutdown, Error 3 - Emergency-Stop, Error F1442 Pos. SW-Limit Switch F1443 Neg. SW-Limit Switch A 0002 SW-LIM CW Application Warnings 273 = A 0004 SW-LIM CCW 10 - Warning 11 - Warning pos. SW-Limit-Switch 12 - Warning neg.
Warnings and error messages of software limit switches Neg. SW Limit Switch 1146 Pos. SW Limit Switch 1145 Home position Fault Reaction 1144: 1 - Error-Switch-Off 2 - Shutdown, Error 3 - Emergency-Stop, Error 10 - Warning F1443 Neg. SW-Limit Switch A0004 SW-LIM CCW F1442 Pos. SW-Limit Switch A0002 SW-LIM CW Application Warnings 273 (Actual value) 12 - Warning neg. SW-Limit-Switch 11 - Warning pos. SW-Limit-Switch Create Appl. Warning Mask 626 Note: Limit switches are assigned as follows: Pos.
4.8.3.1 Move away from SW limit switches The axis can be moved to the defined travel range again: − Acknowledge error and move in opposite direction in JOG mode or − Acknowledge error and start positioning in opposite direction Error "F1444 Pos. SW-Lim. Switch < Neg. SW-Lim. Switch" is displayed if parameters Positive SW Limit Switch 1145 and Negative SW Limit Switch 1146 are set such that the positive SW switch is to the left of the negative SW switch.
4.8.4 Target window The target window monitors the current position after completion of a positioning operation. A positioning operation is complete as soon as the current position is in the target window. Via parameter Target Window 1165, you can define as from which distance from the target position the signal "60 – Target Position Reached" is set. This setting is valid both for the positive and negative direction.
4.8.5 Contouring error supervision Contouring errors may occur, for example, if the acceleration and deceleration ramps are not adjusted to the moment of inertia of the load and the drive cannot follow the specified reference values. With the contouring error threshold, you can define a maximum deviation between the current position and the required position. If this limit is exceeded for a user-defined time, the drive will respond as defined in parameter Fault Reaction 1120.
Contouring error supervision output signals Error messages/warnings Contouring error supervision Operation modes for digital outputs: 61 - Warning Deviation of Position 161- Inv. Warn.
4.8.6 Warning mask Application The logic signals of monitoring and control functions can be selected via parameter Create Warning Mask 536. For the available options, refer to the operating instructions. The logic signals of different positioning monitoring functions can be selected via parameter Create Appl. Warning Mask 626. As soon as limit switches are reached or contouring error thresholds are exceeded, a warning can be issued.
The current warning mask can be read via parameter Actual Appl. Warning Mask 627. The operation modes of parameter Create Appl. Warning Mask 626 are encoded in Actual Appl. Warning Mask 627. If several warnings are combined, the code can be calculated from the hexadecimal addition of the individual warnings and the corresponding code.
4.9 Speed Override The positioning function uses the parameterized speeds of the individual motion blocks. Alternatively, the positioning speed can be defined via an external reference value source. For this purpose, the Speed Override 1236 function is enabled. The set values can be changed during operation dynamically, e.g. by a potentiometer on an analog input. The speed override function does not affect the ramps set for acceleration and deceleration.
4.10 Position Comparator The position comparator compares the current position and the specified positions. It checks if the actual position is within the specified range (defined by on and off positions). Via the comparator, logic functions can be controlled or activated, depending on the current position value. The following signals are set if the current value is in the range between the OnPosition 1243 and the Off-Position 1244: − "58 – Position Comparator" and "158 - Inv.
Via parameter Operation Mode 1242, you can define the source for the actual position to be processed by the comparator. Operation mode 1242 9 - Off 606 - Actual position Sensorless Act. Posi631 tion 708 - RxPDO1 Long1 1) 709 - RxPDO1 Long2 1) 718 - RxPDO2 Long1 1) 719 - RxPDO2 Long2 1) 728 - RxPDO3 Long1 1) 729 - RxPDO3 Long2 1) 1) Function Comparator is switched off. Current position value is processed by comparator.
4.11 Rotary Table Application A rotary table is a round axis with unlimited travel range. No limit switch required. Unlimited travel ranges. Via parameter Operation Mode 1240, the type of motion to the target position is defined. The direction of rotation and way optimization (shortest way) can be specified. Operation mode 1240 0 - Off 1 - On 2- On / Optimized (shortest way) 3- On / Clockwise Rotation 4- On / Anticlockwise Rotation Note: Function Round table positioning switched off.
Example: Definition of units as degrees (°), setup of reference system (Feed Constant 1115), Feed Constant = 3600 for resolution of 0.1°; revolution distance = 3600 u In order to limit the travel range of a rotary table, it can be configured as a linear axis. Linear movements can be effected via a round axis, e.g. in the case of a belt conveyor.
Example: Operation modes "3 – On /Clockwise Rotation" and 4 – "On / Anticlockwise Rotation" Operation mode 3 Operation mode 4 Operation mode 3 Target position 315° 0° Current position 45° 45° Actual position value 45° Target position 315° 315° clockwise (positive) anticlockwise (negative) Operation mode 4 Target position 315° 90° 270° Direction of rotation 0° 270° 180° Actual postion value 45° 90° 180° Direction of rotation is defined by operation mode.
4.12 Position Controller The position controller evaluates the positioning operation (target/actual position) and tries to control the drive such that it comes as close as possible to the specifications. For this purpose, an additional frequency is calculated for compensation of position deviations. By setting the corresponding parameter, this frequency can be limited. The parameter settings of the position controller determine how quick and to what extent position deviations are to be compensated.
In order to avoid oscillations of the drive while it is at standstill, amplification is reduced to 50 % of the parameterized value for small position deviations Amplification [%] 100 50 -0.50 -0.25 0.00 0.25 0.50 Control deviation of position [°] The following behavior may indicate that the controller parameters are not configured properly: − − − − drive is very loud drive vibrates frequent contouring errors inexact control For the setting options of other control parameters, e.g.
4.13 Store the actual position value (latching function) With the latching function the actual position value of the drive can be stored. With a rising or falling signal edge at digital input S2IND the actual position value is stored in the EEPROM and displayed via Latched Position 1281. Parameter Operation Mode 1280 allows to set the storing of actual position value to rising or falling signal edge.
4.14 Wiring Example ACU, device series ACTIVE Cube X210A 1 +20 V/180 mA 2 GND 20 V 3 1st secure disable input for the safety function STO STOA 4 S2IND Start Positioning/JOG Clockwise 5 S3IND Stop Positioning/JOG Anticlockwise 6 S4IND Pos. HW Limit Switch/Speed sensor 1 track B (HTL) 7 S5IND Neg.
In configuration 240 S4IND (X210A.6) and S5IND (X210A.7) are parameterized by default as inputs for Encoder 1. Via S6IND (X210B.1), the zero track of a HTL encoder can be evaluated. Alternatively, the inputs of an optional extension module EMENC can be used as encoder inputs. In this case, inputs S4IND and S5IND must be parameterized for a changed assignment of functions. In configuration 540, evaluation of Encoder 1 (parameter Operation Mode 490) is disabled by default, parameter Act.
5 List of homing modes In the following sections, the homing modes are explained in detail. The sections are organized as follows: • • • • 5.1 5.2 5.3 5.5 Brief description Overview table Graphical overview Detailed explanations The graphic overview and overview table are recommended for experienced users who are already familiar with the functions of the different homing types. With these overviews, the correct mode for the application can be selected quickly.
11 12 13 14 - Homing Mode 1130 Neg. Lim.-Sw., Ref.-Sig. right of right Edge of Home-Sw. Neg. Lim.-Sw., Ref.-Sig. left of right Edge of Home-Sw. Neg. Lim.-Sw., Ref.-Sig. right of left Edge of Home-Sw. Neg. Lim.-Sw., Ref.-Sig. left of left Edge of Home-Sw. Function Homing to home switch with detection of encoder ref. signal. Homing direction negative (anticlockwise). Reversal of direction of rotation when negative HW limit switch is reached. Home position is the first encoder ref.
5.2 Overview Table of Homing Types The following table provides an overview of which position is approached and which limit switch is used for reversal of the direction of rotation. No.
5.3 Graphic Overview of Homing Modes Negative limit switch Positive limit switch 1 Encoder zero track (Reference signal) 2 17 33 34 Actual position 35 18 Home switch 3 5 6 4 19 21 20 22 P 7 P 10 P 8 P 9 Home switch N 13 N 14 N 118 118 N 11 23 P 25 P 24 P 26 P 29 N 27 N 30 N 28 N Zero track left or right of edge P N 12 Number of homing mode Destination approached from left upon rising edge.
5.4 Terminology To enable a better understanding of the homing modes, the terms used are explained in the following. Home switch "High" signal is present inactive = 0 "Low" signal is present not used In this homing mode, no home switch is used Limit switch Travel limit. Hardware limit switches Travel limit. Design: Initiators connected to digital inputs. Software limit switches Travel limit, managed centrally in frequency inverter. Only active after homing.
5.5 Description of Homing Modes Application example setup: Neg. HW Limit Switch Home Switch Pos. HW Limit Switch M S Motor and speed sensor vf, vc Negative direction of movement for anticlockwise direction of rotation of the motor. v f, vc 1 Positive direction of movement for clockwise direction of rotation of the motor. Initial position of the homing vf Fast Speed vc Creep Speed 1 ...
5.5.1 Homing Modes with Ref. Signal Operation mode 1: Homing to negative limit switch with detection of encoder ref. signal Dest.: Ref. signal to the right of negative limit switch Home switch not used Search direction Negative direction Speed (before reversal of direction of rotation) Fast Speed 1132 Condition Rising edge reversal of direction of rotation negative limit switch Speed (after reversal of direction of rotation) Creep Speed 1133 Home position vf 1 vc Encoder reference signal Neg.
Operation mode 3: Homing to positive home switch with detection of encoder ref. signal, home position is the first ref. signal after the home switch signal has changed Dest.: A B Ref.
Operation mode 4: Homing to positive home switch with detection of encoder ref. signal, home position is the first ref. signal after the home switch signal has changed Dest.: A B Ref.
Operation mode 5: Homing to negative home switch with detection of encoder ref. signal, home position is the first ref. signal after the home switch signal has changed Dest.: A B Ref.
Operation mode 6: Homing to negative home switch with detection of encoder ref. signal, home position is the first ref. signal after the home switch signal has changed Dest.: A B Ref.
Operation mode 7: Homing to home switch with detection of encoder ref. signal, homing direction positive (clockwise), reversal of direction of rotation when positive HW limit switch is reached Dest.: A Ref.
C: Homing direction (search direction) is clockwise toward positive HW limit switch. The home switch is not in search direction. The positive limit switch acts as a reversing switch. When the positive limit switch is reached, the direction of rotation is reversed, and homing is performed in negative direction. Travel to rising edge of home switch is performed at Fast Speed 1132. Home position is the first encoder ref. signal after the home switch is passed.
The homing direction (search direction) depends on the signal status of the home switch. A: Homing direction (search direction) is clockwise toward positive HW limit switch if home switch and limit switch are inactive. The home switch is in search direction. Home position is the first encoder ref. signal after the home switch is reached. During the whole operation, homing is performed at Fast Speed 1132. B: When homing is started, the home switch is active.
vf A vc 9 vc B vc C 9 9 vf vc Encoder reference signal Home switch Pos. HW Limit Switch A: Homing direction (search direction) is clockwise toward positive HW limit switch if home switch and limit switch are inactive. The home switch is in search direction. Travel to falling edge of home switch is performed at Fast Speed 1132. When the home switch is passed, the direction of rotation is reversed. Home position is the next encoder ref. signal.
Operation mode 10: Homing to home switch with detection of encoder ref. signal, homing direction positive (clockwise), reversal of direction of rotation when positive HW limit switch is reached Dest.: A Ref.
C: Homing direction (search direction) is clockwise toward positive HW limit switch. The home switch is not in search direction. The positive limit switch acts as a reversing switch. When the positive limit switch is reached, the direction of rotation is reversed, and homing is performed in negative direction. When the home switch is reached, the direction of rotation is reversed again. Home position is the first encoder ref.
A: Homing direction (search direction) is anticlockwise toward negative HW limit switch if home switch and limit switch are inactive. The home switch is in search direction. Travel to right edge of home switch is performed at Fast Speed 1132. When the home switch is reached, the direction of rotation is reversed. Home position is the first encoder ref. signal after travel in positive direction. Search for the home position is performed at Creep Speed 1133.
12 A vc vc B vf C vc 12 vf vc 12 Encoder reference signal Home switch Neg. HW Limit Switch A: Homing direction (search direction) is anticlockwise toward negative HW limit switch if home switch and limit switch are inactive. The home switch is in search direction. Home position is the first encoder ref. signal after the home switch is reached. During the operation, homing is performed at Fast Speed 1132. B: When homing is started, the home switch is active.
Operation mode 13: Homing to home switch with detection of encoder ref. signal, homing direction negative (anticlockwise), reversal of direction of rotation when negative HW limit switch is reached Dest.: A B C Ref.
A: Homing direction (search direction) is anticlockwise toward negative HW limit switch if home switch and limit switch are inactive. The home switch is in search direction. Travel to left edge of home switch is performed at Fast Speed 1132. When the home switch is passed, the direction of rotation is reversed. Home position is the first encoder ref. signal after travel in positive direction. Search for the home position is performed at Creep Speed 1133 B: When homing is started, the home switch is active.
A 14 B 14 vc vc vf C vf vc 14 Encoder reference signal Home switch Neg. HW Limit Switch A: Homing direction (search direction) is anticlockwise toward negative HW limit switch if home switch and limit switch are inactive. The home switch is in search direction. Travel to rising (right) edge of home switch is performed at Fast Speed 1132. Home position is the first encoder ref. signal after the home switch is passed. Search for the home position is performed at Creep Speed 1133.
5.5.2 Homing modes without reference signal Operation mode 17: Homing to negative HW limit switch without encoder ref. signal. Dest.: Negative limit switch Home switch active Search direction Speed (before reversal of direction of rotation) Condition reversal of direction of rotation Speed (after reversal of direction of rotation) Negative direction Fast Speed 1132 Rising edge negative limit switch Creep Speed 1133 Home position vf vc 17 Neg.
Operation mode 19: Homing to positive home switch without encoder ref. signal., falling edge Dest.
Operation mode 20: Homing to positive home switch without encoder ref. signal., rising edge Dest.
Operation mode 21: Homing to negative home switch without encoder ref. signal., falling edge Dest.
Operation mode 22: Homing to negative home switch without encoder ref. signal., rising edge Dest.
Operation mode 23: Homing to left falling edge of home switch without encoder ref. signal with positive hardware limit switch Dest.
Operation mode 24: Homing to left rising edge of home switch without encoder ref. signal with positive hardware limit switch Dest.
Operation mode 25: Homing to right rising edge of home switch without encoder ref. signal with positive hardware limit switch Dest.
Operation mode 26: Homing to right falling edge of home switch without encoder ref. signal with positive hardware limit switch Dest.
Operation mode 27: Homing to right falling edge of home switch without encoder ref. signal with negative hardware limit switch Dest.
Operation mode 28: Homing to right rising edge of home switch without encoder ref. signal with negative hardware limit switch Dest.
Operation mode 29: Homing to left rising edge of home switch without encoder ref. signal with negative hardware limit switch Dest.
Operation mode 30: Homing to left falling edge of home switch without encoder ref. signal with negative hardware limit switch Dest.
5.5.3 Homing modes, only ref. signal and actual position Operation modes 33 and 34: Homing to first encoder ref. signal Home position is the first encoder ref. signal in negative (operation mode 33) or positive (operation mode 34) direction. 33 34 Encoder reference signal Operation mode 35: Current position is home position Current position is home position. Home offset (Parameter 1131) is taken over as actual position value. Actual position value 35 Home position Note: 150 150 Without encoder ref.
6 Output Signals and fault messages 6.1 Actual positioning values The display of actual values in VPlus is refreshed after the window for parameterizing of motion blocks VTable has been closed. Note: For information on other actual values, refer to the operating instructions of the frequency inverter. Application Warnings 273 shows warning messages affecting the positioning functions. Actual Appl. Warning Mask 627 shows current warning mask. Act. Speed 1107 shows current speed in unit [u/s]. Act.
6.2 Status word of the positioning The positioning offers advanced information via a positioning status word. This status word is output during operation by parameter Actual Motion Mode 1255. Additional the same information is available for other device functions (system bus, scope) via the signal source “880 - Actual Motion Mode”.
Decimal Bit-No. 256 8 512 9 … 15 Is set in Motion Mode or Operation Mode Gearing. Parameter Motion Mode 1208 of the actual motion block is set to: − “10 - gearing, absolute” or − “11 - gearing, relative” or − “12 - gearing, Touch-Probe: Rising Edge” or − “13 - gearing, Touch-Probe: Falling Edge” or − “14 - gearing” or − “20 - gearing, direct sync., absolute” or − “21 - gearing, direct sync., relative” or − “22 - gearing, direct sync., Touch-Probe: Rising Edge” or − “23 - gearing, direct sync.
6.3 Status word 411 Parameter Status word 411 includes two specific bits of the positioning. These bits can be evaluated by the logic control. Note: The applicable status word is dependent on the operation mode Local/Remote 412. The status word is used in most of the operation modes for parameter Local/Remote 412. If the inverter is controlled via statemachine (Local/Remote 412 = „1 Control via Statemachine“) a different status word is applicable.
6.4 Digital Positioning Output Signals Parameters OP. Mode Digital Output 1 530 of digital output S1OUTD and Op. Mode Digital Output 3 532 of f the relay output link the digital outputs to various functions. The use of the multifunctional output MFO1 as a digital output requires parametersetting Operation mode 550 = “1 - Digital” and linking via parameter Digital operation MFO1 554. The following output signals of the positioning function can be assigned to the digital outputs.
6.5 Logic Signal Sources for Positioning Logic signal sources can be assigned to the software functions for further processing. In addition to the signals on the digital control inputs, the following signal sources of the positioning functions are available. For information on other signal sources, refer to the operating instructions of the frequency inverter.
Logic signal 891 - Motion-Block Digital Signal 1 892 - Motion-Block Digital Signal 2 893 - Motion-Block Digital Signal 3 894 - Motion-Block Digital Signal 4 Motion-Block 895 - Digital Signal inverted Motion-Block 896 - Digital Signal inverted Motion-Block 897 - Digital Signal inverted Motion-Block 898 - Digital Signal inverted 04/08 04/08 Function Message on status of a travel order during a positioning operation. The conditions set for parameter Digital Signal 1 1218 were fulfilled.
6.6 Positioning Error Messages The following error messages may occur during positioning operations. For information on other error messages, refer to the operating instructions of the frequency inverter. Error F0404 F1442 F1443 F1444 F1445 F1446 F1447 F1448 F1451 158 158 Error message Description/Action The current contouring error has exceeded the value defined in Error Threshold 1106 for a time longer than the time defined in parameter Contouring Error Control Deviation Time 1119.
Error F1452 F1453 F1460 F1461 F1462 F1463 F1464 F1465 F1466 04/08 Error message Description/Action Negative hardware limit switch or negative software limit switch reached. After acknowledgement of error it was tried to move in negative direction (anticlockAnti-Clockwise wise). Negative direction is disabled as long as negaOperation Locked tive limit switch is active. Move axis in defined travel range again: In JOG mode, move in opposite direction or start positioning in opposite direction.
Error F1470 F1471 F1472 F1473 F1474 F1475 F1476 Error message Neg. HW-Lim. Switch: Illegal Signal Source Description/Action Neg. HW Limit Switch 1137 is set to an illegal logic signal source or to a digital input of an expansion module (EM-S1IND, EM-S2IND or EM-S3IND) although no expansion module is installed. The parameter must be set to an available digital input. The digital input for Neg. HW Limit Switch 1137 is set as PWM- or repetition frequency input. Set paNeg. HW-Lim.
Error F1571 F1572 F1573 Error message Description/Action For Homing Mode 1130, an operation mode with Homing : Encoderzero impulse was selected for setting the reference Mode w.o. Zposition. However, an operation mode without zero Impulse impulse is selected to evaluate the encoder. Settings of SW limit switches or connections of HW limit switches is not correct.
6.7 Positioning Warning Status Warnings of the positioning functions are displayed in the error environment by parameter Application Warning Status 367 and can be used for an early message of a critical operational condition. Combinations of various warnings can be created in parameter Create Appl. Warning Mask 626. If a warning is present, this is indicated by the flashing red LED and the display field WARN of the control unit KP500.
6.8.1 Touch probe: Drive is decelerated or stops Description: Touch probe input is used in parameterization. As soon as the touch probe input is activated, the drive is decelerated or stopped. Remedy: Change parameter Stop Positioning 1223 to an input other than S3IND. Change wiring accordingly. 6.8.2 Drive jerks/is very load Description: Drive jerking during positioning and is very loud.
7 Parameter List The parameter list is ordered numerically. For better clarity, the parameters are marked with pictograms. The parameter is available in the four data sets. Parameter value is displayed in VSetup This parameter cannot be written when the frequency inverter is in operation. This parameter can be edited using VTable in VPlus. Note: At the control unit KP500 parameter numbers > 999 are displayed hexadecimal at the leading digit (999, A00 … B5 … C66). 7.1 Actual Value Menu (VAL) No.
No. 1115 1116 1117 1118 1119 1120 1122 1123 1124 1125 1126 1127 1128 1130 Description Feed Constant Gear Box: Driving shaft revolutions Gear Box: Motor shaft revolutions Reference System Unit Setting range u/U 1 ... 231-1 1 ... 65535 1 3.5.2 - 1 ... 65535 1 3.5.2 327680 4.12 10 0 – Off 4.8.5 4.8.5 0 – Off 1 1 65536 327680 327680 4.7.1 4.7.2 4.7.2 4.7.4 4.7.4 4.7.4 7 – Off 4.7.4 - Selection: 0 ...
No. 1168 1169 1170 1171 1172 1173 1174 1175 1176 1177 1178 1179 1180 1200 1201 1202 1203 1204 1205 1206 1207 1208 1209 1210 1211 1212 1213 1214 1215 1216 1217 1218 1219 1220 1221 166 166 Master Settings (el. gear) Unit Setting range u 1 ... 231-1 ms 1 … 65535 Fixed Speed-Values Fixed Speed 1 u/s -(231-1) ... 231-1 Fixed Speed 2 u/s -(231-1) ... 231-1 Fixed Speed 3 u/s -(231-1) ... 231-1 Fixed Speed 4 u/s -(231-1) ... 231-1 Jog-Speed Keypad u/s -(231-1) ... 231-1 Ramps 1 ...
No. 1224 1225 1226 1227 1228 1230 1231 1232 1233 1235 1236 1239 1240 1241 1242 1243 1244 1245 1247 1248 1254 1260 Fact. sett. 320 – EM-S1IND 321 – EM-S2IND 322 – EM-S3IND Chapter 7 – Off 4.4.3.1 1 4.4.3.2 7 – Off 4.4.5.2 76 – MFI1D 4.5 71 – S2IND 4.5 72 – S3IND 4.5 7 – Off 4.2.1 0 – Off 4.9 76 – MFI1D 4.6 0 – Off 65536 4.11 4.11 9 – Off 4.10 0 65536 182 4.10 4.10 4.10 0 – unv. 0 – unv. 4.4.6 4.4.6 7 – Off 4.4.3.1 7 – Off 4.4.2.4 4.4.3.1 4.4.3.1 4.4.3.1 1261 Int.
7.3 Parameter list, sorted by function The parameter list is sorted by positioning functions. For the setting and display ranges, refer to numerically sorted parameter lists in chapters "Parameter Menu (PARA)" and "Actual Value Menu (VAL)". Chapter No. Name of parameter Reference system 3.5.2 1115 Feed Constant Gear Box: Driving shaft 3.5.2 1116 revolutions Gear Box: Motor shaft revo3.5.2 1117 lutions Homing 4.2.1 1220 Operation Mode 4.2.1 1235 Start Homing (manual) 4.2.
Chapter No. Name of parameter Master Settings (el. gear) 4.7.1 1122 Master Position Source 4.7.2 1123 Gear Factor Numerator 4.7.2 1124 Gear Factor Denominator 4.7.3 Resync. on Change of Gear1142 Factor 4.7.4 1125 Phasing: Offset 4.7.4 1126 Phasing: Speed 4.7.4 1127 Phasing: Acceleration 4.7.4 1128 Start Phasing 4.4.1.5 1168 ”In-Gear”-Threshold 4.4.1.5 1169 “In-Gear“-Time Actual value: 6.1; 1129 Act. Master Speed 4.4.1.5 Monitoring functions: Hardware Limit Switch 4.8.2.2 1143 Fault Reaction 4.8.2 1137 Neg.
Index Expansion modules...................................... 8 A Acceleration Electronic Gear ...................................... 48 Homing ................................................. 38 JOG ...................................................... 81 Motion block .......................................... 55 Phasing ................................................. 87 Actual position source...........................18, 19 Actual speed source .............................18, 19 F Factory settings.
I P Interrupt .............................................55, 59 Parameter list numerical order ................................... 164 sorted by function ................................ 168 J JOG mode ................................................ 76 Acceleration........................................... 81 Deceleration .......................................... 81 Fixed speed ........................................... 79 Terminal assignment .............................. 77 via keypad...........
JOG mode ............................................. 79 JOG speed keypad ................................. 80 Motion blocks ........................................ 54 Phasing ................................................. 87 Speed override........................................ 104 Starting-record number.............................. 65 Status of motion........................................ 73 Status word 411...................................... 154 Touch probe ...................................
Bonfiglioli has been designing and developing innovative and reliable power transmission and control solutions for industry, mobile machinery and renewable energy applications since 1956. www.bonfiglioli.com Bonfiglioli Riduttori S.p.A. Via Giovanni XXIII, 7/A 40012 Lippo di Calderara di Reno Bologna, Italy tel: +39 051 647 3111 fax: +39 051 647 3126 bonfiglioli@bonfiglioli.com www.bonfiglioli.