
Operation Manual

38
Ironing without steam
NOTE:
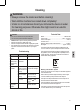
Sort out the garments according to their ironing temperatures.
1. If the handle should still be in the carrying position, unlock
the lock as described above under “Function of the
Handle”.
2. Place the iron on the rest (6).
3. Only connect the machine to a properly installed safety
socket.
4. Adjust the temperature on the temperature control (3). If
you have sensitive items to iron, please begin with the low-
est temperature.
NOTE:
The control lamp (5) on the iron indicates the heating pro-
cess. As soon as this goes out, the operating tempera-
ture is reached. You can now begin ironing.
Steam Ironing
WARNING:
The iron expels a large quantity of hot steam. Danger of
burns.
CAUTION:
• When using the steam iron please ensure that the water
tank is always lled to the required level.
• The lime lter cartridge always has to be positioned in the
water tank, even if you use distilled water.
CAUTION: Initial use:
Please proceed as follows:
1. The tank should only be lled up to the maximum mark.
Do not overll!
2. Close the water tank and place it back in the base.
3. Connect the base station to a socket with earthing
contact.
4. If the handle is still in the carrying position, release the
lock as described under “Function of the Handle”.
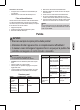
5. Set the required temperature in the range “
” to “ ”.
The control lamp on the iron lights up.
6. Wait until the sole plate has heated up. If the temperature
has been reached, the control lamp goes out.
7. Now press the steam jet button (2) for at least 60 sec-
onds or until the steam comes out of the soleplate. This
time is needed for the steam to reach the iron. A slightly
louder noise of the pump is normal with this.
NOTE ON STEAM IRONING:
If the temperature is set to less than “
”, no steam will be
produced.
Vertical Steam function
This can be used to produce a jet of steam in a vertical direc-
tion. This function can be used to remove creases from hanging
clothes or from curtains.
WARNING:
Never point the steam jet at other people. Danger of burns.
Hang the washing on a hanger. Guide the iron closely over the
material as specied by the material.
How can I replenish the water during operation?
Rell with water before the tank is completely empty. A loud
noise of the pump during operation indicates that the water
level is too low.
1. Place the iron on the rest (6).
2. Set the temperature control to “MIN”.
3. Remove the mains plug from the socket.
4. Open the ll opening (13).
5. Fill the tank up to the maximum mark. Do not overll!
6. Close the ll opening.
7. You can now continue ironing.
1. Always set the temperature control to “MIN” after use.
Remove the mains plug from the socket.
2. Allow the device to cool down before you put it away.
Cord and pipe storage
• Wind the mains cord around the cord groove on the foot of
the base.
• Place the connection pipe in the cord clip.
Your steam iron station is tted with an anti-scale lter. The anti-
scale lter cartridge becomes spent after ltering approximately
18 litres of water, depending on the hardness of your water. It
then loses its effectiveness and must be replaced.
1. Turn off the appliance.
2. Disconnect the mains plug from the mains.
3. Remove the water tank.
4. Remove the anti-scale lter cartridge.
5. Fill the tank up to the maximum mark. Do not overll!
6. Insert a new anti-scale lter cartridge.
7. Slide the tank back into the base. A “click” sound conrms
that the water tank is correctly tted.
8. Before turning on the appliance, wait a few minutes until
the new lter cartridge is saturated with water.
NOTE:
If you do not have a new anti-scale lter cartridge, you can
still iron with the used cartridge and distilled water.