
User guide


JOB CONTROL WINDOWS
7-6 XEROX DOCUPRINT 180 LPS PC UI REFERENCE
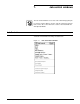
Print Darkness
Use the Print Darkness window to make the printed image darker or
lighter. The setting ranges from 1 (lightest) to 9 (darkest). The
default value is 5.
Figure 7-5. Job Control>Print Darkness window
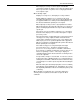
Header buttons Redisplay: Select this option from the auxiliary header menu to
return the print darkness value to what it was when you first opened
the window.
Test: Select this option from the auxiliary header menu to print a
sample with the new print darkness value.
If a job is currently printing, a page from the job with the new value
applied is delivered to the sample tray. If a print job is not running,
the test form, with the new value applied, is delivered to the sample
tray.
Parameters Lighter/Darker: 5. Enter/select a new value in the field. The default
is 5.
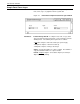
Lead Edge Screen
Use this task to apply a screen to the leading margin of a printed
sheet. The screen lightens a high-density image in the margin. If you
select the Lead Edge task while the LPS is printing, the following
message window is displayed.
Figure 7-6. Job Control>Lead Edge Screen message window
Select the Yes header button to continue with the lead edge screen
task. Select the No header button to cancel the task.