
User guide


PRINT TASKS WINDOWS
6-34 XEROX DOCUPRINT 180 LPS PC UI REFERENCE
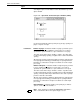
Example of use SET FILTER
Once you have displayed the SDI Jobs status window, you can select
“Set Filter . . .“. This sets up the job status option which you want to
display when you select the “Jobs“ header button. In the future, when
you want a display of the selected options, come to the SDI Jobs
Status window and select the Jobs header button. The display will be
in the lower part of the SDI Jobs Status window.
DISPLAY STATUS
To display status of jobs you can use any of the following header
buttons.
Jobs
All
Job ID:
Job Range:
Status:
Jobs will display, as we discussed earlier, all jobs having the status
as defined in the previously set up SDI Job Option window by the Set
Filter . . . selection.
All will display all jobs.
Job ID: will display any jobs you enter in the JID #: field.
Job Range: will display the jobs entered in the range you entered in
the JID Range: boxes.
Status . . . will display the SDI Job Options window where you can
select any job options you wish. Selecting Apply/Close closes the
SDI Job Options window and displays in the SDI Job Status window
those jobs with the status you just selected.
SELECTING SPECIFIC JOBS FOR ACTION
Now that you have all the jobs that you want to display in the lower
portion of the SDI Job Status window, you can scroll through the
display and select any job or jobs. The JID will be captured for those
selected, displayed jobs in the JID #: field.
You can then use the Start header button or any of the selections in
the Auxiliary menu to initiate action upon those jobs that you
captured in the JID #: field.