
User's Manual


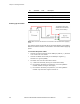


Table Of Contents
- FCC Compliance and Industry Canada Statement
- January 2005
- Chapter 1: Introduction
- Chapter 2: Product Description
- Available Models
- Front View
- Rear View
- Top View
- Bottom View
- LED indicators
- Serial Port (DB9)
- USB Port (Type B)
- Ethernet Port (RJ-45)
- Input and Output Ports (Digital & Analog I/O)
- Power Connector
- Chapter 3: Installation Requirements
- Cellular antenna
- GPS antenna
- Serial cable
- Ethernet cable
- USB cable
- Power source
- Mounting Hardware
- Wireless network account
- Chapter 4: Installing the Modem
- Power cable connector
- Powering up the modem
- Adding the modem
- Creating the DUN profile
- Chapter 5: Troubleshooting
- Appendix A: Warranty and Customer Support

Chapter 4: Installing the Modem
30 BlueTree Wireless BT4400 & BT5400 Product Manual V0.0
2. Connect the other end of the ethernet connection of your terminal.
Connecting the USB cable:
This feature is not supported on product version 1.0
8) Configuring the
modem
Once the physical installation is complete, the modem should be
configured for:
• Activation on the wireless network
• Operation mode and network connection setup
This configuration is peformed using:
• BlueVue Device Manager companion software, or
• through standard AT commands (refer to AT Command manual).
9) Connecting to
the wireless
network using the
serial port (DB9)
Note: The following section is only required if you want to connect to the
network using a PC/laptop with Windows 2000/XP. It is described here as an
example of how a connection profile should be configured to work with the
BT4400/5400 modems.
Adding the modem To add a modem in Windows 2000 or XP
1. Click Start > Settings > Control Panel > Phone and Modem Options.
2. On the Phone and Modem Options box, click the Modems tab and
then:
a) Click Add.
b) Check the box labelled “Don’t detect my modem;...” and
then click Next.
c) Select the Standard 33600 bps Modem and click Next.
d) Select the COM port that the modem is attached to then click
Next.
e) Click Finish to complete the addition of the modem in
Windows.
f) Click the Modem tab and confirm that the Maximum Port
Speed is set to 115,200.
g) Click OK.
The modem profile is now configured.