
Use and Care Manual


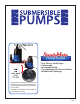

AUTOMATIC ON/OFF SENSORS
START GO-FLOW STOP-FLOW SYSTEM
page 6 page 7
Your new Submersible Pump is fully assembled and ready to use
Follow these simple instructions to begin the operation of your submersible pump. Be sure to read all the
instructions and warnings before you begin the operation of the pump to help prevent personal injury or
property damage.
1. Set the release end of the discharge hose to the area you want to move the unwanted water. Be sure to
check the area for possible damage/ooding before you begin pump operation.
2. Set the green “GO FLOW” level indicator to the desired level of water you want for automatic activation
of your pump. This is the height you want the water to reach before the pump switches on. Once the water
reaches the set level the pump will start and continue until the water level decreases to the level set on the red
“NO FLOW” indicator.
3. Set the red “NO FLOW” indicator to the water height you want to pump to automatically turn o (stop
pumping) Once the water level reaches the height set on the “NO FLOW” setting and turns o, it will not turn
on again until the water reaches the level set on the “GO FLOW” indicator.
4. Note: Do not set the red (No Flow) and green (Go Flow) indicators too closely. This will result in the pump not
functioning properly as well as running dry. If this happens the motor will overheat and void your warranty.
5. Place your pump in its desired location. Always use the carry handle to transport your pump. NEVER carry
your pump by the cord or hose connection.
6. Plug the cord into an approved electrical outlet (as outlined in this manual) and begin operation.
7. It is recommended that you use the SteadyMate pump guard for your submersible pump when you use
the pump for removing excess water from a swimming pool cover. It will increase the pumps stability and
performance.