
Instructions / Assembly

No Diving or Jumping. Observe all Safety Rules
GENERAL INSTRUCTIONS - YARDMORE OVAL POOLS
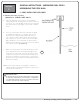
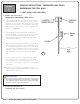
ASSEMBLING THE POOL WALL
Secon
3
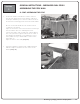
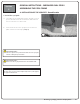
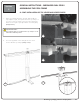
C. INSTALL THE POOL LINER
1. Set the liner in place
a. Open the carton. Do not use anything sharp to
open the carton.
b. Unpack and unfold the liner and spread it out in
the sun to warm it up. Inspect all the seams and
surfaces for holes.
c. Remove your shoes to avoid damaging the base or
tearing the liner.
d. Spread out the liner, smooth side down. Unfold the
liner from the centre of the pool toward the sides.
(Image 14)
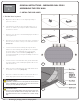
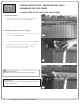
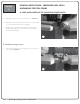
e. Use the liner’s bottom seam(s) as a guide and
make sure the seam(s) are parallel to the straight
sections and to the imaginaryl ine which links
points A and B in the illustration (Image 15). It is
recommended that you begin installing the liner in
a round section.
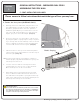
f. Use the liner’s vertical seam as a guide and make
sure the seam is vertical and perpendicular to the
wall and bottom.
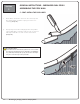
g. Make sure the seam between the wall and bottom
is centred on the cove (Image 16)
h. Smooth out all the wrinkles in the bottom. Do not
leave any space between the liner and cove.
14
15
16
Important Note:
If possible, unfold the liner on the grass one to two hours
before installation. Be careful not to leave the liner too
long or you may damage the grass.
Important Note:
The liner is generally smaller than the support structure
of the pool. It will stretch more easily when warm. It is
important that the liner is installed on a warm sunny
day.
1 2
3 4
3-6