
Instructions / Assembly
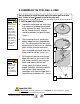

No Diving or Jumping. Observe all Safety Rules.
B. CONT. ASSEMBLING THE POOL WALL
14
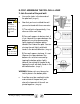
Important
Note:
The cove is an
important part
of the pool
structure. Take
your time to
make a
complete, full
-
size cove.
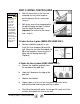
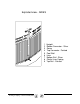
5. Make a cove
a.
If you are using sand, bank the sand
against the wall to form a cove of 6
”
(15.24cm) high and 6
”
(15.24cm) wide
at ground level. Water the sand to
compact it and use a trowel to spread
it evenly.
(Image 14 )
b.
If you are using
styrofoam
instead of
brick sand, you can now install the
sheets of
styrofoam
in the centre of
the pool and join them with duct tape
along the whole length of each seam.
Remember to wait until the pool wall
has been installed before installing the
styrofoam
.
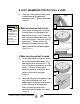
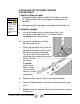
c.
A vacuum cleaner can later be used to
remove the air from between the liner
and the wall. This technique enables
you to remove folds in the liner.
However the following precautions
should be taken:
15
14
16
•
Do not use an industrial vacuum cleaner which could be too
powerful.
•
Tape the end of the vacuum hose before inserting it into the
wall so as not to damage the liner.
•
Insert the nozzle until it is about 4
”
(10cm) above the cove
(insert through the water return outlet or the skimmer
depending on the diameter of your hose). Make sure you will be
able to remove the hose later on.
•
Tape the hose to the wall.
(Image 15)
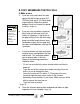
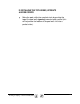
d.
Close the skimmer opening with cardboard and adhesive tape
to prevent air from escaping.
(Image 16)