
Owners manual

BX1698
2011-13 Chevy Cruze RS
Installation Instructions
405-0207 Rev. B Page 8 of 11 8/24/12
When using power drills be aware of the
dangers of torque and drill bit length.
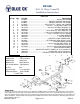
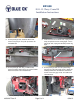
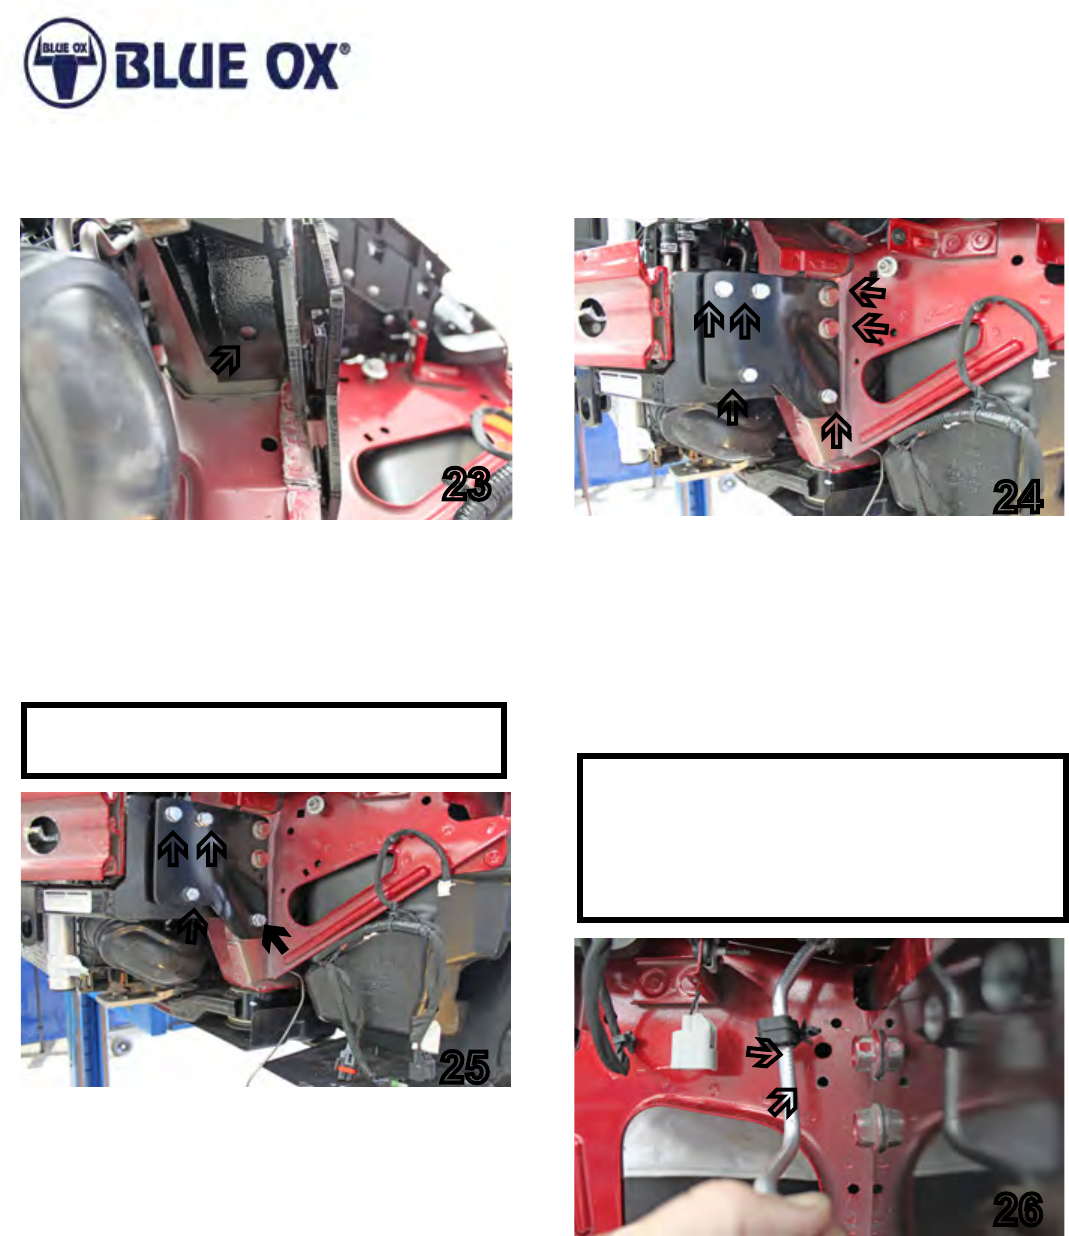
23. Using the baseplate as a template, drill a hole on
the bottom side with the 13/32” drill bit. Insert 3/8-
16 x 1 1/2” hex bolt with Loctite Red and 3/8” lock
washer. Attach to 3/8-16 nut plate inserted through
the 1 1/2” lower opening on bumper. Do this to
both sides.
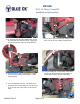
24. Remove the existing bolts apply Loctite Red and
reattach the support plates to the existing holes on
the outside of the frame (gray arrows). Use 18MM
socket and a wrench on the other side to tighten
bolts in order to sandwich the baseplate between
the frame and the support plates. Using the support
plate as a template, drill the other four holes with
a 13/32” drill bit (white arrows). Do this on both
sides.
23
24
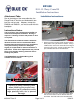
BE SURE TO USE LOCTITE
®
RED ON ALL BOLTS
BEFORE TIGHTENING. TIGHTEN ALL BOLTS
ACCORDING TO THE TORQUE CHART ON THE
FRONT PAGE OF THESE INSTRUCTIONS OR ON
PAGE 3 OF THE BASEPLATE GENERAL TOWING
INSTRUCTIONS.
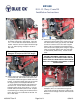
26. On the passenger side in the corner next to the
baseplate, drill a 1/4” hole below the large hole
(gray arrow) and pop the clip back in (white arrow).
Be sure it is low enough so that the line misses the
baseplate.
25
26
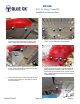
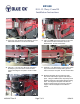
25. Bolt the upper two holes (white arrows) with 3/8-16
x 2” hex bolts, 3/8” lock washers and fasten to 3/8-
16 nut plates inserted through the drilled hole in the
bumper. In the lower outside hole (gray arrow) bolt
the support plate to the baseplate with 3/8-16 x
1 1/2” hex bolt fastened with 3/8” lock washer and
3/8-16 hex nut. Into the lower inside hole on the
baseplate (black arrow), insert 3/8-16 x 1 1/2” hex
bolt with 3/8” lock washer fasten to a 3/8” nut plate
inserted through an existing hole underneath in the
frame. Be sure to use Loctite Red on all bolts. Do
this on both sides.