
Specifications


Installation
14
Final Check
BEFORESWITCHINGTHEAPPLIANCEON
Beforeapplying power to the unit forthe first time,
check for the following conditions:
1. All electrical safety provisions have been ad -
hered t o and the electrical connections are
correct.
2. The circulation fan(s) should turn counter-
clockwise:checkrotation frominsidetheoven
cavity.
3. Water is connected, turned on and all of the
connections are w ater tight.
4. Thegreasefilterandholderareintheirproper
positions.
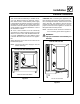
COS-6, COS-101 and COS-101S
1. The pan holders on Models COS-6 and
COS-101 are inserted into the oven cavity.
Stationaryrackguidesareprovidedw ithMod-
el COS-101S.
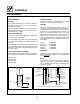
COS-20 and COS-201
1. The transport cart on Models COS-20 and
COS-201 is inserted into the oven cavity.
When the cartis notinserted intothe unit, wa-
tercanspillontothefloorcausingittobecome
slippery. If the door will not close properly, fol-
low the adjustment directions to the right.
WARNING!!
If the fan turns in the wrong direction, the
appliance will not function properly and
can be damaged.
ELECTRICAL CONTROL COMPARTMENT
Applied voltage to unit voltage/phase suitable for
appliance specified.
j Remove side panel
j Reset motor protector
j Set motor protector to automatic
j Adjust motor protector to maximum
j Reset high limit thermostat “F3”
j Check fuses
j Verify all time delay relay settings
j Verify proper fan r otation
j Reinstall side panel
PLUMBING FINAL CHECK
j Water pressure within40 PSI (minimum) --- 50
PSI (maximum)
j Atmospheric vented drain in place
j Water s olenoid properly brack eted and not
leaking
j Water feed lines intact w ithout leaks
j Steam boiler drain lever is working and in
closed position
j Optional Spray Hose connected properly.