Blizzard Lighting, LLC http://www.blizzardpro.
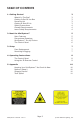
TABLE OF CONTENTS 1. Getting Started 3 What’s In The Box? Getting It Out Of the Box Powering Up! Getting A Hold Of Us Safety Instructions General Requirements Laser Safety Requirements 3 3 3 3 4 4 4 2. Meet the MiniSystem™ 5 Main Features Dimensional Drawings MiniSystem™ Pin-Up Picture The Control Panel 3. Setup 5 5 6 6 7 Fuse Replacement Mounting & Rigging 7 7 4. Operating Instructions 8 The Control Panel Using the IR Remote Control 5.
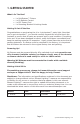
1. GETTING STARTED What’s In The Box? • • • • 1 1 1 1 x x x x MiniSystem™ Fixture IR Remote Control IEC Power Cord Mounting Bracket & Locking Knobs Getting It Out Of the Box Congratulations on purchasing the 4-in-1 minisystem™ party light. Now that you’ve got minisystem™, you should carefully unpack the box and check the contents to ensure that all parts are present and in good condition.
Safety Instructions Please read these instructions carefully. They include important information about the installation, usage and maintenance of this product. General Requirements • • • • • • • • • Always make sure that you are connecting to the proper voltage. This product is intended for indoor use only. To prevent risk of fire or shock, do not expose fixture to rain or moisture. The unit must be installed in a location with adequate ventilation.
2.
MiniSystem™ Pin-Up Picture 100mW, 650nm Red + 30mW, 520nm Green Laser Mounting Bracket Safety Loop Locking Knob Locking Knob Rotating Crystal HalfSphere with 4* 3W LEDs 32* 3-in-1 RGB SMD5050 Wash/Strobe/Chase The Control Panel Power Switch Internal Mic Mic Sensitivity Mode Selector MiniSystem™ Manual - Rev.
3. SETUP Before replacing a fuse, disconnect the power cord. ALWAYS replace with the same type and rating of fuse. Fuse Replacement 1. With a flat head screwdriver, remove the fuse holder from its housing. 2. Carefully remove the damaged fuse from the holder and replace with exact same type of fuse (2A, 250V). Mounting & Rigging This fixture may be mounted in any SAFE position provided there is enough room for ventilation. The fan or vent pathway must never be obstructed.
4. OPERATING INSTRUCTIONS The Control Panel All the features and different modes possible with the minisystem™ can be accessed by using the control panel buttons or IR remote control. The buttons allow you to control the unit, as detailed below. Note: You must turn the laser safety key switch to "ON" to use the lasers. 1 ON/OFF Power switch 2 MIC Internal microphone 3 VOL Using a small phillips screwdriver, adjust clockwise for high mic sensitivity, or adjust counter-clockwise for low sensitivity.
Using the IR Remote Control All the goodies and different modes possible with the minisystem™ can be accessed by using the IR remote control. The IR remote control is simple to use. It offers the same functionality of the LED control panel, with the addition of quick access shortcut buttons. Puts the fixture in standby mode. Press again to return to normal working mode. This button shows all 3 built-in show programs in random order (Shows 1-3).
5. APPENDIX Keeping Your MiniSystem™ As Good As New The fixture you’ve received is a rugged, tough piece of pro lighting equipment, and as long as you take care of it, it will take care of you. That said, you’ll need to take care of it if you want it to operate as designed. You should keep the fixture clean, especially if you are using it in an environment with a lot of dust, fog, haze, wild animals, wild teenagers or spilled drinks.
Tech Specs! Weight & Dimensions Width 9.8 inches (248 mm) Depth 6.3 inches (160 mm) Height 7.9 inches (200 mm) Weight 3.6 lbs. (1.6 kg) Power Operating Voltage 100-240VAC, 50-60 Hz Power Consumption 25W Fuse 2A, 250V (5x20mm) Light Source LED 4* 3W LEDs (R1/G1/B1/W1) 32* 3-in-1 RGB SMD5050 LEDs Lasers Red: 100mW, 650nm Green: 30mW, 520nm Thermal Max. Operating Temp.
Enjoy your product! Our sincerest thanks for your purchase! --The team @ Blizzard Lighting