
Installation guide


BlipNet Administrators Guide
28
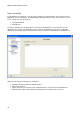
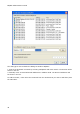
Log to Socket:
This feature enables Ericsson Bluetooth Networks to view logging information online. This
checkbox should only be used in co-operation with Ericsson Bluetooth Networks.
Configure Obex File Storage Root Path
In these text fields the Obex storage root folders for the Object Push Profile (OPP) Server and
File Transfer Profile (FTP) Server can be set. Default are all received OPP objects stored in the
folder <blipnet installation dir>/obex/OPP and FTP files in <blipnet installation dir>/obex/FTP.
OPP Objects will be stored with the name “DeviceBlutoothAddress”_“ObjectName”.“ext”, for
example “008037bc2123_MyCard.vcf”. Objects will be overwritten if an object with the same
name is received again.
Important
FTP Objects are stored without name change. Within the FTP root folder, FTP client users has
unlimited rights to read, create and delete file and folders. As a result it is NOT recommended
to specify a FTP root folder to sensitive data areas. I.e. a FTP root folder set to C:\ will give
FTP clients unlimited access to your Server!
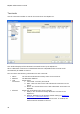
The BlipServer can sort objects based on the BlipNodes receiving the objects. This can be done
by setting a specific storage folder on a BlipNode, see section BlipNode Properties - Advanced.
DHCP Configurations
When a terminal needs an IP-address the BlipNode retrieves this IP address from a DHCP
server on behalf of the terminal. Normally the DHCP server distributes IP addresses using
broadcast and in this case the relay-agent should be switched off. BlipNet 1.0 should be
installed on top of a RedHat 7.2 installation. When using the DHCP server in this RedHat
distribution the relay agent should be switched off. Certain DHCP server applies unicast and in
this case the relay-agent should be switched on.
If a RedHat 6.2 DHCP server is used the DHCP relay agent should be switched ON.
BlipNode SW Upgrade
The BlipNode is upgradeable via the LAN interface. When upgrading your BlipNet installation
new versions might include a new version of the BlipNode Software. By enabling automatic
Software update it will be possible to get the BlipNodes Software upgraded with the latest
version.
When receiving a new release the update procedure is like this:
1.
Make sure all BlipNodes that requires an update are listed in the “Allowed BlipNodes”
list. This is done in “BlipServer Properties Allowed BlipNodes” window. Check the
“Enable automatic BlipNode SW upgrade” checkbox. All allowed BlipNodes on the
BlipServer will then be updated when they are restarted.
2.
Right click on a BlipNode in the configuration view tree and choose “Restart”.
3.
Do NOT power off the BlipNode or disconnect it from the LAN during the update
procedure, which in some cases can take up to 10 minuets.
When the BlipNode is being updated it is "grayed" in the tree, when the software
upgrade is finalized and the BlipNode is active again it will change color back to "blue"
again.