
Installation guide
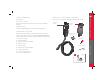


HIGH POWER WALL CONNECTOR
13
INSTALLATION
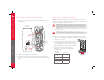
STEP EIGHT - SECURE COVER AND POWER UP
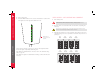
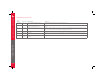
1. Reposition the front cover over the unit, aligning the five tabs on the
back of the front cover with their corresponding slots. Starting at the
bottom and working upwards, press firmly on both sides of the front
cover until it clicks into place.
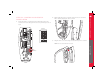
2. Using a T20 torx driver, re-attach the two security screws that you
removed in STEP THREE.
3. Turn on the power.
YOU HAVE NOW FINISHED INSTALLING THE HIGH POWER WALL
CONNECTOR. YOU ARE READY TO INSTALL THE CABLE DECK. FOR
DETAILS, REFER TO THE INSTALLATION INSTRUCTIONS PROVIDED
WITH THE CABLE DOCK.