
Installation guide
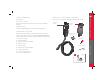


HIGH POWER WALL CONNECTOR
11
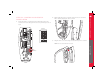
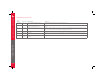
2. While holding the front cover near the wall connector, re-connect the
ribbon cable by aligning the cable, as shown.
3. Hang the front cover over the hinge located at the top of the connector.
NOTE: Do not secure the front cover yet.
INSTALLATION
STEP SIX - CONFIRM A SUCCESSFUL
INSTALLATION
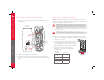
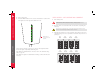
1. Set the dip switches, located in the lower right-hand portion of the
connector, to the test setting shown here. Use a pointed object such as
a pen.
Dip
switches
Test Mode