
Installation guide


HIGH POWER WALL CONNECTOR
9
INSTALLATION
STEP THREE - PREPARE CONNECTOR FOR
INSTALLATION
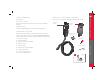
1. Using a T20 Torx driver, remove
the two security screws from the
bottom of the High Power Wall
Connector.
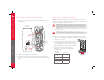
2. Release the front cover by
pulling it towards you far enough
to disconnect the ribbon cable.
Disconnect the ribbon cable from
inside the main enclosure to fully
release the front cover.
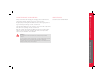
CAUTION: When removing
the front cover, do not
damage the ribbon cable.
Disconnect the ribbon cable
before fully releasing the
front cover.
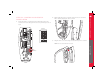
3. Disconnect the ground wire from
the terminal block and push it out
of the way to avoid damaging it
when completing the next step.
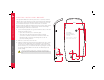
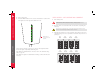
4. Use a 1
¼ ” (32 mm) hole saw
to remove the power entry
knock-out from either the side
or back of the connector.
NOTE: Use the back knock-
out when mounting the High
Power Wall Connector to a
pedestal or when running
wires from behind a wall.
CAUTION: When using
the hole saw, be careful
not to damage internal
components.
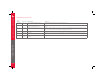
If using the side knock-out,
center the hole saw at the
indented hole and drill through
all layers. After drilling, use a
sharp knife or razor to cut and
remove the rubber molding, as indicated by the indentations in the
rubber.
5. Reconnect the ground wire to the terminal block.
Side knock-out Back knock-out