
User's Manual

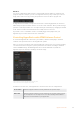


Auto Roll
You can set a HyperDeck disk recorder to automatically roll video when it is switched to the
program output. For example, you can cue a HyperDeck to the point you want your source to
begin, then roll the source by pressing its input button on the mix effects program row.
As HyperDecks must buffer a couple of frames before commencing playback, the actual cut
will be delayed a preset number of frames to ensure a clean transition. This is just like setting a
preroll on a videotape machine. You can adjust the length of this delay by changing the number
in the ‘offset’ box. We’ve found that five frames usually ensures a clean cut.
If you want to cue to a still frame of video or manually trigger video playback on your
HyperDeck, you can also deselect the ‘auto roll’ feature.
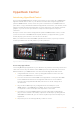
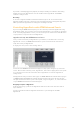
Controlling HyperDecks with ATEM Software Control
To control the HyperDecks connected to your switcher, click the ‘media players’ tab in the
software control panel and choose the ‘HyperDecks’ palette.
Here you can choose between each of the HyperDecks connected to your system by clicking
one of the four buttons along the top of the panel. These are named according to the labels
entered in ATEM settings. Available HyperDecks are shown with white text, while the
HyperDeck you are currently controlling is shown in orange.
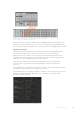
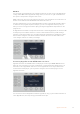
Choose from up to four HyperDecks by clicking their
selection buttons in the HyperDecks palette.
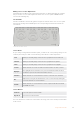
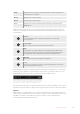
In addition to the text color, each HyperDeck’s selection button also has a tally indicator.
Green Outline Indicates a HyperDeck that is currently switched to the preview output.
Red Outline Indicates a HyperDeck that is currently switched to the program output, meaning
it is currently live to air. You may also see one of the following status indicators
above the selection buttons for your HyperDecks.
86HyperDeck Control