
User's Manual
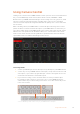


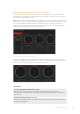


Using Camera Control
Clicking on the ‘camera’ button in ATEM Software Control opens the camera control feature that
lets you control Blackmagic Studio Cameras, Micro Studio Cameras, URSA Mini or URSA
Broadcast from your ATEM switcher. Blackmagic camera settings such as iris, gain, focus, detail
and zoom control are easily adjusted using compatible lenses, plus you can color balance
cameras and create unique looks using the DaVinci Resolve primary color corrector that’s built
into the camera.
When controlling cameras, the ATEM switcher control works by broadcasting camera control
packets via all the non down converted SDI outputs of your ATEM switcher. So this means you
can connect an SDI output of your ATEM switcher to the camera’s video inputs and the camera
will detect the control packets in the SDI link and allow you to control features in the camera
itself. You can control cameras via both regular SDI or optical fiber SDI connections when an
optional SFP module is installed in a Blackmagic Studio Camera.
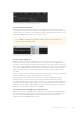
ATEM Camera Control.
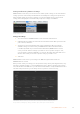
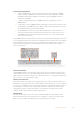
Connecting via SDI
1 Connect your Blackmagic camera’s SDI output to any SDI input on your ATEM switcher.
2 Connect any one of your ATEM switcher’s SDI outputs, except down converted or multi
view outputs, to your camera’s program SDI input. Camera control signals are not sent
via the multi view and down converted SDI outputs.
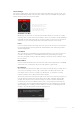
3 In your camera’s settings, set the camera ID number to match your switcher input.
Forexample, if studio camera 1 is connected to ‘cam 1’ on your ATEM switcher, the
camera number in your camera settings must also be set to 1. This ensures tally is sent
to the correct camera.
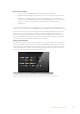
Connect a Blackmagic Studio Camera to any of your ATEM switcher’s SDI inputs.
75Using Camera Control