
User's Manual

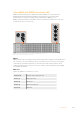

Program Output Tally signal
Switcher Input 4 Tally 4
Switcher Input 5 Tally 5
Switcher Input 6 Tally 6
Switcher Input 7 Tally 7
Switcher Input 8 Tally 8
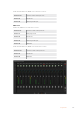
Switcher Input 9 Tally 9
Switcher Input 10 Tally 10
Switcher Input 11 Tally 11
Switcher Input 12 Tally 12
Switcher Input 13 Tally 13
Switcher Input 14 Tally 14
Switcher Input 15 Tally 15
Switcher Input 16 Tally 16
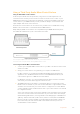
Changing the Network and Tally Settings
Blackmagic ATEM Setup is used to configure the network settings in the GPI and Tally Interface
so it will communicate with your ATEM switcher. The GPI and Tally Interface must be connected
via USB in order to configure its settings with the Blackmagic ATEM Setup.
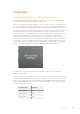
1 Connect the GPI and Tally Interface to the same Ethernet network as your
ATEM switcher.
2 Connect the GPI and Tally Interface to a USB port on your computer and also connect
the included power supply.
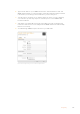
3 Launch the Blackmagic ATEM Setup.
4 If your ATEM switcher connects directly to your computer or ATEM advanced panel
without an Ethernet network switch, choose to “Configure Address Using Static IP”.
TheGPI and Tally Interface defaults to a fixed IP address of 192.168.10.2 when shipped
and we suggest you use this number for simplicity. If you are using two GPI and Tally
Interface units with an ATEM 2 M/E Production Switcher, we suggest setting the second
unit to 192.168.10.3.
If you want to choose a different static IP address, you can set it to anything you like
that’s in the same range as the ATEM switcher, so long as it’s not already in use by
another device on your network. Default IP addresses for ATEM products are best
avoided for this reason, including: 192.168.10.1, 192.168.10.2, 192.168.10.3, 192.168.10.10,
192.168.10.50, 192.168.10.60 and 192.168.10.240.
If your ATEM switcher connects via an existing Ethernet network switch, you may wish
to choose “Configure Address Using DHCP” as this setting automatically obtains the
IPAddress, Subnet Mask and Gateway information from your DHCP server.
184Using Tally