
User's Manual
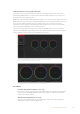

Record
Click on this button to start recording on your HyperDeck. Click again to stop recording.
Previous Clip
Moves to the previous clip in your HyperDeck’s media list.
Play
Clicking ‘play’ once initiates playback, clicking it again stops playback. If you have ‘auto
roll’ enabled in your HyperDeck settings, playback will commence automatically when
your HyperDeck is switched to the program output.
Next Clip
Moves to the next clip in your HyperDeck’s media list.
Loop
Click ‘loop’ once to loop the currently selected clip and again to loop all of the clips in
your HyperDeck’s media list.
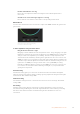
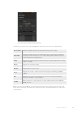
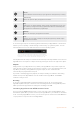
To move through a clip use the shuttle/jog slider underneath your HyperDeck’s control buttons.
This lets you move quickly, or shuttle through a selected clip, or jog frame by frame. You can
switch between these modes with the buttons next to the shuttle/jog slider.
Choose between shuttle and jog transport controls with the
buttons to the left of the transport slider. Adjust the slider left
and right to move forward or backwards through your clip.
The clip list below the transport control shows all of the clips currently available on the selected
HyperDeck. You can expand or collapse the list by pressing the arrow to the right of the clip list.
Playback
Playing media on your Hyperdeck is easy. Switch your HyperDeck to the preview output and
select the clip you want to show. Use the transport controls to cue to the preferred point in your
clip. When you switch your HyperDeck to program output, the ‘auto roll’ feature will
automatically start playback from this point.
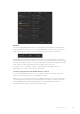
If you want to manually trigger the playback, for example holding on a still frame then rolling,
disable the respective HyperDeck’s auto roll checkbox in the ’HyperDeck’ tab in ATEM
software’s ‘settings’ menu.
Recording
To record to a HyperDeck with a formatted disk inserted, press the ‘record’ button in the
HyperDeck palette transport controls. The ‘time remaining’ indicator in the HyperDeck palette
will let you know the approximate recording time remaining in the SSD.
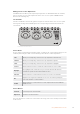
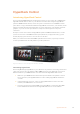
Controlling HyperDecks with ATEM Hardware Panels
If you are using an ATEM hardware panel, you can control any connected HyperDecks using
the hardware panel. Once you have connected your HyperDecks to your switcher as described
in the ‘connecting HyperDecks’ section, you can use the system control buttons and LED menu
on your panel to set up and control each HyperDeck.
89HyperDeck Control