
User's Manual

HyperDeck Control
Introducing HyperDeck Control
If you are running ATEM Switchers software 6.8 or newer, you can connect up to 4 Blackmagic
HyperDeck Studio disk recorders to your switcher and control them using the HyperDecks
palette in ATEM Software Control, or from the system control buttons on an ATEM broadcast
panel. This is a very powerful feature! With four HyperDecks connected to your switcher, it’s like
having a portable videotape department able to record outputs from your switcher, play back
graphics, or you can even set your switcher to roll prerecorded segments at the press
of a button!
Transport controls are located in the HyperDecks palette in ATEM Software Control, or in the
system control menu on an ATEM broadcast panel, which lets you play back video, jog and
shuttle, skip clips, pause and more. You can also record video.
When you combine this feature with ATEM’s powerful macros feature, it opens up a world of
creative possibilities that can really enhance your live production!
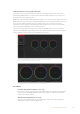
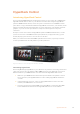
HyperDeck Extreme Control and HyperDeck Extreme 8K HDR
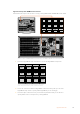
Connecting HyperDecks
Connecting Blackmagic HyperDecks to your switcher is very similar to connecting cameras and
other video sources via your switcher’s SDI or HDMI inputs. The only additional connection is
Ethernet which lets your ATEM switcher communicate with the HyperDeck disk recorder.
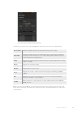
1 Make sure your ATEM switcher and broadcast panel software are updated to version
6.8 or newer and your HyperDeck disk recorder is running HyperDeck software 4.3
or newer.
2 Using the Ethernet connector, connect your HyperDeck disk recorder to the same
network your ATEM switcher is connected to.
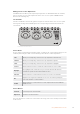
3 Press the remote button marked ‘REM’ on the HyperDeck’s control panel. The ‘REM’
button will illuminate which means the HyperDeck has remote control enabled.
85HyperDeck Control