
User's Manual

Lum Mix Setting
The color corrector built into Blackmagic cameras is based on the DaVinci Resolve primary
color corrector. DaVinci has been building color correctors since the early 1980’s and most
Hollywood films are color graded on DaVinci Resolve than any other method.
This means that your color corrector built into the camera has some unique and creatively
powerful features. The YRGB processing is one of those features.
When color grading, you can choose to use RGB processing, or YRGB processing. High end
colorists use YRGB processing because you have more precise control over color and you can
independently adjust the channels with better separation and more creative options.
When the Lum Mix control is set to the right side, you have the 100% output of the YRGB color
corrector. When you have the Lum Mix control set to the left side, you get 100% output of the
RGB corrector. You can set the Lum Mix to any position between the left and right to get a blend
of output from both the RGB and YRGB correctors.
Which is the correct setting to use? That’s up to you, as color correction is a pure creative
process and there is no right and wrong. The best setting is what you like the most and what
you think looks good!
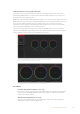
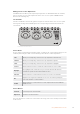
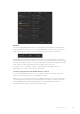
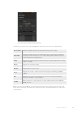
Drag the sliders left or right to adjust Contrast,
Saturation, Hue and Lum Mix settings.
Synchronizing Settings
When connected, camera control signals are sent from your ATEM switcher to the Blackmagic
camera. If a setting is accidentally adjusted from your camera, camera control will automatically
reset that setting to maintain synchronization.
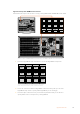
Using a DaVinci Resolve Micro Panel
The DaVinci Resolve primary color corrector in each camera controller can be controlled using
a DaVinci Resolve Micro panel. This lets you make fast and precise color adjustments using a
hardware control panel.
TIP For the DaVinci Resolve Micro Panel to communicate with your ATEM switcher,
make sure you have installed DaVinci Resolve 12.5.5 or later and ATEM switchers 7.1
orlater.
To set up a DaVinci Resolve Micro Panel with your ATEM switcher
1 Connect the DaVinci Resolve Micro Panel to your computer via USB-C and launch
ATEM Software Control.
2 Click on the ‘camera’ tab and select a camera by clicking anywhere in the desired
camera controller.
3 On the DaVinci Resolve Micro Panel, rotate the trackballs and turn the knobs to adjust
the corresponding controls in the primary color corrector.
83Using ATEM Software Control