
User's Manual


Pattern Key Settings
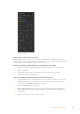
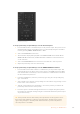
To set up a pattern key on upstream keyer 1 on the broadcast panel:
1 Press the KEY 1 button to enable the keyer on the preview output. The system control
will dynamically navigate to the KEY 1 menu. You can manually navigate to the KEY 1
menu by pressing HOME > EFFECTS KEYS > KEY 1.
2 Select the PATTRN KEY menu button.
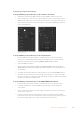
3 The destination display will say key1fill on the ATEM 1 M/E Broadcast Panel. On the
ATEM 2 M/E Broadcast Panel, the KEY 1/CUT button will be lit. Select the fill source
on the select bus.
4 Select the PATTRN MENU button and use the menu buttons to select a pattern.
5 Adjust the pattern key controls to refine the key.
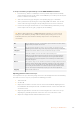
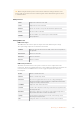
To set up a pattern key on upstream keyer 1 on the ATEM 1 M/E Advanced Panel:
1 Press the KEY 1 next transition button to enable the key on the preview output. This
automatically selects the keyers menu on the system control LCD. Pressing the KEY 1
next transition button ties the key to the next transition so it will transition to air when
the next transition is performed.
2 In the keyers LCD menu, select the ‘pattern’ key type using the corresponding ‘key
type’ control knob.
3 Select the fill source using the corresponding soft control knob or by pressing a source
button on the source select bus.
4 Turn the corresponding soft control knobs to choose the ‘pattern’ you want for the
pattern key and set the ‘size’ of the pattern.
5 Press the system control left and right arrow buttons to navigate through the pattern
key parameters and adjust settings using the control knobs. Watch the preview output
as you refine the key.
TIP Some patterns can have their center point repositioned. Use the joystick to move
the position of the pattern. If you need to reset the position, navigate to the ‘pattern
type’ setting, change it to another pattern and then return to your chosen pattern to
reset the position to its default.
167Operating your ATEM Switcher