
User Manual


Connecting to an ATEM Switcher
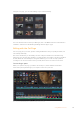
If you’re using an ATEM switcher, you can plug in up to 4 Blackmagic HyperDeck disk recorders
and control them using the ATEM software control panel. This is a very powerful feature that
effectively gives you an entire videotape department at your fingertips. You can also trigger
recording on your HyperDeck from an ATEM switcher, which is a great way of making an archive
copy of a live broadcast, or capturing B roll when live switching a production that will be fine
tuned later.
PUSHPUSHPUSHPUSH
1 7 13 19 COL 1 BARS AUX 1
2 8 14 20 COL 2
SPR
SRC
AUX 2
3 9 15
KEY
MASK
CLEAN
FEED 1
ME 2
PVW
AUX 3
4 10 16 BLK
CLEAN
FEED 2
ME 2
PGM
AUX 4
5 11 17 MP 1 MP 1K
ME 1
PVW
AUX 5
6 12 18 MP 2 MP 2K
ME 1
PGM
AUX 6
PUSHPUSHPUSHPUSH
1 7 13 19 COL 1 BARS AUX 1
2 8 14 20 COL 2
SPR
SRC
AUX 2
3 9 15
KEY
MASK
CLEAN
FEED 1
ME 2
PVW
AUX 3
4 10 16 BLK
CLEAN
FEED 2
ME 2
PGM
AUX 4
5 11 17 MP 1 MP 1K
ME 1
PVW
AUX 5
6 12 18 MP 2 MP 2K
ME 1
PGM
AUX 6
ATEM switchers, such as the ATEM 2 M/E Broadcast Studio 4K,
canconnect with up to four HyperDeck disk recorders
To connect HyperDecks to an ATEM switcher:
1 Update your ATEM Switcher to software version 6.8 or higher. This process outlined in
the ATEM Switcher manual and can even be done over Ethernet.
2 Update your HyperDeck’s internal software to version 4.3 or later. Updating your
HyperDeck software is explained earlier in this manual.
3 Connect your HyperDeck to the same network as your ATEM Switcher and note its
IP address.
Your HyperDeck’s IP address can be found via its front panel and LCD menu by
entering the ‘setup’, then ‘Ethernet’ menus from the main menu.
Alternatively, you can access your HyperDeck’s IP address on your Mac or PC via the
‘configure’ tab in BlackMagic HyperDeck Setup utility.
4 Connect one of your HyperDeck’s SDI or HDMI outputs to an SDI or HDMI source input
on your ATEM Switcher.
5 If you want to use your ATEM Switcher to trigger recording on your HyperDeck,
you’llalso need to connect a video source to your HyperDeck.
Simply connect an SDI or HDMI source to your HyperDeck as usual. To record your
ATEM switcher’s program output, connect one of your switcher’s auxilary SDI outputs to
your HyperDeck’s SDI input.
6 Enable remote by pressing the remote button on HyperDeck’s front panel, or via the
LCD menu on HyperDeck Studio Mini, to allow remote control from the switcher.
7 Complete the connection process by entering your HyperDeck’s source and
IPaddress information into your ATEM software or ATEM broadcast panel. This is very
straightforward and laid out in your ATEM switcher manual.
37Connecting to an ATEM Switcher