
User Manual


Table Of Contents
- Getting Started
- Using HyperDeck
- About SSDs
- HyperDeck Utility
- About Ultra HD 4K
- Accessing Your Clips
- Status Indicators
- Using the Display Menu on HyperDeck Studio Models
- Selecting Timecode Source
- SDI Start/Stop Recording
- Timecode Run Recording
- Shuttling with HyperDeck Shuttle
- Jog and Shuttle with HyperDeck Studio Models
- Ref Input
- RS-422 Control
- Installing the HyperDeck Shuttle Mounting Plate
- Using Your Favorite Editing Software
- Using Blackmagic Media Express
- Using Blackmagic UltraScope
- Using Blackmagic Disk Speed Test
- Developer Information
- Help
- Warnings
- Warranty
Using Blackmagic Media Express
37
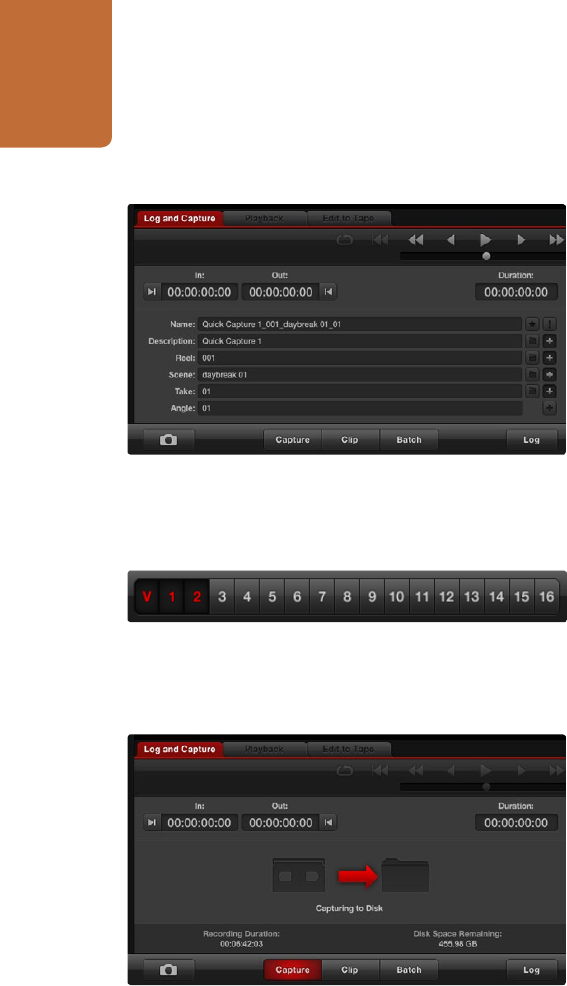
Capture
Capturing video is easy. All you need to do is connect HyperDeck Studio Pro via a Thunderbolt cable, set
the Media Express preferences and press the Capture button.
Step 1. Connect your video source to an input on HyperDeck Studio Pro.
Step 2. Check that HyperDeck Studio Pro is set to the input you have connected your source to.
e.g. SDI, HDMI or analog.
Step 3. Open Media Express and set its preferences to the project video format and capture file format.
The project video format must be set correctly otherwise you will not see your video in the preview
pane.
Step 4. Click the red Log and Capture tab and enter a description for your video into the Description field
of the logging information area.
Step 5. Click the "+" button next to the Description to add it to the automatic Name field. Click the "+"
button next to any of the other fields that you wish to add to the Name field.
You can increment the value in each of these fields by clicking on the corresponding clapper
board icon. Alternatively you can type directly into any field to customize its name and number.
The text in the automatic Name field will be applied to the clip(s) which are about to
be captured.
Click the "star" icon next to the Name field if you want to log the clip as a favorite.
Click the "!" icon next to the Name field if you wish a clip name confirmation prompt to
appear before every capture. This will provide you with the chance to change the clip name.
Step 6. Set the desired number of audio channels to be captured.
Step 7. Click the “Capture” button to start recording. To end capture, click the “Capture” button again to
automatically keep the clip. Alternatively, press esc if you want to be prompted to delete or save
the clip. The captured clips will be added to the Media List.
Set the desired number of audio channels to be captured
Enter a description for your video
Click the Capture button to commence recording