
User Manual


Table Of Contents
- Getting Started
- Using HyperDeck
- About SSDs
- HyperDeck Utility
- About Ultra HD 4K
- Accessing Your Clips
- Status Indicators
- Using the Display Menu on HyperDeck Studio Models
- Selecting Timecode Source
- SDI Start/Stop Recording
- Timecode Run Recording
- Shuttling with HyperDeck Shuttle
- Jog and Shuttle with HyperDeck Studio Models
- Ref Input
- RS-422 Control
- Installing the HyperDeck Shuttle Mounting Plate
- Using Your Favorite Editing Software
- Using Blackmagic Media Express
- Using Blackmagic UltraScope
- Using Blackmagic Disk Speed Test
- Developer Information
- Help
- Warnings
- Warranty
Using HyperDeck
28
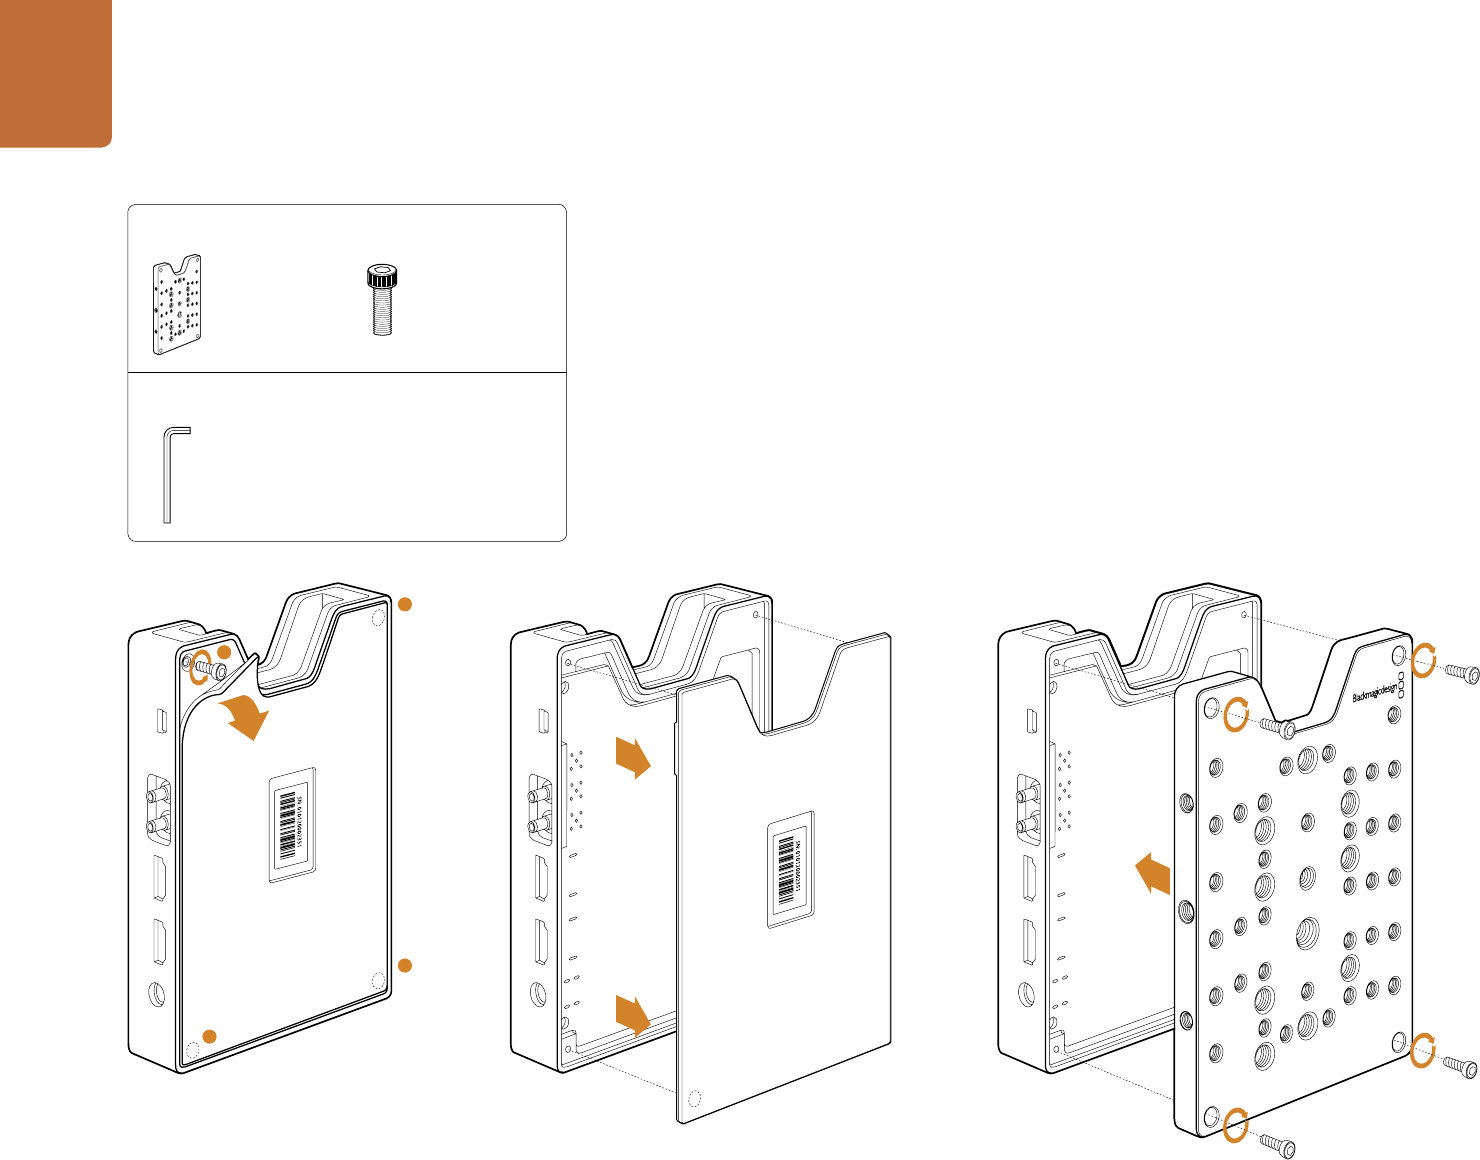
Installing the HyperDeck Shuttle Mounting Plate
HyperDeck Shuttle Mounting Plate is an optional accessory that lets you secure your HyperDeck
Shuttle to a camera rig with your choice of rail mounts, cold shoe mounts, articulated arms and more.
You can also use the plate to power your HyperDeck Shuttle from an external battery by attaching
a V-Mount or Anton Bauer style battery plate. HyperDeck Shuttle Mounting Plate is available for
purchase from Blackmagic Design resellers. For easy installation, please follow these simple steps.
Step 1. Peel back the rubber mat from all four corners of the base so you can just see the screws.
Remove all four screws.
Step 2. Remove the base.
Step 3. Attach your HyperDeck Shuttle Mounting Plate using the supplied socket head screws.
1
3
2
4
1
3
2
4
1
3
2
4
Step 1 Step 2 Step 3
The contents of the box includes:
x1
HyperDeck Shuttle
Mounting Plate
x4
Socket Head Screws
M3 x 10mm
You will need:
x1
Hex Allen Key 2.5mm
(not included)