
User's Manual


Blackmagic Video Assist Settings and Features
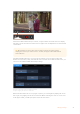
Your video assist displays overlays on the LCD to help with exposure, focus, composition and
framing when connected to a camera.
These settings can be accessed via the ‘monitor overlay’ icon in the top left corner of your
video assist. You can also use the ‘monitor’ tab of the dashboard menu to toggle these settings
on or off individually, or disable them all by selecting ‘clean feed’.
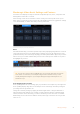
Disable all overlays by selecting clean feed
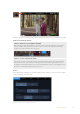
Zebra
The zebra feature helps you achieve optimum exposure by displaying diagonal lines over areas
of the video that exceed your set zebra level. For example, if you set the zebra level to 100%,
you’ll know that any area of the image displaying the zebra pattern will be clipped. If you set the
zebra to 90%, you can feel confident that you have some extra exposure headroom to protect
the highlights in your shot.
Zebra controls on Blackmagic Video Assist
TIP You can also set the zebra to highlight areas of your image that represent specific
video levels on a waveform, for example setting the zebra for 50% means you can
visually identify which regions of your image will appear at approximately 50% on a
waveform scope.
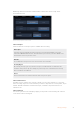
Focus Peaking and Focus Assist
Focus peaking and focus assist settings give you powerful tools to help focus your images fast.
Focus peaking displays edge lines on the sharpest areas of the image. Sensitivity settings let
you change how strong the lines are.
Change the sensitivity settings by tapping the left and right arrows or drag the slider left or
right. Sensitivity levels include ‘low’, ‘medium’ or ‘high’. In images with lots of detail and high
contrast, the lines can be distracting, so in these conditions you can select ’low’ or ‘medium’.
Alternatively, for low contrast shots with less detail, select ‘high’ so the lines are stronger and
easier to see.
13Changing Settings