
User Manual

COLOR 198
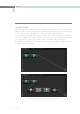
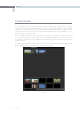
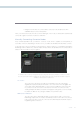
The nodes have a yellow dot for the image Input and Output hooks, and a yellow triangle for the Key
or Matte Input and Output hooks. It is important that the connecting line from the processing input on
the left through the various nodes via the image hooks, is connected to the output on the right. If the
connection path is not complete the nodes will not display images, but instead will show an icon and
the correction will not be visible on the Viewer or Grading monitor.
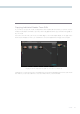
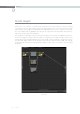
With the path complete, the image shown in each node within the graph will give you a visual indication
of the correction that is taking place within that node. The Node Graph display may be zoomed by using
the rotary center mouse button, and moved by dragging the mouse while holding down the center
mouse button.
Managing Nodes
Ambitious grades may require trees of multiple nodes to create the necessary effect. This section covers
the mechanics of putting nodes together into the structures that are described in more detail later in
this chapter.
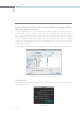
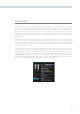
You can only select one node at a time. When you adjust any of the parameters or settings in the Color
page, you’re adjusting the current node, which is highlighted with a blue border.
To select a node, making it the current node, do one of the following:
•Double-clickanynodeinthenodegraph.
•UsingtheDaVinciResolvecontrolsurface,pressthePreviousNodeorNextNode
buttons(foundontheJog/ShuttlepanelunderneaththeShuttlecontrol)
•UsingtheDaVinciResolvecontrolsurface,enterthenumberofthenodeyouwant
to select using the keypad, and then press the SELECT NODE button (all on the
Jog/Shuttlepanel).
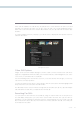
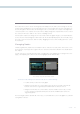
The following procedures describe all of the ways you can add nodes to the node graph as you build
each grade’s node tree.
The currently selected node has a blue border.