
User Manual
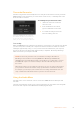

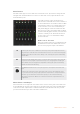
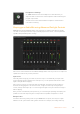
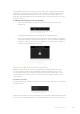
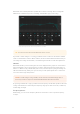
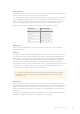
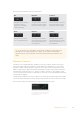
Table Of Contents
- Getting Started
- Switching your Production
- Additional Features on ISO Models
- ATEM SDI Extreme ISO
- ATEM Software Control
- Switching Modes
- Using ATEM Software Control
- Media Manager
- Audio Mixer
- Camera Control
- Using the Software Control Panel
- Transition Control and Upstream Keyer
- Downstream Keyers
- Processing Palettes
- Media Player Tab
- Output Tab
- Recording ISO Files
- Timecode Generator
- Using the Audio Mixer
- Shaping your Audio Mix using Advanced Fairlight Controls
- Using the 6 Band Parametric Equalizer
- Fairlight Controls Workflow Guide
- Using the Media Page
- Navigating the Browse Window
- ATEM Media Pool
- Image File Types
- Creating a TGA File with an Alpha Channel
- Camera Control
- Using Macros
- Changing Switcher Settings
- ATEM Setup Settings
- Using Adobe Photoshop with ATEM
- Using Multiple Control Panels
- Connecting to a Network
- Connecting to an Internet Router
- Keying using ATEM SDI
- Streaming Video
- HyperDeck Control
- ATEM 1 M/E Advanced Panel
- Using ATEM 1 M/E Advanced Panel
- ATEM Camera Control Panel
- Mixing Audio
- Help
- Regulatory Notices
- Safety Information
- Warranty

Shaping your Audio Mix using Advanced Fairlight Controls
ATEM SDI has advanced Fairlight audio controls that let you enhance and refine the quality
of sound on each input and master output, including input level controls, a6band parametric
equalizer and powerful dynamics settings.
This section of the manual shows the different Fairlight audio controls you can use to shape and
optimize the audio mix in your live production.
Input Level
Generally, when setting up your audio mix, the first step is to normalize all your inputs. This
means adjusting the input level knob on each input so you can optimize all the levels to their
highest strength without clipping.
This control is at the top of each track under the tally light. Change the level by clicking on
theknob and dragging left to decrease the level, or right to increase. By setting the input
control, itbrings all the inputs up to a common signal strength so they are all at their strongest
without clipping.
After you have normalized all your input levels, you can now begin optimizing and shaping the
qualities in each audio input using the6 band parametric equalizer and dynamics controls.
Delay Control
Sometimes when using analog audio via your ATEM SDI’s mic inputs, there may be a slight
difference in the sync between analog audio and video. For example, the analog audio may
Headphones Settings
On ATEM SDI Extreme ISO the headphones volume knob lets you
adjust the audio monitor levels of the headphones without affecting the
program output audio.
Click the ‘mute’ button underneath the headphones volume knob to
mute audio monitoring.
54ATEM Software Control