
User Manual
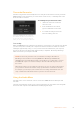

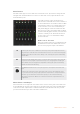
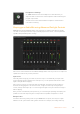
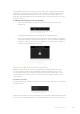
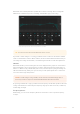
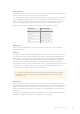
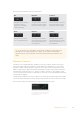
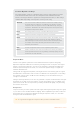
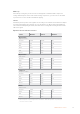
Table Of Contents
- Getting Started
- Switching your Production
- Additional Features on ISO Models
- ATEM SDI Extreme ISO
- ATEM Software Control
- Switching Modes
- Using ATEM Software Control
- Media Manager
- Audio Mixer
- Camera Control
- Using the Software Control Panel
- Transition Control and Upstream Keyer
- Downstream Keyers
- Processing Palettes
- Media Player Tab
- Output Tab
- Recording ISO Files
- Timecode Generator
- Using the Audio Mixer
- Shaping your Audio Mix using Advanced Fairlight Controls
- Using the 6 Band Parametric Equalizer
- Fairlight Controls Workflow Guide
- Using the Media Page
- Navigating the Browse Window
- ATEM Media Pool
- Image File Types
- Creating a TGA File with an Alpha Channel
- Camera Control
- Using Macros
- Changing Switcher Settings
- ATEM Setup Settings
- Using Adobe Photoshop with ATEM
- Using Multiple Control Panels
- Connecting to a Network
- Connecting to an Internet Router
- Keying using ATEM SDI
- Streaming Video
- HyperDeck Control
- ATEM 1 M/E Advanced Panel
- Using ATEM 1 M/E Advanced Panel
- ATEM Camera Control Panel
- Mixing Audio
- Help
- Regulatory Notices
- Safety Information
- Warranty

Audio Balance
The audio mixer supports stereo audio from each audio source. If you wish to change the left
and right audio channel balance for a camera or other audio source, adjust the knob to the
desired balance point.
ON Selecting the direct mix to ON allows an audio input to be permanently mixed into the
program output, even when the associated video source is not on air. The red tally light
will always be lit because the audio is always on air. Selecting this option automatically
disables AFV.
AFV Audio follow video (AFV) allows audio to crossfade when inputs change. The audio will
only be sent to the program output when the input is on air, lighting the red tally light
above. When off air, the tally light is lit dull yellow. Selecting this option automatically
disables the direct mix ON setting.
SOLO
On ATEM SDI Extreme ISO the solo option appears as a headphone icon below each
input.
Selecting solo exclusively outputs that single audio source to the headphone output
so you can listen clearly to any single input when required. This is an important feature
which lets you confirm audio content before putting it to air and without affecting
the program output audio. When solo is deselected the audio output will return to its
original state.
Master Audio Level Output
The master fader on the right side of the audio mixer is used to set the gain on the audio level
for the USB webcam program output and has its own audio level meter. Select the AFV button
on the master audio output fader to enable the AFV fade to black feature. This lets you fade
your master audio when you click on the fade to black button.
The audio meter for Cam1 is shown in gray to
indicate that its audio will not be used as neither of
its ON or AFV buttons are enabled. Cam2 has AFV
selected but its audio is not currently being used
as the camera is not on air as is indicated by its
dull yellow tally light. Cam3 and Cam4 have their
direct mix set to ON so their mixed audio is always
used and their tally lights remain lit, even if another
camera is currently on air. The audio level meter
for mic 1 is also set to ‘on’ and therefore always
present in the mix.
Audio Source Selection
Below each audio level meter, you will find the ON
and AFV buttons that select which audio sources
are sent to the program output of the switcher.
53ATEM Software Control