
User Manual
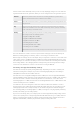
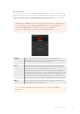
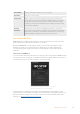
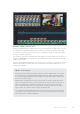
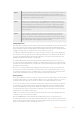
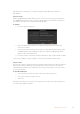
Table Of Contents
- Getting Started
- Switching your Production
- Additional Features on ISO Models
- ATEM SDI Extreme ISO
- ATEM Software Control
- Switching Modes
- Using ATEM Software Control
- Media Manager
- Audio Mixer
- Camera Control
- Using the Software Control Panel
- Transition Control and Upstream Keyer
- Downstream Keyers
- Processing Palettes
- Media Player Tab
- Output Tab
- Recording ISO Files
- Timecode Generator
- Using the Audio Mixer
- Shaping your Audio Mix using Advanced Fairlight Controls
- Using the 6 Band Parametric Equalizer
- Fairlight Controls Workflow Guide
- Using the Media Page
- Navigating the Browse Window
- ATEM Media Pool
- Image File Types
- Creating a TGA File with an Alpha Channel
- Camera Control
- Using Macros
- Changing Switcher Settings
- ATEM Setup Settings
- Using Adobe Photoshop with ATEM
- Using Multiple Control Panels
- Connecting to a Network
- Connecting to an Internet Router
- Keying using ATEM SDI
- Streaming Video
- HyperDeck Control
- ATEM 1 M/E Advanced Panel
- Using ATEM 1 M/E Advanced Panel
- ATEM Camera Control Panel
- Mixing Audio
- Help
- Regulatory Notices
- Safety Information
- Warranty

Record button Click the record button marked ‘rec’ to start recording.
Stop button Click ‘stop’ to stop recording.
Display status Enable or disable this feature by clicking the display status checkbox in the
record options. The display status will appear in ATEM Software Control at the
bottom right side of the user interface and shows the recording status. When
recording, the record indicator will illuminate red and displays the current drive
and record time remaining.
Record in
all cameras
This feature lets you set all connected Blackmagic cameras to record when
you press the record button. This is helpful if you want isolated recordings from
each camera for editing later. Cameras will be automatically set to record using
Blackmagic RAW at the quality setting the camera was last set to.
Recording ISO Files
ATEM SDI Pro ISO and Extreme ISO switchers can record video files from each of the video
inputs, and these are called isolated input files or “ISO” files.
By default, ATEM SDI ISO model switchers will record a video file of the program output.
However if you select to record the ISO files, it will change to recording a whole folder
of content that includes the input video files as well as audio files, and a DaVinci Resolve
project file.
How to Record ISO Files
To record a folder of ISO files and other items, simply go to the record palette in ATEM Software
Control and select the setting “ISO record all inputs”. Now ISO switcher will record the folder of
contents when you press record in the palette or on the front panel.
To enable ISO recordings, check the ‘ISO record all
inputs’ checkbox in the record stream palette.
It’s important to use a disk that’s fast enough. A good flash disk is recommended as often
mechanical disks cannot work fast enough to record the 5 streams of H.264 HD video that you
will record with this setting. For the most up to date list of recommended USB-C flash disks
please go to www.blackmagicdesign.com/support.
44ATEM Software Control