
User Manual
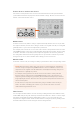
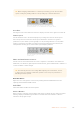
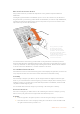
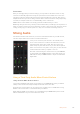
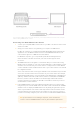
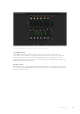
Table Of Contents
- Getting Started
- Switching your Production
- Additional Features on ISO Models
- ATEM SDI Extreme ISO
- ATEM Software Control
- Switching Modes
- Using ATEM Software Control
- Media Manager
- Audio Mixer
- Camera Control
- Using the Software Control Panel
- Transition Control and Upstream Keyer
- Downstream Keyers
- Processing Palettes
- Media Player Tab
- Output Tab
- Recording ISO Files
- Timecode Generator
- Using the Audio Mixer
- Shaping your Audio Mix using Advanced Fairlight Controls
- Using the 6 Band Parametric Equalizer
- Fairlight Controls Workflow Guide
- Using the Media Page
- Navigating the Browse Window
- ATEM Media Pool
- Image File Types
- Creating a TGA File with an Alpha Channel
- Camera Control
- Using Macros
- Changing Switcher Settings
- ATEM Setup Settings
- Using Adobe Photoshop with ATEM
- Using Multiple Control Panels
- Connecting to a Network
- Connecting to an Internet Router
- Keying using ATEM SDI
- Streaming Video
- HyperDeck Control
- ATEM 1 M/E Advanced Panel
- Using ATEM 1 M/E Advanced Panel
- ATEM Camera Control Panel
- Mixing Audio
- Help
- Regulatory Notices
- Safety Information
- Warranty

Try sliding the gain faders up and down on your hardware control surface and verify that the audio mixer faders
show a corresponding movement in the software on your computer screen
The MUTE button
In the ATEM audio mixer interface, audio is always on, or present in the mix, when the
ON button is selected. When the ON button is deselected, audio is not present or is muted.
To match the software interface, you’ll find the MUTE button on your audio mixer control
surface will be lit when audio is always on or present in the mix. The MUTE button will be unlit
when audio is not present or is muted.
Decibel Scales
All hardware mixers are made differently, and the scale printed on your control surface may not
match the scale in the ATEM audio mixer interface. Always refer to the ATEM audio mixer levels
for the true decibel scales.
180Mixing Audio