
User Manual
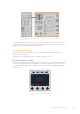
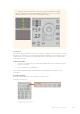
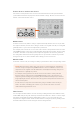
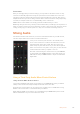
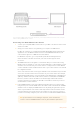
Table Of Contents
- Getting Started
- Switching your Production
- Additional Features on ISO Models
- ATEM SDI Extreme ISO
- ATEM Software Control
- Switching Modes
- Using ATEM Software Control
- Media Manager
- Audio Mixer
- Camera Control
- Using the Software Control Panel
- Transition Control and Upstream Keyer
- Downstream Keyers
- Processing Palettes
- Media Player Tab
- Output Tab
- Recording ISO Files
- Timecode Generator
- Using the Audio Mixer
- Shaping your Audio Mix using Advanced Fairlight Controls
- Using the 6 Band Parametric Equalizer
- Fairlight Controls Workflow Guide
- Using the Media Page
- Navigating the Browse Window
- ATEM Media Pool
- Image File Types
- Creating a TGA File with an Alpha Channel
- Camera Control
- Using Macros
- Changing Switcher Settings
- ATEM Setup Settings
- Using Adobe Photoshop with ATEM
- Using Multiple Control Panels
- Connecting to a Network
- Connecting to an Internet Router
- Keying using ATEM SDI
- Streaming Video
- HyperDeck Control
- ATEM 1 M/E Advanced Panel
- Using ATEM 1 M/E Advanced Panel
- ATEM Camera Control Panel
- Mixing Audio
- Help
- Regulatory Notices
- Safety Information
- Warranty

Panel Active
After you are happy with your camera settings, you may want to lock all the controls so they
cannot be accidentally adjusted. Pressing the ‘panel active’ button enables the CCU lock so
all controls cannot be changed. Press the button again to disable the CCU lock. This can be a
helpful feature when you are recording a locked off shot and don’t want the setting adjusted by
accident, for example a wide shot of a stadium filling as the crowd enters.
ATEM Camera Control Panel is an exciting, practical and efficient way to control
Blackmagic Design cameras in your live production. We believe you will enjoy the experience of
hands on camera control using CCUs, which lets you take control of exposure and other camera
settings, freeing up your camera operators so they can concentrate on framing and focus.
Mixing Audio
The switcher’s built in audio mixer lets you use the embedded audio from your SDI cameras,
and other inputs without the need for an external audio mixer.
Once you’ve connected your cameras to the switcher, there
are no other connections to make as the audio mixer uses the
embedded audio in the video signal. This saves space and
makes setup very fast and low cost as you don’t need separate
audio connections for every video source, plus you don’t need an
external audio mixer unless you prefer to use one.
The audio is mixed using the control buttons on your ATEM SDI,
or via the Audio tab of ATEM Software Control and output over
USB webcam and your ATEM switcher’s outputs as embedded
digital audio.
Using a Third Party Audio Mixer Control Surface
Using an Audio Mixer Control Surface
Connecting a hardware audio mixer control surface to your ATEM SDI provides you with the
ability to use both hands and adjust multiple audio levels at the same time.
An audio mixer control surface can be connected to your Mac or PC as a MIDI device using
Mackie Control commands to communicate with your switcher.
Many third party MIDI control surfaces are compatible with your ATEM SDI but please check
with the manufacturer of your control surface if in doubt.
178Mixing Audio