
User Manual
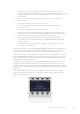
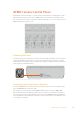
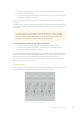
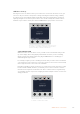
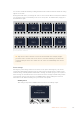
Table Of Contents
- Getting Started
- Switching your Production
- Additional Features on ISO Models
- ATEM SDI Extreme ISO
- ATEM Software Control
- Switching Modes
- Using ATEM Software Control
- Media Manager
- Audio Mixer
- Camera Control
- Using the Software Control Panel
- Transition Control and Upstream Keyer
- Downstream Keyers
- Processing Palettes
- Media Player Tab
- Output Tab
- Recording ISO Files
- Timecode Generator
- Using the Audio Mixer
- Shaping your Audio Mix using Advanced Fairlight Controls
- Using the 6 Band Parametric Equalizer
- Fairlight Controls Workflow Guide
- Using the Media Page
- Navigating the Browse Window
- ATEM Media Pool
- Image File Types
- Creating a TGA File with an Alpha Channel
- Camera Control
- Using Macros
- Changing Switcher Settings
- ATEM Setup Settings
- Using Adobe Photoshop with ATEM
- Using Multiple Control Panels
- Connecting to a Network
- Connecting to an Internet Router
- Keying using ATEM SDI
- Streaming Video
- HyperDeck Control
- ATEM 1 M/E Advanced Panel
- Using ATEM 1 M/E Advanced Panel
- ATEM Camera Control Panel
- Mixing Audio
- Help
- Regulatory Notices
- Safety Information
- Warranty

If you are using the camera control panel with just your switcher and a computer on a shared
network, connect the panel to your switcher, then the spare Ethernet port to your computer.
After connecting the camera control panel to your ATEM equipment, you should see the lights
on the panel illuminate and the LCDs on each CCU will display their respectively assigned
cameras. The panel is now powered, connected to your switcher and ready to start controlling
your cameras!
The connection process is fast because all the network settings for each ATEM unit have a
different default IP address when shipped from the factory. This means when you connect them
all to each other, their network settings are automatically configured and will work straight away.
However, if you are adding a camera control panel to an already existing system, or you need
tomanually assign a different IP address to avoid potential conflicts on your network, you can
enable DHCP so your panel determines the best IP address, or disable DHCP and set the
IP address manually.
163ATEM Camera Control Panel