
User Manual
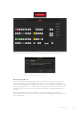
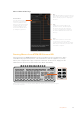
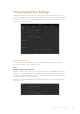
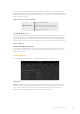
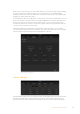
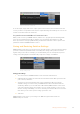
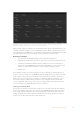
Table Of Contents
- Getting Started
- Switching your Production
- Additional Features on ISO Models
- ATEM SDI Extreme ISO
- ATEM Software Control
- Switching Modes
- Using ATEM Software Control
- Media Manager
- Audio Mixer
- Camera Control
- Using the Software Control Panel
- Transition Control and Upstream Keyer
- Downstream Keyers
- Processing Palettes
- Media Player Tab
- Output Tab
- Recording ISO Files
- Timecode Generator
- Using the Audio Mixer
- Shaping your Audio Mix using Advanced Fairlight Controls
- Using the 6 Band Parametric Equalizer
- Fairlight Controls Workflow Guide
- Using the Media Page
- Navigating the Browse Window
- ATEM Media Pool
- Image File Types
- Creating a TGA File with an Alpha Channel
- Camera Control
- Using Macros
- Changing Switcher Settings
- ATEM Setup Settings
- Using Adobe Photoshop with ATEM
- Using Multiple Control Panels
- Connecting to a Network
- Connecting to an Internet Router
- Keying using ATEM SDI
- Streaming Video
- HyperDeck Control
- ATEM 1 M/E Advanced Panel
- Using ATEM 1 M/E Advanced Panel
- ATEM Camera Control Panel
- Mixing Audio
- Help
- Regulatory Notices
- Safety Information
- Warranty

Output control menu on Mac OS
To set an output, simply click on the ‘output’ option in the menu bar, then scroll the list for the
source you want to output. When selected, the output will change immediately. You can see the
current source with a tick in the menu item.
Program/Preview and A/B Direct Transition Control
When you first receive your ATEM switcher, it will be set to program/preview switching which
is the current standard for mix/effects switchers. You can change this preference to A/B
Direct if you wish to use legacy A/B switching. You’ll find the ‘transition control’ options in the
preferences window of ATEM Software Control.
Saving and Restoring Switcher Settings
ATEM Software Control lets you save and restore specific settings, or all of the switcher settings
you have created. This powerful feature is incredibly time saving on live productions where
regular settings are used. For example, you can immediately restore saved picture in picture
settings, lower third graphics and detailed key setups from a laptop or USB drive.
Saving settings menu.
Saving your Settings
1 Go to the menu bar in ATEM Software Control and select File>Save As.
2 A window will open asking for a file name and destination folder. After you have made
your selection, click Save.
3 You’ll now see the Save Switcher State panel containing checkboxes for all the
available settings on each block of your ATEM switcher. The Select All checkbox is
enabled by default. If you save with Select All enabled, ATEM Software Control saves
your entire switcher settings. If you want to choose specific settings to save, you can
deselect settings individually, or to remove all settings click Select All once to deselect
them. Now you can select specific settings you want to save.
4 Click Save.
ATEM Software Control saves your settings as an XML file together with a folder for
ATEM media pool contents.
89Changing Switcher Settings