
User Manual
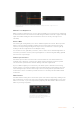
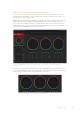
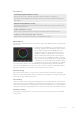
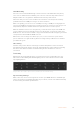
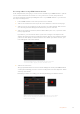
Table Of Contents
- Getting Started
- Switching your Production
- Additional Features on ISO Models
- ATEM SDI Extreme ISO
- ATEM Software Control
- Switching Modes
- Using ATEM Software Control
- Media Manager
- Audio Mixer
- Camera Control
- Using the Software Control Panel
- Transition Control and Upstream Keyer
- Downstream Keyers
- Processing Palettes
- Media Player Tab
- Output Tab
- Recording ISO Files
- Timecode Generator
- Using the Audio Mixer
- Shaping your Audio Mix using Advanced Fairlight Controls
- Using the 6 Band Parametric Equalizer
- Fairlight Controls Workflow Guide
- Using the Media Page
- Navigating the Browse Window
- ATEM Media Pool
- Image File Types
- Creating a TGA File with an Alpha Channel
- Camera Control
- Using Macros
- Changing Switcher Settings
- ATEM Setup Settings
- Using Adobe Photoshop with ATEM
- Using Multiple Control Panels
- Connecting to a Network
- Connecting to an Internet Router
- Keying using ATEM SDI
- Streaming Video
- HyperDeck Control
- ATEM 1 M/E Advanced Panel
- Using ATEM 1 M/E Advanced Panel
- ATEM Camera Control Panel
- Mixing Audio
- Help
- Regulatory Notices
- Safety Information
- Warranty
6 Click on the bars button in the program panel on the switcher page. This sets bars to
your switcher’s program output.
7 Select color 1 on the preview output.
8 Open the transitions palette and set it to mix.
If mix is already selected, make sure your macro records the setting by selecting a
different transition type, for example the wipe transition, then clicking on mix again.
9 Now change the transition Rate to 3:00. This sets the mix transition duration to
3 seconds.
10 Click on the auto button in the transition style panel. Your switcher will perform a mix
transition from color bars to color 1.
11 To set the switcher to wait for 2 seconds before applying another transition, click on the
add pause button at the top of the red border. The ‘add pause’ window will open. Set
the pause to 5 seconds and 00 frames and click ‘add pause’ to confirm your choice.
Why set a 5 second pause when you only want a 2 second pause? That’s because
when the mix transition occurs, it takes 3 seconds to complete. So if you want to add a
pause, you need to consider the transition duration, plus the pause you want to happen
before the next transition occurs.
In this example, it takes 3 seconds for the transition to complete, then 2 seconds for
your 2 second pause, so you should enter a pause of 5 seconds. Another way is to add
two separate pauses, one for the duration of the transition, and then another for the
pause you want. It’s up to you.
12 Now select black on the preview panel, and click the auto button in the transition style
panel. Your ATEM switcher will perform a mix transition to black.
13 Click the record icon in the macros window to stop recording your macro.
The macro you just recorded will now appear as a button in your selected macro slot.
To preview your macro, click the run button in the macros window to enter the run
page. Select recall and run, which sets the macros window to run a macro as soon as
you click on a macro button. Now click on your new macro button, named ‘Transitions’.
14 If you want your macro to instantly run as soon as you select it, click on the ‘recall and
run’ button. By enabling this feature you can load and play your macros with only one
click of a button.
If your macro was successful, you should see your ATEM switcher perform a mix from color bars
to color 1 using a 3 second transition, pause for 2 seconds, then perform another 3 second mix
transition to black, all by clicking one button in the macros window! Your ATEM switcher will also
display an orange border around your software control panel to indicate a macro is playing.
If your macro doesn’t perform the way you expect it to, simply rerecord the macro you just
created following the previous steps.
80Using Macros