
User Manual
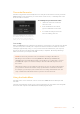
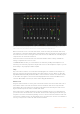
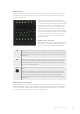
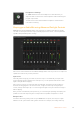
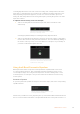
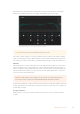
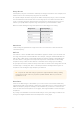
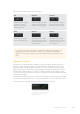
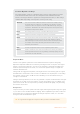
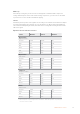
Table Of Contents
- Getting Started
- Switching your Production
- Additional Features on ISO Models
- ATEM SDI Extreme ISO
- ATEM Software Control
- Switching Modes
- Using ATEM Software Control
- Media Manager
- Audio Mixer
- Camera Control
- Using the Software Control Panel
- Transition Control and Upstream Keyer
- Downstream Keyers
- Processing Palettes
- Media Player Tab
- Output Tab
- Recording ISO Files
- Timecode Generator
- Using the Audio Mixer
- Shaping your Audio Mix using Advanced Fairlight Controls
- Using the 6 Band Parametric Equalizer
- Fairlight Controls Workflow Guide
- Using the Media Page
- Navigating the Browse Window
- ATEM Media Pool
- Image File Types
- Creating a TGA File with an Alpha Channel
- Camera Control
- Using Macros
- Changing Switcher Settings
- ATEM Setup Settings
- Using Adobe Photoshop with ATEM
- Using Multiple Control Panels
- Connecting to a Network
- Connecting to an Internet Router
- Keying using ATEM SDI
- Streaming Video
- HyperDeck Control
- ATEM 1 M/E Advanced Panel
- Using ATEM 1 M/E Advanced Panel
- ATEM Camera Control Panel
- Mixing Audio
- Help
- Regulatory Notices
- Safety Information
- Warranty

Timecode Generator
The timecode generator automatically runs time of day timecode from the moment you launch
ATEM Software Control. However, you can reset the counter to zero, or manually enter a new
timecode value to start from.
Time of Day
When an ATEM SDI Pro ISO or Extreme ISO switcher is connected to your computer, the unit will
sync time of day timecode with your computer. The unit has a built in clock that can continue
running for approximately 6 days, so once you disconnect the switcher from your computer,
thetime of day timecode will continue until the battery is depleted. The battery will charge
while connected to your computer via USB.
NOTE The timecode generator is also crucial when recording isolated files on
Blackmagic cameras. When connecting ATEM SDI to Blackmagic URSA Mini Pro,
URSABroadcast G2 or Blackmagic Studio Camera 4K Pro use an SDI cable to connect
the ATEM SDI output to the camera’s SDI input. The SDI cable will carry timecode to
the camera.
When all the cameras are recording the same timecode, you can edit your broadcast in
post production and have all cameras easily synchronized on a multicamera timeline.
For example, you can import your isolated camera recordings in DaVinci Resolve and
setup a multicamera edit with all cameras synced to the same timecode.
Using the Audio Mixer
The audio tab is used to mix audio sources connected to ATEM SDI via the SDI inputs and
mic audio.
Cameras and external mic audio sources are listed along the top of the audio mixer along with
the master audio output for the USB webcam and SDI program output.
To manually set a preset timecode value:
1 Click in the ‘run mode’ menu and
select‘free run’.
2 In the smaller timecode counter,
typeinadefined timecode value.
3 To confirm the change and set the
timecode running, click ‘set’.
When using ATEM SDI Pro ISO or Extreme
ISO switchers, the timecode generator can
be set to time of day, or free run timecode
where you can set a manual preset timecode
51ATEM Software Control