
User Manual
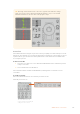
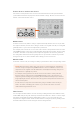
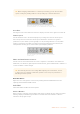
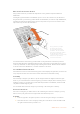
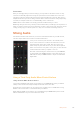
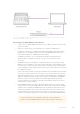
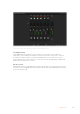
Table Of Contents
- Getting Started
- Switching your Production
- Additional Features on ISO Models
- ATEM SDI Extreme ISO
- ATEM Software Control
- Switching Modes
- Using ATEM Software Control
- Media Manager
- Audio Mixer
- Camera Control
- Using the Software Control Panel
- Transition Control and Upstream Keyer
- Downstream Keyers
- Processing Palettes
- Media Player Tab
- Output Tab
- Recording ISO Files
- Timecode Generator
- Using the Audio Mixer
- Shaping your Audio Mix using Advanced Fairlight Controls
- Using the 6 Band Parametric Equalizer
- Fairlight Controls Workflow Guide
- Using the Media Page
- Navigating the Browse Window
- ATEM Media Pool
- Image File Types
- Creating a TGA File with an Alpha Channel
- Camera Control
- Using Macros
- Changing Switcher Settings
- ATEM Setup Settings
- Using Adobe Photoshop with ATEM
- Using Multiple Control Panels
- Connecting to a Network
- Connecting to an Internet Router
- Keying using ATEM SDI
- Streaming Video
- HyperDeck Control
- ATEM 1 M/E Advanced Panel
- Using ATEM 1 M/E Advanced Panel
- ATEM Camera Control Panel
- Mixing Audio
- Help
- Regulatory Notices
- Safety Information
- Warranty

Recall All
When this feature is enabled, you can recall a stored scene file on all cameras simultaneously
when you press the corresponding scene file button on a single CCU.
For example, you may have a specific setup for each camera that is optimized for a set in your
live production. This will likely be a large number of settings that you will want to recall later
when you return to that set.
The following is an example of how you can recall complex settings for multiple cameras
simultaneously.
To recall a scene file to multiple cameras:
1 Once all your cameras are set up, store a scene file for each camera on scene file 1.
2 Enable the ‘recall all’ setting by pressing the corresponding soft button in the LCD
home menu.
3 Now make any changes you want to each camera.
4 Press the scene file 1 button on any CCU. You will notice that all CCUs have recalled the
settings stored in scene file 1 for each independent CCU.
NOTE While this feature is very powerful and helpful, please use with care as it affects
all cameras, including the camera switched to the program output. We recommend
enabling ‘recall all’ for specific setups prior to air and then immediately disabling the
feature until you need it again.
ND
This setting will be enabled in a future update.
CC
This setting will be enabled in a future update.
Master Gain
Blackmagic Design cameras have ISO and gain settings that can be set using the master gain
buttons on the camera control panel. To increase the master gain, press the up arrow next to
the master gain indicator. To decrease gain, press the down arrow.
Increasing or decreasing the master gain lets you allow for more light in dimly lit shooting
conditions, however it’s worth being careful with the master gain as electronic noise can appear
in the image as it reaches its highest settings.
TIP When a negative gain value is set, the down arrow will illuminate. When positive
gain is set, the up arrow will illuminate.
173ATEM Camera Control Panel