
User Manual
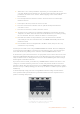
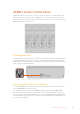
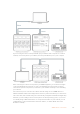
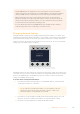
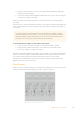
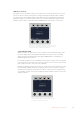
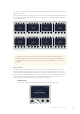
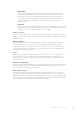
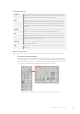
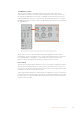
Table Of Contents
- Getting Started
- Switching your Production
- Additional Features on ISO Models
- ATEM SDI Extreme ISO
- ATEM Software Control
- Switching Modes
- Using ATEM Software Control
- Media Manager
- Audio Mixer
- Camera Control
- Using the Software Control Panel
- Transition Control and Upstream Keyer
- Downstream Keyers
- Processing Palettes
- Media Player Tab
- Output Tab
- Recording ISO Files
- Timecode Generator
- Using the Audio Mixer
- Shaping your Audio Mix using Advanced Fairlight Controls
- Using the 6 Band Parametric Equalizer
- Fairlight Controls Workflow Guide
- Using the Media Page
- Navigating the Browse Window
- ATEM Media Pool
- Image File Types
- Creating a TGA File with an Alpha Channel
- Camera Control
- Using Macros
- Changing Switcher Settings
- ATEM Setup Settings
- Using Adobe Photoshop with ATEM
- Using Multiple Control Panels
- Connecting to a Network
- Connecting to an Internet Router
- Keying using ATEM SDI
- Streaming Video
- HyperDeck Control
- ATEM 1 M/E Advanced Panel
- Using ATEM 1 M/E Advanced Panel
- ATEM Camera Control Panel
- Mixing Audio
- Help
- Regulatory Notices
- Safety Information
- Warranty

LCD Menu Settings
Pressing the ‘home’ soft button returns you to main home screen. From the home screen, you
can access all your camera control panel’s settings including the network settings, auxiliary
for camera control, master black enable and disable settings and the brightness settings for
adjusting the lights on the various panel controls. You can also identify the software version
installed on your camera control panel and the ATEM switcher your panel is connected to.
The home screen displays features you mayneed access
to at all times, for example selecting the desired camera
bank and recalling scene files for all cameras
Camera Banks A and B
When the LCD is set to the home screen, you will see the camera bank setting at the
top of the display. This setting displays which bank of cameras you are controlling,
which is an important feature when using larger ATEM switchers controlling up to
20 Blackmagic Design cameras.
For example, imagine you are controlling 8 cameras and you want to have a dedicated
CCU assigned to each camera. You can assign cameras 1 to 4 for each CCU on bank A,
then assign cameras 5 to 8 to each CCU on bank B.
Now when switching your live production, you can press the ‘bank’ soft button to swap
between banks A and B, which lets you instantly access camera control for cameras
that have been assigned to dedicated CCUs. This is a faster and more organized way
of controlling cameras compared to swapping between multiple cameras on each CCU
during production.
Press the bank soft button to cycle between
camera banks A and B, or hold the button down
to disable or enable camera banks
166ATEM Camera Control Panel