
User Manual
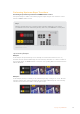
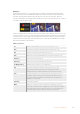
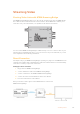
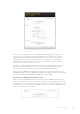
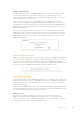
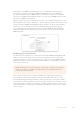
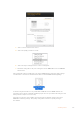
Table Of Contents
- Getting Started
- Switching your Production
- Additional Features on ISO Models
- ATEM SDI Extreme ISO
- ATEM Software Control
- Switching Modes
- Using ATEM Software Control
- Media Manager
- Audio Mixer
- Camera Control
- Using the Software Control Panel
- Transition Control and Upstream Keyer
- Downstream Keyers
- Processing Palettes
- Media Player Tab
- Output Tab
- Recording ISO Files
- Timecode Generator
- Using the Audio Mixer
- Shaping your Audio Mix using Advanced Fairlight Controls
- Using the 6 Band Parametric Equalizer
- Fairlight Controls Workflow Guide
- Using the Media Page
- Navigating the Browse Window
- ATEM Media Pool
- Image File Types
- Creating a TGA File with an Alpha Channel
- Camera Control
- Using Macros
- Changing Switcher Settings
- ATEM Setup Settings
- Using Adobe Photoshop with ATEM
- Using Multiple Control Panels
- Connecting to a Network
- Connecting to an Internet Router
- Keying using ATEM SDI
- Streaming Video
- HyperDeck Control
- ATEM 1 M/E Advanced Panel
- Using ATEM 1 M/E Advanced Panel
- ATEM Camera Control Panel
- Mixing Audio
- Help
- Regulatory Notices
- Safety Information
- Warranty

Click the ATEM Streaming Bridge icon in ATEM Setup to open
the settings
Now you can see information such as the ATEM Streaming Bridge name and the network
settings. If you are connecting via the local network, then most of the time you can select
DHCP. This will let your ATEM Streaming Bridge find its network address on the network
automatically and this is how most people connect their computers to a local network.
With DHCP the network itself will take care of the correct network settings for anything
connected to it. It’s the easiest way to connect.
However if you have a network administrator, it’s possible your network might have custom
IP addresses for all the equipment connected to it. It’s best to check with your network
administrator if they are managing your computers and network in your company.
Now you have the ATEM Streaming Bridge set to DHCP, try looking at the platform menu on
the ATEM SDI again to see if the ATEM Streaming Bridge has appeared in the list. The switcher
should automatically see the ATEM Streaming Bridge on your network.
Changing the ATEM Streaming Bridge name
While you are using the ATEM Setup, it’s a good idea to give your ATEM Streaming Bridge a
custom name. If you are using it on a projector in a public space in your building, perhaps call
it “Main Projector” or if you are using it for a large television in a conference room, perhaps call
it “Conference Room 3” or similar. This means when you have more than one ATEM Streaming
Bridge, you can tell which one is which.
126Streaming Video