
Specifications


22 BK Radio
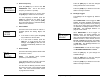
16. Backlight Duration
Backlight Duration can be set for LITE OFF,
1 SEC ON, 1-second increments up to 6
SEC ON, and LITE ON.
NOTE: Excessive battery drain will result if
LITE ON is set and used for extended
periods of time.
If no change is needed, press the [FCN] key
to advance to the next field.
Press the [CLR] key to set backlight duration
to zero and display LITE OFF.
Press the [PRI] key to increase backlight
duration by 1 second increments from LITE
OFF, to 1 SEC ON, 2, 3, 4, 5, 6 SEC ON,
LITE ON (illumination remains on constantly)
then back to LITE OFF.
Press the [ENT] key to store changes and
advance to the next field.
Press the [FCN] key to advance to the next
field without storing changes.
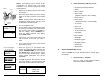
17. Silent Mode
When SILENT MODE is set to ON, all
beeps, tones, and alerts from the radio’s
speaker are silenced. Only normal audio
communication between radio users will be
heard.
Press [PRI] to toggle the option on or off.
Press [ENT] to store the setting and
advance to the next field.
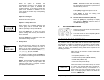
18. Battery Saver
The Battery Saver should be turned off only
for getting proper voltage readings during
service or for systems requiring fast squelch
attack time.
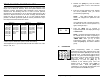
PRG
ON
SILENT MODE
PRG
ON
BATTERY SA
V
PRG
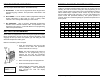
6 sec
BL DURATIO
N
Keypad Programming Manual 7
Changing The Group Label
Labels are edited from left to right. Pressing
the [PRI] key moves the cursor to the next
character. Pressing and holding the [PRI]
key backspaces to the previous character.
The number keys 2 – 9 allow for entry of the
letters printed on the respective keys. For
example, the first press of the [2] key enters
the letter A, the second press enters a B,
the third press enters a C, and the forth
press enters a 2. The letters Q and Z are
entered with keys 7 and 9.
Keys 0 and 1 can be used to enter the
following characters:
0: 0, space, –, _, ., *, +
1: 1, <, >, /, \, |, $, %, h
Press the [ENT] key to store changes and
go back to the starting point for Channel 0
settings.
C. CHANNEL PARAMETERS (CH 01 – CH 20)
At the starting point for Channel 0, the display shows ‘PRG CH
00’. At this point, a channel number can now be entered to allow
access to the settings for that channel.
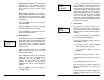
1. Channel Bandwidth
Press ‘1’ and the display will show ‘PRG CH
01’. This is the starting point for entering
channel 1 values.
At this point, pressing the [#] key will toggle
the channel's bandwidth setting. An 'N' will
appear to the right of the channel number
when the channel is set for 12.5/15 kHz
channel spacing using the narrow band
receiver filter. A ‘W’ appears when the
channel is set for 25/30 kHz channel
spacing using the wide band receiver filter.
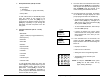
PRG
CH 01 N