
Specifications


18 BK Radio
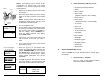
9. Priority 1 Lock
When PRI-1 SELECTION is set to LOCKED
OUT, the user will not be able to change the
designation of the Priority 1 Channel by
selecting a channel and pressing the [PRI]
key.
When PRI-1 SELECTION is set to USER
SELECT the user will be able to change the
channel that is designated as Priority 1
Channel.
Press [PRI] to toggle the option on or off.
Press [ENT] to store the setting and
advance to the next field.
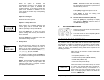
10. Scan List Lock
When SCAN LIST SELECTION is set to
LOCKED OUT, the user will not be able to
use the [ENT] and [CLR] keys to add
channels to and delete channels from the
Scan List.
When SCAN LIST SELECTION is set to
USER SELECT, the user can alter the Scan
List using the [ENT] and [CLR] keys.
Press [PRI] to toggle the option on or off.
Press [ENT] to store the setting and
advance to the next field.
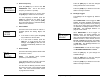
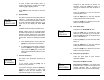
11. Transmitter Time-Out Timer
This field is the ‘Transmitter Time-Out
Timer’ setting. 0 SEC means the Time-Out
Timer is disabled.
Press the [PRI] key to increase the Time-
Out Timer duration by 15 seconds, with a
PRG
USER SELECT
PRI-1 SELECT
PRG
LOCKED OUT
SCAN LIST
PRG TX
225 sec
tx timeout
Keypad Programming Manual 11
Only valid frequencies will be operable.
If you want to operate this channel as a
receive-only channel, press the [CLR] key
(setting the display to 0.0) followed by the
[ENT] key. The transmitter will be locked off
for this channel.
8. Transmit Mode
This field is the transmit mode for channel 1.
Available options are Analog, Digital, and
Mixed.
a. If the mode is correct, press the [FCN]
key to advance to the next field.
b. If a new mode is desired, press the
[PRI] key to cycle through the mode
settings. Press [ENT] to store the new
mode and automatically advance to the
next field.
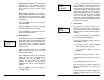
9. Transmit Guard
This field is the Analog Channel Guard value
for Channel 1 transmit.
NOTE: To enable User Tone Pick List
Selection, the TX Guard must be set to 0.0
(no guard).
If this value is correct press the [FCN] key to
advance to the next field. To enter a new
value, press the [CLR] key to reset the
display to 0.0. Press the number keys to
enter a Tone Channel Guard value. See
"Tone Channel Guard Values" on page 26 of
this manual.
To enter Digital Channel Guard, first press
the [CLR] key, then the [#] key, causing the
letter ‘D’ to appear followed by three zeros.
Enter the desired digital code using keys 0
thru 7 (keys 8 & 9 do not respond). See
'Digital Channel Guard Values" on page 27
of this manual. Pressing the [PRI] key after
PRG TX
100.0
Tx Guard
PRG TX
D 023
Tx Guard
PRG RX
Analog
Rx mode