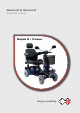
Bischoff & Bischoff Instruction manual Rapid 2 / Paseo Enjoy mobility.
Contents 1| Preface 1.1 Signs and symbols 2| Important safety instructions 2.1 General safety instructions 2.2 Information on EMC interference 2.3 Brakes 2.4 Safety in vehicles 2.5 Travelling in traffic 2.6 Purpose 2.7 Indications 2.8 Contraindications 2.9 Declaration of Conformity 3| Overview of product and accessories 3.1 Checking the delivery 3.2 Package 3.3 Overview 3.4 Basic adjustments 3.4.1 Steering column 3.4.2 Seat 3.4.3 Back rest 3.4.4 Arm rests 3.4.
Paseo / Rapid 2 Bischoff & Bischoff GmbH • 04.05.2011 16 English 4| Using the scooter 4.1 Description of controls 4.2 Entering and leaving 4.3 Driving the scooter 4.4 Pushing the scooter 5| Technical Data 6| User care instructions 6.1 Cleaning and disinfection 6.2 Checking the brake system 6.2.1 Service brake 6.2.2 Drum brake 6.3 Lighting system 6.4 Battery 6.4.1 Charging 6.4.
1. Preface Dear user, You have selected a high-quality scooter from Bischoff & Bischoff. Thank you for your trust in our products. The scooter has been designed to offer you many advantages and to meet your requirements. The wide range of adjustment options and the ease of setting the seat height, backrest angle and the distance to the handlebars makes it easy to adjust the scooter to fit your body size exactly. The scooter is designed exclusively for use outdoors.
Paseo / Rapid 2 1.1 Signs and symbols. English Caution! Indicates specially safety-relevant instructions. Follow instruction manual. Important! Indicates specially useful information in the specific context. Bischoff & Bischoff GmbH • 04.05.
2. Important safety instructions 2.1 General safety instruction To prevent falls and dangerous situations, you should start familiarising yourself with your new scooter on a level, open area. We recommend having someone accompany you at this stage. Before operating the scooter please check that all attached parts are correctly fastened. Before driving the scooter practise operating it on a level and open area.
English Paseo / Rapid 2 The lights on the scooter must always be visible to other traffic. Wear bright, conspicuous clothing as much as possible. This will ensure that you are more visible to other traffic. Please note that seat cushions that are exposed to direct sunlight may become hot and if they are touched may burn your skin. Cover these parts or protect the scooter from direct sunlight. Only push the scooter on flat ground with the drive uncoupled.
2.4 Safety in vehicles Please note that the scooter must not be used as a seat in a vehicle. The user must transfer from the scooter to a standard vehicle seat. The scooter must be secured to prevent movement with straps. 2.5 Travelling in traffic The scooter is designed exclusively for use outdoors. Please note that you will be using it on public roads among traffic and you must obey all traffic regulations at all times. Do not endanger pedestrians by careless driving on footpaths. 2.
Paseo / Rapid 2 2.7 Indication English Walking disability or serious difficulty in walking as a result of • paralysis • loss of limb • defect or deformity in limbs • joint contractures • joint damage (not on both arms) • other conditions Use of scooters (or electric wheelchairs) is indicated if the use of manually operated wheelchairs is no longer possible because of handicaps but the person can still competently operate an electromechanically driven vehicle. 2.
3. Overview of product and accessories 3.1 Checking the delivery All B+B products are given a final inspection before they leave our factory and the CE mark is attached. The scooters are supplied in a special carton. After unpacking the scooter, keep the carton if possible. It can be used for subsequent storage or return of the product. The product is supplied by a qualified dealer in medical products, which also instructs the user in the operation of the device.
Paseo / Rapid 2 3.2 Package English Check the contents of the package for completeness immediately on receipt. The package contains: • packaging material • scooter (ready for use with 2 batteries) • battery charger • tool kit • air pump • instruction manual Rapid 2 equipment: ead rest, dual mirrors, walking stick holder, flag, arm rests (adjustable) Paseo equipment: Standard 3.
3.3 Adjustment Before using the scooter for the first time it must be adjusted to fit you. This is essential to ensure that your posture is physiologically correct for extended use without excessive fatigue. The basic adjustments of the scooter are described below. You should have all adjustments made by your dealer. 3.3.1 Steering column The steering column of the scooter can be adjusted to make it comfortable for you. You can adjust it while seated in the driver's seat.
Paseo / Rapid 2 English Moving seat • Pull the lever (right under the seat) towards you. The seat can be moved forward and back. • You can adjust the seat to the desired position. • Release the lever and make sure that the seat is locked in the closest fixed position. Fig. 4 Seat height First remove the seat and the cover. • Pull the lever (left under the seat) completely up until it is unlocked and remove the seat. • Unscrew the screws holding the cover in place and remove it completely.
3.3.3 Back rest The back rest of your scooter can be folded forward and back. The adjustment angle to the back can also be restricted. Back adjustment • Pull the lever (right under the seat) upwards. The back rest now presses forward. • Move the back rest back to the desired position. Fig. 7 • Release the lever and make sure that the back rest is locked again. Limiting the back adjustment • Unscrew the socket screw on the left hinge of the seat back.
Paseo / Rapid 2 3.3.5 Seat belt English The seat belt is attached to the sides of the frame. • Adjust the length of the seat belt to your requirements by positioning the buckle for comfort. • Lock the belt with the buckle. • Unlock the belt by pressing the red button on the buckle. Fig. 10 Bischoff & Bischoff GmbH • 04.05.
4. Using the scooter When you have adjusted the scooter to fit you, it is now time to familiarise yourself with the functions of the controls. 4.1 Description of controls The control panel is part of the steering column of your scooter. It contains LED indicators and controls. Battery status display Power indicator Light switch Speed control Indicator Indicator lights Horn Fig. 11 The ignition key is in the front of the steering console.
Paseo / Rapid 2 4.2 Entering and leaving English Make sure that the scooter is switched off before sitting on it. • Set the steering column to the upright position, as described above, and swing the arm rest backwards to the side on which you wish get onto the scooter. • It is easier to sit on the scooter by turning the seat 90° to the side on which you wish get onto the scooter (see the section on basic adjustments). • Now sit down on the seat. Fig.
4.3 Driving the scooter • Press the right throttle lever forward to move forward. The further forward you press the lever the higher the speed. The maximum speed will be the speed that you preset with the speed control, max. 6 km/h. Release the lever and you will slow down gently. Practice these manoeuvres until you are comfortable with them. Fig. 13 • Steering is simple and it is exactly like a bicycle in that you turn the handlebars in the direction in which you wish to move.
Paseo / Rapid 2 4.4 Pushing the scooter English If you need to push the scooter in some situations, you will have to unlock the brakes. It is easy to push the scooter with the brakes unlocked. Caution! The electro-mechanical brake will not operate. • Pull the unlocking lever upwards. • A small jerk will indicate that the drives are now unlocked. • To lock the brakes simply push the lever down, and it will automatically lock.
5. Technical Data Dimensions and weights Max. load capacity (kg): 120 Seat width (cm): 48 Seat height from foot rest (cm): 40 / 43 / 46 Seat back height (cm): 47 Seat back angle (°): can be limited to 105, 120, 135, 150 Overall length (cm): 132 Overall width (cm): 61 Unloaded weight (kg): 97,5 Tyres Drive wheels (mm): Steering wheels (mm): ø 260 x 85 ø 260 x 85 (3.5 bar) (3.
Paseo / Rapid 2 English 6. Care instructions for the user 6.1 Cleaning and disinfection Make sure that the scooter is switched off before starting to clean it. • The frame components and panels of the scooter can be wiped with a moist cloth. Use a mild cleaning agent it they are very dirty • The wheels can be cleaned with a moist brush with plastic bristles (do not use a wire brush) • Use a moist cloth to clean the seat, the back rest, the head rest and the arm rests from dust and minor dirt.
6.2. Checking the brake system The motor brake operates correctly if you cannot move the scooter when it is switched off. However, if it can be moved, the electromagnetic brake is faulty. Do not use the scooter in these circumstances. Contact your dealer immediately. 6.2.1 Motor brake The drum brake can be used for braking and parking when the scooter is pushed. • To lock the brake simply pull the brake lever and push the locking lever upwards.
Paseo / Rapid 2 6.3 Lighting system English Every time you use the scooter check that the lighting system, indicators and horn operate correctly. If one of the above items does not respond to the switch when it is actuated, inform your dealer immediately and do not use the wheelchair. • To adjust the drum brake set the scooter in push mode, remove the seat and the rear cover and tilt it to the side so the brake points up. Fig.
6.4.1 Charging Charging for the first time: To charge the batteries to their maximum capacity proceed as follows: • Discharge the factory-charged batteries until the LED display shows two bars. • Charge the batteries as described below (approx. 16 h). • Discharge the batteries again to two bars on the LED indicator. • Finally charge the batteries as described. Use only approved battery chargers to charge the batteries (see Technical Data). See the instructions for use for the battery charger.
Paseo / Rapid 2 English Use only batteries that are approved for this scooter (see Technical Data). Make sure that the scooter is switched off before starting to replace the batteries. • First remove the seat and the back cover. • Switch off the scooter first. • Loosen the handwheel and remove the retainer. Fig. 20 • Disconnect the cable (plug contact) to the batteries on the right and left. When the batteries have reached the end of their life, i.e.
8. Disposal Our customer service will supply a service schedule on request. If your scooter is no longer used and is to be discarded, please contact your dealer. If you wish to dispose of the scooter yourself, contact local disposal companies for the disposal regulations of your area. 9. Transfer of the scooter When transferring the scooter to another own, please remember to give the new owner all technical documentation required for safe operation.
Paseo / Rapid 2 English Warranty certificate (Please note our general business terms and conditions) Model name: Paseo /Radid 2 Serial number:* (to be entered by dealer) Dealer: Date and stamp * See the side frame for information stickers Bischoff & Bischoff GmbH • 04.05.
Bischoff & Bischoff GmbH Becker-Goering-Strasse 13 • D-76307 Karlsbad Tel.: +49 700/6000 7070 • Fax: +49 700/6000 8080 www.bischoff-bischoff.com info@bischoff-bischoff.