® ProteinChip SELDI System: Reader Guide Personal Edition and Enterprise Editon
Page i Bio-Rad Laboratories, Inc. Notice to Purchaser: Limited License Surface Enhanced Laser Desorption/Ionization (“SELDI”) is a patented process. To use the SELDI process an end user must obtain a two-part license, including an up-front fee component and a running-royalty component, under U.S. Patent 5,719,060 or its foreign counterparts, from Bio-Rad Laboratories, Inc. (“Bio-Rad”).
Page ii ProteinChip SELDI System: Reader Guide
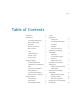
Page iii Table of Contents Introduction 1 Specifications 1 Set Up Requirements 6 ProteinChip SELDI Reader 1 Packing Case 6 Mass Analysis Range 1 ProteinChip SELDI Reader 6 Sensitivity 1 Ventilation 7 Mass Resolving Power 2 Mounting 7 Mass Accuracy 2 Network Connection 7 Laser 2 Sample Handling 2 Installing the ProteinChip SELDI Reader 7 Vacuum System 2 Control System 3 Equipment Ratings 3 Electrical Requirements 3 Identification and Certification Label 3 Environmen
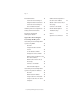
Page iv Basic Maintenance 18 Redirect Client Computers to the New Server Address 42 Obtain a New License File (If Necessary) 43 23 Connect to the Reader 44 Warranty and Service Agreements 23 Edit the Reader Options 47 Getting Technical Assistance 24 Troubleshooting 48 Moving the ProteinChip SELDI System Reader How To 48 24 Questions or Comments? 49 Appendix A: Networking the ProteinChip SELDI System 25 Networking the ProteinChip SELDI System Using DHCP 26 Load Lock Door Cleaning
Introduction Page 1 ProteinChip SELDI System: Reader Guide Introduction The ProteinChip SELDI System, Personal Edition and Enterprise Edition, is designed to read Bio-Rad’s proprietary ProteinChip arrays in conjunction with Bio-Rad software. Sample preparation, protocol development, and analysis are outside the scope of this guide. For information on ProteinChip arrays, sample preparation, and protocols, please see the ProteinChip SELDI System Applications Guide (bulletin 10008221), volumes 1–2.
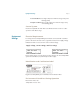
Page 2 Mass Resolving Power Peptide Better than 1000 for [Arg8]-vasopressin at 1084 Da, standard operating voltage Mass Accuracy Inherent Measured mass will be within 0.5% of true mass with 95% confidence (0.25% CV) External calibration Measured mass will be within 0.1% of true mass with 95% confidence (0.05% CV) Internal calibration Measured mass will be within 0.01% of true mass with 95% confidence (0.
Equipment Ratings Page 3 Personal Edition:70 L/s high compression with two-stage rotary-vane backing pump Enterprise Edition:250 L/s high compression with two-stage rotaryvane backing pump Control System Network compatible PC with Microsoft Windows 2000 or XP for reader operation and data storage. Equipment Ratings Electrical Requirements For safety, the ProteinChip SELDI system must be connected with a certified power cord rated to at least 10 A to a grounded outlet.
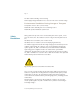
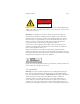
Page 4 20–80% relative humidity, noncondensing Mains supply voltage fluctuations not to exceed ±10% of the nominal voltage Environmental Conditions During Storage or Transport Temperature -20°C to 60°C (-4°F to 140°F) Maximum relative humidity 93% non-condensing at 35°C Maximum operational altitude 2,000 meters Safety Precautions Safety symbols are present on the user-accessible parts of the system, on the top rear of the tower. These labels are shown in Fig. 4. Internal symbols used are: ISO 3864, No.
Safety Precautions Page 5 DANGER HIGH VOLTAGE Fig. 4: Safety symbols indicating high voltage inside the ProteinChip SELDI system cabinet. These labels are located on the exterior of the instrument, near the screws retaining the side covers. Warning: If the equipment is used in a manner other than specified, the protection provided by the equipment may be impaired. No contact with hazardous parts or emissions is possible if the instrument panels are kept in place.
Page 6 glasses must have an optical density of >5 at 337 nm. Care should be taken to avoid specular reflection of the beam. Laser energy levels up to 250 µJ at 337 nm could be accessible in the interior if the inner cover is removed. High Voltage Warning: The unit contains high-voltage power supplies. While the components are fully insulated under normal conditions, electrostatic charge can accumulate on wires and feedthroughs carrying high voltage as well as nearby components.
Installing the ProteinChip SELDI Reader Page 7 Ventilation The ProteinChip SELDI reader requires 3.0 cm of space at the rear and 3.0 cm above the vents on the top of the main enclosure and at the top of the tower for adequate ventilation. The air on all sides of the enclosure must meet the environmental conditions specified above during operation. The region around the system should be kept free of dust. Mounting The ProteinChip SELDI reader has no special mounting requirements.
Page 8 Fig. 6: The ProteinChip SELDI reader, Personal Edition, on its shipping pallet. 3. Inspect the reader for physical damage. If the reader appears to be damaged, contact Bio-Rad customer service. 4. Check the voltage label on the rear of instrument to verify that the operating voltage is correct for your line voltage. If the selected voltage is incorrect, change it by removing and reinserting the fuse assembly with the arrows aligned to the proper operating voltage.
Setting Up the ProteinChip SELDI System Page 9 Description: Sinergy 1KVA UPS, 120 V AC input/output, 60 Hz line frequency. 5-minute backup time. Ordering: Uninterruptible Power Supply, 120 V (catalog # A30-10010) One kVA UPS provides clean and uninterruptible power for the US and countries utilizing 120 V AC, 60 Hz power. This unit will provide 5–8 minutes of backup time in the event of a utility power loss.
Page 10 Launch the software 1. Locate the ProteinChip data manager client software shortcut on the desktop and double-click it to launch the client (please refer to the ProteinChip Data Manager Installation and Setup guide Bulletin# 10008270 for software installation instructions). 1. 2. In the Login dialog box (Fig. 7), enter admin for the User name, and admin for the Password. Leave the Server set to Local host. Fig. 7: The Login dialog box. 3.
Setting Up the ProteinChip SELDI System Page 11 Fig. 8: The New Instrument dialog box. 3. Enter a name for the reader into the Name field. This can be any name of your choosing. This is a required field. 4. Enter the reader’s Serial Number. This is a required field. See Fig. 8, below, for the location of the serial number. Fig. 9: The serial number plate. 5. Enter the IP address of the instrument in the Host Name/IP field. The IP address is preconfigured to be “192.168.1.200”.
Page 12 Connect to the reader using ProteinChip data manager client software 1. After the reader profile has been created, connect to the reader by highlighting the reader name in the Explorer pane. 2. Once the connection is made, the Home tab will be displayed. You may receive a “Server mismatch” error message on connecting. You must now configure the reader to communicate with the ProteinChip data manager server software.
Operating the ProteinChip SELDI Reader Page 13 3. In ProteinChip data manager client software, connect to the reader by clicking its name in the Explorer pane. 4. Once connected, select Instrument | Instrument Options. Allow a few moments for the dialog box to retrieve the current settings from the ProteinChip SELDI reader. Fig. 11: The Instrument Options dialog box. Operating the ProteinChip SELDI Reader 5.
Page 14 Multicassette Autoloader (Enterprise Edition) The ProteinChip SELDI system Enterprise Edition comes with a multicassette autoloader. It contains cassette loader and unloader assemblies designed to allow the automated processing of multiple cassettes from a stack. The purpose of this feature is to allow unattended operation of the reader for significant periods of time.
Operating the ProteinChip SELDI Reader Page 15 Fig. 12: Sensor status before beginning operation. Manual Mode Manual Mode allows you to manually set data acquisition parameters for individual pixels on spots, to optimize reader settings, or as a quick test. All data are collected using the Manual Mode tab’s data collection settings. Single laser shots can be fired using the Fire Once button. Multiple laser shots can be fired using the Fire Continuously button.
Page 16 Fig. 13: Collecting data in Manual Mode (Enterprise Edition). Protocol Mode Protocol Mode allows you to apply and run existing protocols on arrays or spots. All data will be collected using the currently selected protocol (displayed at the top of the Protocol Mode tab). The protocol settings can be adjusted by clicking the Protocol Settings button beside the Cassette/Spot map (the Spot/Pixel Selector, if using the Personal Edition).
Operating the ProteinChip SELDI Reader Page 17 Fig. 14: Collecting data in Protocol Mode (Enterprise Edition). Auto Mode (Enterprise Edition only) Auto Mode allows you to run cassettes automatically, as long as the barcodes on the arrays match those in a Virtual Notebook’s bioprocessor maps (please refer to the ProteinChip data manager software manual for more information on Virtual Notebooks).
Page 18 Fig. 15: Collecting data in Auto Mode (Enterprise Edition). Shutting Down the ProteinChip SELDI Reader To shut down the reader and turn off the power, first stop data collection, if necessary, by clicking on the Stop Run ( ) button on the toolbar, then select Instrument Shutdown from the Instrument menu. Wait for the System Active light on the lower right side of the reader to go out. It is then safe to shut off power to the reader.
Basic Maintenance Page 19 2. Wait for the System Active light on the lower right side of the reader to go out, then turn off the reader power. 3. Remove the front cover from the reader. You will need to remove the two screws at the top rear corners of the front cover and carefully disconnect the “stack full” sensor cable. 4. Completely loosen the captive screws on either side of the rear cassette guide (Fig. 16). Rear cassette guide Captive screw Captive screw Fig.
Page 20 Pawl drive thumbscrew Pawl drive thumbscrew Fig. 18: Pawl drive front. 7. Gently pull the pawl drive assembly back and up to clear it from the load lock door. Be careful not to damage the wires connected to the pawl drive assembly (Fig. 19).
Basic Maintenance Page 21 Fig. 19: Pawl drive assembly, pulled back from front plate. 8. Using the pins on the front, unscrew the load lock door from its post (counterclockwise). 9. Clean the load lock O-ring and the flat side of the door with a clean lab wipe and alcohol (Fig. 20). Load lock seal Fig. 20: Load lock seal, and load lock seal door.
Page 22 10. Replace the load lock door by screwing it clockwise back on to the post. 11. Tighten the door until it seals against the O-ring. 12. Unscrew the load lock door about 1/2 turn until it is in the open position (cutout in door should match opening in load lock). 13. Carefully replace the pawl drive assembly, lining up the posts on the load lock door with the pawl drive plate.
Warranty and Service Agreements Page 23 14. Replace the thumb screws on the front of the pawl drive. 15. Manually open and close the load lock door to verify proper operation and sealing. Leave the load lock door in the closed position. 16. Replace the rear cassette guide. 17. Reconnect the “stack full” sensor cable, then replace the reader front cover. 18. Turn on the reader power. 19. Verify that the reader initializes correctly. 20.
Page 24 Getting Technical Assistance For technical service, call your local Bio-rad office, or in the US, call 1-8004BIORAD (1-800-424-6723). Moving the ProteinChip SELDI System Reader The ProteinChip SELDI system reader is not intended to be carried by hand. Carrying the reader is not recommended because its weight poses a significant risk of physical harm.
Moving the ProteinChip SELDI System Reader Page 25 Appendix A: Networking the ProteinChip SELDI System The ProteinChip SELDI system requires a computer that serves as both the ProteinChip data manager server and the primary workstation. Additional client workstation computers can be networked to the reader (Fig. 22). Connecting the ProteinChip SELDI system to a network gives the flexibility to perform data analysis and monitor data acquisition.
Page 26 Networking the ProteinChip SELDI System Two methods can be used to network the ProteinChip SELDI system instrument and its workstation: • Dynamic host configuration (DHCP), or • Assigning a static IP address to each device. Please refer to the section appropriate to the method. NOTE These instructions should only be used by persons that have experience with computers and networking. Networking the ProteinChip SELDI System Using DHCP Overview 1. Verify the reader software version 2.
Networking the ProteinChip SELDI System Using DHCP Page 27 Fig. 23: The reader web page. 4. Next, click the Software link. If the first number in the Current Software Version is 01, the last number must be greater than or equal to 13 to use DHCP. Otherwise, you should use a static IP address (refer to Networking the ProteinChip SELDI System Using Static IP Addresses on page 38).
Page 28 Networking the ProteinChip SELDI System Fig. 24: Checking the reader software version. Set the Reader to DHCP By default, the reader is configured with the IP address 192.168.1.200 when it is initially installed, and is set up to communicate with the supplied workstation (IP address 192.168.1.10). The workstation is used to update the reader settings. NOTE If you need to configure a separate computer to communicate with the reader, please see the troubleshooting section. 1.
Networking the ProteinChip SELDI System Using DHCP Fig. 25: The reader web page. 4. Click on the Settings link. The Network Settings page will appear (Fig. 26).
Page 30 Networking the ProteinChip SELDI System Fig. 26: The Network Settings web page. 5. Click the Obtain network settings automatically (DHCP) option then click the Save Changes button. The changes may take a few minutes to take effect. IMPORTANT Clicking the Save Changes button will change your reader’s settings immediately. Thereafter, the client workstation will be unable to communicate with the reader until the workstation’s settings are also changed. 6.
Networking the ProteinChip SELDI System Using DHCP 7. Page 31 Record the reader's hostname. The format of the hostname is pcs4000xxxx, where xxxx are the last 4 digits from the serial number, as shown in Fig. 27. You will find the serial number on the reader itself on lower left side (when facing the front of the reader). Fig. 27: The reader serial number. 8.
Page 32 Networking the ProteinChip SELDI System Fig. 28: The Internet Protocol (TCP/IP) Properties dialog box. 2. Click on Obtain an IP address automatically and click OK. 3. Test the connection. Use a different computer already on your network to ping the server's hostname (from the command prompt, type ping followed by the hostname). Be aware that it may take a few minutes for the DHCP settings to take effect.
Networking the ProteinChip SELDI System Using DHCP Page 33 Fig. 29: The Servers dialog box. 3. Highlight the alias for the current server (not the localhost) and click the Edit button. The Edit Server dialog box will open (Fig. 30). Fig. 30: The Edit Server dialog box. 4. In the Edit Server dialog box, enter the server's hostname into the Host field. The server's hostname can be obtained by opening the Windows Control Panel, opening the System item, then click on the Computer Name tab.
Page 34 Networking the ProteinChip SELDI System Obtain a New License File (If Necessary) After changing the server's IP address, it may be necessary to obtain a new license file. 1. Log in using the ProteinChip data manager client software. 2. If either of the messages shown in Fig. 31 appears, the computer's settings do not match the settings specified in the current license file. Fig. 31: Errors produced when the server needs a new license file after changing the IP address. 3.
Networking the ProteinChip SELDI System Using DHCP 2. Page 35 Click on the Instruments node in the Explorer tree. A table of the available instrument will be displayed in the main pane of the software (Fig. 32). Fig. 32: Connecting the client software to a reader. 3. Right-click on the desired reader in the table, then select Properties from the pop-up menu. The Instrument Properties dialog box will open.
Page 36 Networking the ProteinChip SELDI System Fig. 33: The Instrument Properties dialog box. 4. Enter the hostname into the Host Name/IP field. Click OK to save the change and close the dialog box. 5. Click on the reader name in the Explorer tree to connect to the reader. You will see the Home tab screen similar to the one in Fig. 34.
Networking the ProteinChip SELDI System Using DHCP Page 37 Fig. 34: The Home tab of the ProteinChip data manager software. Edit the Reader Options After connecting to the reader, you must enter the server's hostname into the reader (see the How To on page 48 to find the server’s current hostname). 1. After connecting to the reader, select Instrument > Instrument Options from the menu. The Instrument Options dialog box will open (Fig. 35). Fig. 35: The Instrument Options dialog box.
Page 38 Networking the ProteinChip SELDI System 2. Enter the hostname of the server into the Data Manager Server hostname field. 3. Click the Update button to save the changes. NOTE If the server hostname does not save properly (i.e. reverts back to its original settings, please see Instrument Options in the Troubleshooting section, starting on page 48.) Networking the ProteinChip SELDI System Using Static IP Addresses Overview 1.
Networking the ProteinChip SELDI System Using Static IP Addresses Page 39 If you need to configure a separate computer to communicate with the reader, please see the troubleshooting section. 1. Make sure that no one is using the reader. 2. Open Internet Explorer on the client workstation. 3. Enter the following URL into the address bar: http://192.168.1.200. The reader web page shown in Fig. 36 will appear. Fig. 36: The reader web page. 4. Click on the Settings link.
Page 40 Networking the ProteinChip SELDI System Fig. 37: The Network Settings web page. 5. Enter the network settings for the reader obtained from your IT group, then press the Save Changes button. The changes may take a few minutes to take effect. IMPORTANT Clicking the Save Changes button will change your reader's settings immediately. Thereafter, the client workstation will be unable to communicate with the reader until the workstation’s settings are also changed. 6.
Networking the ProteinChip SELDI System Using Static IP Addresses Page 41 Assign a Static IP to the Server Computer A second static IP address must be given to the server computer. 1. In the Windows Start menu, select Control Panel | Network Connections | Local Area Connection | Properties dialog. Under This computer uses the following items, highlight Internet Protocol TCP/IP, then click Properties. This will open the Internet Protocol Properties dialog box as shown in Fig. 38. Fig.
Page 42 Networking the ProteinChip SELDI System DHCP settings to take effect. If the computer receives a reply to the ping, then the reader settings have been changed correctly. If you cannot ping the reader hostname, proceed to the Troubleshooting section (page 48). Redirect Client Computers to the New Server Address The new server settings must be entered onto each installation of ProteinChip data manager client software separately. 1. Start the client. 2.
Networking the ProteinChip SELDI System Using Static IP Addresses Page 43 Fig. 40: The Edit Server dialog box. 4. In the Edit Server dialog box, enter the server's new IP address into the Host field. 5. Click the Update button, then close the Servers dialog. Obtain a New License File (If Necessary) After changing the server's IP address, it may be necessary to obtain a new license file. 1. Log in using the ProteinChip data manager client software. 2. If either of the messages shown in Fig.
Page 44 Networking the ProteinChip SELDI System Fig. 41: Errors produced when the server needs a new license file after changing the IP address. 3. Send an email to lsg_techserv_us@BIO-RAD.
Networking the ProteinChip SELDI System Using Static IP Addresses Page 45 Fig. 42: Connecting the client software to a reader. 3. Right-click on the desired reader in the table, then select Properties from the pop-up menu. The Instrument Properties dialog box will open.
Page 46 Networking the ProteinChip SELDI System Fig. 43: The Instrument Properties dialog box. 4. Enter the new IP address into the Host Name/IP field. Click OK to save the change and close the dialog box. 5. Click on the reader alias in the Explorer tree to connect to the reader. You will see the Home tab screen similar to the one in Fig. 34.
Networking the ProteinChip SELDI System Using Static IP Addresses Page 47 Fig. 44: The Home tab of the ProteinChip data manager software. Edit the Reader Options After connecting to the reader, you must enter the server’s new IP address into the reader. 1. After connecting to the reader, select Instrument > Instrument Options from the menu. The Instrument Options dialog box will open (Fig. 35). Fig. 45: The Instrument Options dialog box.
Page 48 Networking the ProteinChip SELDI System 2. Enter the IP address of the server into the ProteinChip data manager server hostname field. 3. Click the Update button to save the changes. NOTE If the server hostname does not save properly (i.e. reverts back to its original settings, please see Instrument Options under Troubleshooting.
Networking the ProteinChip SELDI System Using Static IP Addresses Page 49 3. At the command prompt, type in ‘ipconfig /all' then press Enter. 4. The hostname will be listed under Windows IP configuration, and the IP address under Ethernet adapter Local Area Connection. The physical (or MAC) address will be listed here as well. Find the reader's MAC address Ping the reader from another computer. 1. On the server computer, select Start | Run. 2. Type in ‘cmd’ then click the OK button. 3.
Page 50 ProteinChip SELDI System: Reader Guide Networking the ProteinChip SELDI System
Page 51 Index A L accessories 8–9 laser safety warning 5 Auto Mode 17–18 lock door cleaning 18–23 enabling cassette processing 17 autoloader 14 M maintenance 18–23 C Manual Mode 15 cassettes 14 mounting requirements 7 connection, network 7 moving instrument 24 controlling instrument 14 multicassette autoloader 14 E N electrical requirements 3 network connection 7 equipment ratings 3–4 O F operating conditions 3 Fire Continuously button 15 operating controls 13 Fire Once button 15
Page 52 networking 25 Index U Protocol Mode 16–17 uninterrupted power supply (UPS) 8 R V requirements ventilation 7 mounting 7 ventilation requirements 7 power 6 space 6 W ventilation 7 warranty 23 Run button 16 S safety interlocks 5 safety labels 4–5 safety precautions 4–6 setting up the ProteinChip SELDI system 7–8 shutting down 18 software 14–18 controlling reader 14 sensor status 14 space requirements 6 specifications 1–3 Start icon 14 starting status (of sensors) 14 storage and transpo
Bio-Rad Laboratories, Inc. Web site www.bio-rad.